My neighbor’s rhubarb patch was legendary in our small town, and every spring she’d bring over armfuls of those gorgeous pink and green stalks. The first time she brought me a slice of her homemade rhubarb pie, I was hesitant—I’d heard rhubarb was sour and strange. But one bite of that perfectly balanced sweet-tart filling in flaky crust completely changed my mind. When she shared her rhubarb pie recipe with me, I was surprised by how straightforward it was. Now I grow my own rhubarb and bake this pie every May, and it’s become the dessert I’m known for at every spring gathering.
Why You’ll Love This Rhubarb Pie Recipe
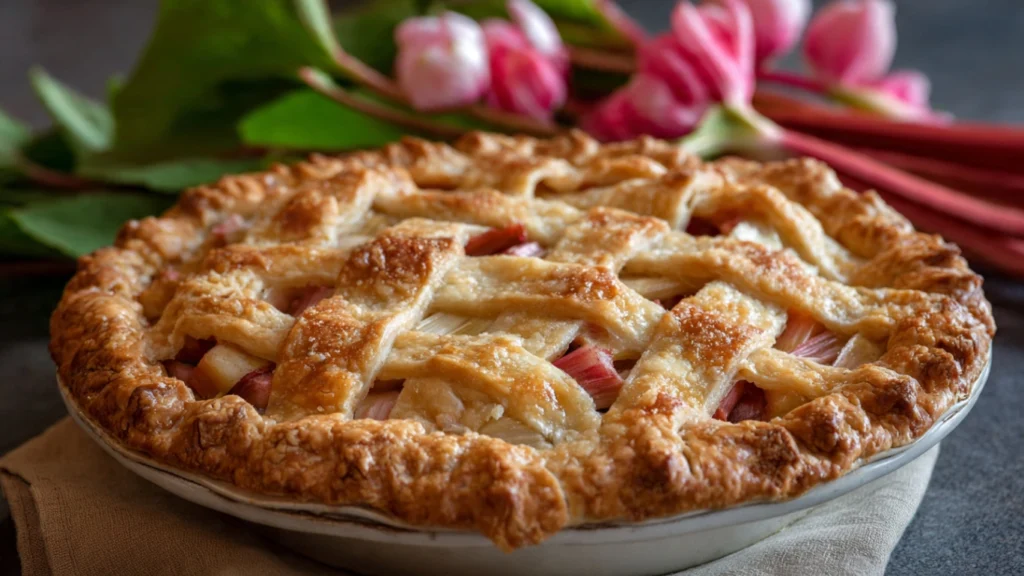
This rhubarb pie recipe creates a classic dessert with the perfect balance of sweet and tart flavors that tastes like springtime in every bite. The bright, tangy rhubarb filling contrasts beautifully with the buttery, flaky crust, creating a combination that’s both refreshing and satisfying. Unlike overly sweet fruit pies, rhubarb pie has a sophisticated flavor profile that appeals to adults while still being enjoyable for kids. The recipe is straightforward and doesn’t require any unusual techniques or hard-to-find ingredients. Fresh rhubarb is widely available at farmers markets and grocery stores in spring and early summer, and if you’re lucky enough to have a plant, it produces abundantly for months. The filling sets up beautifully when properly made, slicing cleanly without being runny or gummy. This pie also freezes wonderfully, so you can enjoy the taste of spring even in the middle of winter.
What Is Rhubarb Pie?
Rhubarb pie is a classic American dessert featuring a double-crust pastry filled with chopped rhubarb stalks mixed with sugar and thickener. This rhubarb pie recipe produces a traditional version where the naturally tart rhubarb is balanced with just enough sugar to make it pleasantly sweet without masking its distinctive tangy flavor. Rhubarb is actually a vegetable, though it’s used like a fruit in desserts. Only the stalks are edible—the leaves are toxic and should always be discarded. The stalks have a crisp, celery-like texture when raw but soften during baking, releasing juice that combines with sugar to create a thick, jammy filling. Some recipes combine rhubarb with strawberries, but pure rhubarb pie has a cleaner, more pronounced flavor that showcases this unique plant. The pie has been a springtime tradition in America since the 1800s, particularly in regions where rhubarb grows abundantly.
Common Mistakes to Avoid
The biggest mistake with this rhubarb pie recipe is not using enough thickener. Rhubarb releases a tremendous amount of liquid during baking, and without adequate cornstarch or flour, you’ll end up with a soupy filling that never sets.
Using rhubarb stalks that are too thick and woody creates a stringy, unpleasant texture. Choose tender stalks that are no thicker than your thumb, with bright color and fresh appearance.
Not letting the pie cool completely before slicing is another common error. The filling needs several hours to set properly—cutting into a warm pie results in runny filling that won’t hold its shape.
Adding too much sugar masks rhubarb’s distinctive tangy flavor. While rhubarb is tart, that tartness is part of what makes the pie special. Balance is key.
Forgetting to vent the top crust traps steam inside, making the bottom crust soggy and preventing proper baking. Always cut slits or create a lattice top for steam to escape.
Using all green rhubarb instead of pink or red stalks means you’ll have a less visually appealing filling. While all colors taste similar, the pink varieties create a prettier filling.
Finally, overbaking makes the rhubarb mushy and breaks down its texture too much. The filling should be bubbling but the rhubarb should still have some texture.
How to Know When Your Pie Is Done
A properly baked rhubarb pie should have a deep golden-brown crust all over, including the bottom edges. The top crust should be evenly colored without pale spots.
The filling should be bubbling vigorously through the vents in the top crust. This bubbling indicates the thickener has activated and the filling will set properly as it cools.
The juices visible through the vents should look thick and syrupy rather than thin and watery. If the liquid looks clear and runny, the pie needs more baking time.
This rhubarb pie recipe typically requires 50-60 minutes at 400°F. If the crust is browning too quickly, tent it loosely with aluminum foil and continue baking until the filling bubbles.
Insert a knife through one of the vents to check the rhubarb. It should be tender but not completely falling apart. Some texture should remain.
The pie will look slightly puffed in the center from steam. As it cools, it will settle and the filling will firm up considerably.
After removing from the oven, you should hear the filling bubbling for several minutes. This continued activity shows the thickener is working properly.
What to Serve With Rhubarb Pie
This rhubarb pie recipe creates a dessert that’s absolutely perfect with vanilla ice cream. The cold, creamy sweetness balances the warm, tangy pie filling beautifully.
Freshly whipped cream, lightly sweetened, is the classic accompaniment. A generous dollop on each slice adds richness without overwhelming the rhubarb flavor.
Sharp cheddar cheese might sound strange, but it’s a traditional pairing in some regions. The savory, salty cheese contrasts wonderfully with the sweet-tart filling.
A scoop of Greek yogurt provides a tangy counterpoint that complements rather than competes with the rhubarb. This is a lighter option than ice cream.
Hot coffee or black tea makes an excellent beverage pairing. The slight bitterness cuts through the sweetness and enhances the overall experience.
Custard sauce or crème anglaise creates an elegant, restaurant-style presentation that’s perfect for special occasions.
Fresh strawberries on the side add color and a complementary fruity sweetness that many people love with rhubarb.
Storage Tips
Store your rhubarb pie covered loosely with aluminum foil at room temperature for up to 2 days. The crust stays crispest at room temperature, though the filling will be safe.
For longer storage, refrigerate the pie for up to 5 days. Cover it loosely to prevent the crust from becoming soggy from condensation.
This rhubarb pie recipe freezes beautifully either baked or unbaked. For unbaked pies, assemble completely, wrap tightly in plastic wrap and foil, and freeze for up to 3 months. Bake directly from frozen, adding 15-20 minutes to the baking time.
To freeze a baked pie, cool it completely, wrap tightly, and freeze for up to 3 months. Thaw overnight in the refrigerator, then warm in a 350°F oven for 15 minutes to refresh the crust.
Individual slices can be wrapped and frozen separately for quick single servings. Microwave for 30-45 seconds or warm in the oven.
Never cover a warm pie tightly, as trapped steam will make the crust soggy. Always let it cool completely before covering.
If the crust becomes soft during storage, refresh it by warming the pie in a 350°F oven for 10-15 minutes.
Estimated Nutrition (Per Slice, 8 Servings)
Calories: 365 | Total Fat: 16g | Saturated Fat: 7g | Cholesterol: 30mg | Sodium: 240mg | Total Carbohydrates: 54g | Dietary Fiber: 2g | Sugars: 28g | Protein: 4g
Note: Nutritional information is approximate and varies based on crust recipe and specific ingredients used.
Recipe Overview
Prep Time: 30 minutes
Cook Time: 55 minutes
Total Time: 4 hours (including cooling)
Difficulty: Medium
Servings: 8 slices
Ingredients
For the Filling:
- 4 cups fresh rhubarb, cut into ½-inch pieces
- 1¼ cups granulated sugar
- ⅓ cup cornstarch
- ¼ teaspoon salt
- 1 teaspoon vanilla extract
- 2 tablespoons butter, cut into small pieces
For the Crust:
- 2 prepared 9-inch pie crusts (homemade or store-bought)
- 1 egg, beaten (for egg wash)
- 1 tablespoon coarse sugar (optional)
Step-by-Step Instructions
Step 1: Preheat your oven to 400°F. Place a baking sheet on the lower rack to catch any drips during baking.
Step 2: Wash the rhubarb stalks thoroughly and trim off both ends. Cut the stalks into ½-inch pieces. You should have about 4 cups of chopped rhubarb.
Step 3: In a large bowl, combine the chopped rhubarb, sugar, cornstarch, and salt. Toss everything together until the rhubarb pieces are evenly coated. Stir in the vanilla extract.
Step 4: Let the rhubarb mixture sit for 15 minutes. During this time, the sugar will begin drawing out juice from the rhubarb, which helps dissolve the cornstarch.
Step 5: Roll out one pie crust and fit it into a 9-inch pie pan, pressing gently into the bottom and sides. Trim the excess, leaving about ½ inch of overhang.
Step 6: Pour the rhubarb filling into the prepared bottom crust, spreading it evenly. Dot the top of the filling with the small pieces of butter.
Step 7: Roll out the second pie crust. Either place it whole over the filling and cut several vents, or cut it into strips and create a lattice pattern for a more decorative look.
Step 8: Trim any excess top crust, then crimp the edges together to seal. Make sure the seal is tight to prevent filling from leaking during baking.
Step 9: Brush the top crust with beaten egg for a beautiful golden finish. Sprinkle with coarse sugar if desired for extra sparkle and crunch.
Step 10: Place the pie on the preheated baking sheet in the oven. Bake for 25 minutes, then reduce the temperature to 350°F.
Step 11: Continue baking for another 30-35 minutes until the crust is deep golden brown and filling is bubbling vigorously through the vents. If the edges brown too quickly, cover them with foil.
Step 12: Remove the pie from the oven and cool on a wire rack for at least 3-4 hours before slicing. The filling must cool completely to set properly for clean slices.
Enjoy this perfect taste of spring with your favorite topping!