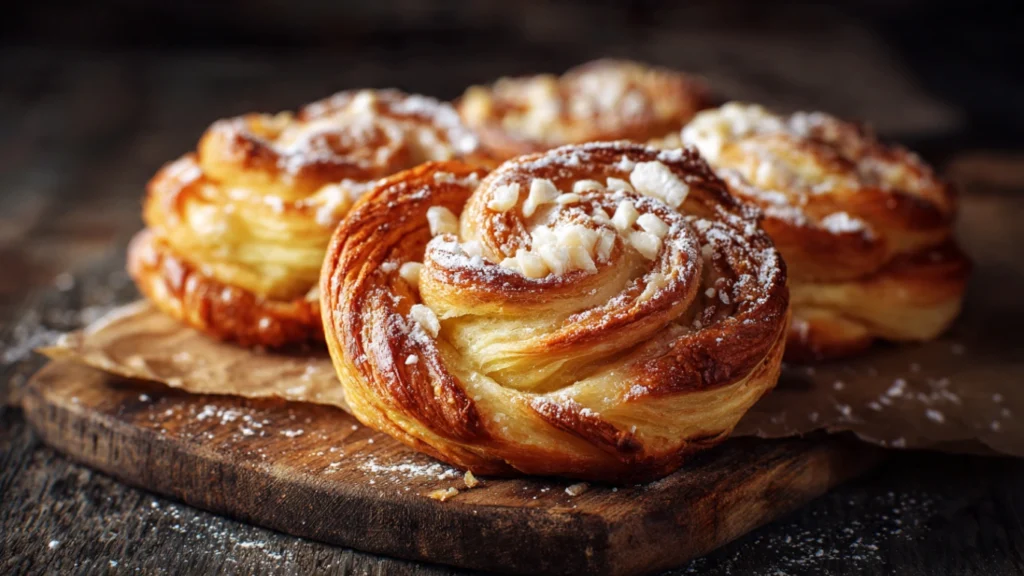

I thought danish pastries were impossibly difficult to make until I spent a weekend learning from my Danish neighbor who insisted they were just about patience, not skill. Watching her fold butter into dough, creating hundreds of delicate layers, was mesmerizing. When those golden, flaky pastries emerged from my oven days later, filled with cream cheese and topped with fruit, I felt like a real baker. The crispy layers shattered with each bite, revealing tender, buttery interior that tasted infinitely better than anything from a bakery case. Now this danish pastry recipe is my weekend project when I want to create something truly special that fills the house with the most incredible aroma.
Why You’ll Love This Danish Pastry Recipe
This danish pastry recipe creates authentic, bakery-quality pastries with hundreds of buttery, flaky layers and your choice of sweet fillings. While the process takes time, the actual hands-on work is minimal and the technique is surprisingly forgiving once you understand the basics. The dough rests in the refrigerator between folds, meaning you can spread the work over two days without any stress. The result is pastries with that signature crispy-tender texture and rich butter flavor that store-bought versions can never match. You can customize these with various fillings—cream cheese, fruit preserves, almond paste, or custard—making the recipe incredibly versatile. These pastries freeze beautifully either before or after baking, so you can always have homemade danishes ready for special breakfasts. Most importantly, the wow factor when you serve these is tremendous, and people will be amazed when you tell them you made them from scratch.
What Is a Danish Pastry?
A danish pastry is a laminated yeast dough pastry characterized by hundreds of thin, flaky layers created through repeated folding of butter into dough, typically shaped into various forms and filled with sweet ingredients. This danish pastry recipe produces the authentic version developed in Denmark (though ironically called “Vienna bread” there), featuring tender, buttery layers similar to croissants but with a sweeter dough. The lamination process creates those signature layers by folding a butter block into dough multiple times, creating alternating layers of dough and butter that puff and separate during baking. Traditional Danish pastries come in various shapes—pinwheels, envelopes, combs, and snails—each designed to showcase the layers and hold different fillings. Common fillings include cream cheese, custard, fruit preserves, almond paste, and chocolate. Good danish pastries should be golden brown, incredibly flaky with visible layers, tender but not doughy, and have a rich butter flavor balanced by sweet fillings.
Common Mistakes to Avoid
The biggest mistake with this danish pastry recipe is using butter that’s too soft. The butter block should be pliable but still cold, about the same consistency as the dough. Too-soft butter melts into the dough instead of creating layers.
Not chilling the dough adequately between folds causes the butter to melt and leak out during rolling. Always refrigerate for the full recommended time.
Rolling the dough too thin or unevenly creates inconsistent layers. Aim for even thickness throughout and measure if you’re unsure.
Working in a warm kitchen melts the butter before you finish folding. If your kitchen is warm, chill the dough more frequently or work near an air conditioner.
Using all-purpose flour with low protein content creates weak dough that tears easily. Use bread flour or all-purpose flour with at least 11% protein.
Overproofing the shaped pastries before baking causes them to deflate in the oven. They should look puffy but not overly risen.
Finally, baking at too low a temperature doesn’t create enough steam to separate the layers properly. Danish pastries need 375-400°F to puff correctly.
How to Know When Your Pastries Are Done
Properly baked danish pastries should be deep golden brown all over, not pale yellow. The rich color indicates the butter has fully caramelized and the dough has cooked through.
The layers should be clearly visible, puffed and separated dramatically from when you put them in the oven. This dramatic rise shows successful lamination.
The bottoms should be golden brown and crispy when you lift one with a spatula. Pale bottoms mean they need more time.
This danish pastry recipe typically requires 18-22 minutes at 375°F. Start checking at 16 minutes, as oven temperatures vary.
Any visible dough should look baked and dry, not pale or wet. The filling should be bubbling slightly if you used fruit or cream cheese.
When you tap the side of a pastry, it should sound hollow and feel crispy, not soft or doughy. The pastry should feel light for its size.
Let them cool for at least 10 minutes before eating. The layers set as they cool, and the filling will be scorching hot straight from the oven.
What to Serve With Danish Pastries
This danish pastry recipe creates treats that are perfect with strong coffee or espresso. The combination is classic for a reason—the coffee’s bitterness balances the sweet pastry perfectly.
Hot tea, particularly Earl Grey or English Breakfast, makes an elegant pairing for a weekend brunch spread.
Fresh fruit salad on the side adds brightness and helps balance the richness of the buttery pastries.
Greek yogurt or cottage cheese provides protein and creates a more substantial breakfast when served alongside these pastries.
Orange juice or fresh-squeezed grapefruit juice offers refreshing acidity that cuts through the butter.
For a Danish-style breakfast, serve with sliced cheeses, cold cuts, and hard-boiled eggs for a complete continental breakfast.
Lightly sweetened whipped cream on the side adds extra indulgence for special occasions.
Storage Tips
Store baked danish pastries in an airtight container at room temperature for up to 2 days. They lose some crispness over time but remain delicious.
To refresh day-old pastries, warm them in a 350°F oven for 5-7 minutes. This restores much of the original crispness.
For longer storage, freeze baked pastries for up to 2 months. Wrap individually in plastic wrap, then place in freezer bags. Reheat from frozen in a 350°F oven for 10-12 minutes.
You can freeze shaped but unbaked pastries. Place them on a baking sheet until frozen solid, then transfer to freezer bags. Let them thaw and proof at room temperature for 1-2 hours before baking.
This danish pastry recipe dough can be made through all the folds, then frozen for up to 1 month. Thaw overnight in the refrigerator before shaping.
Never refrigerate baked pastries, as moisture makes them soggy. Room temperature or frozen are your best storage options.
The unbaked, laminated dough can be refrigerated for up to 3 days between folds, making this a flexible project you can complete over several days.
Estimated Nutrition (Per Pastry)
Calories: 285 | Total Fat: 16g | Saturated Fat: 10g | Cholesterol: 65mg | Sodium: 180mg | Total Carbohydrates: 31g | Dietary Fiber: 1g | Sugars: 12g | Protein: 5g
Note: Nutritional information is approximate and varies based on filling choices.
Recipe Overview
Prep Time: 45 minutes (over 2 days)
Cook Time: 20 minutes
Total Time: 2 days (including resting)
Difficulty: Advanced
Servings: 12 pastries
Ingredients
For the Dough:
- 3½ cups bread flour
- ⅓ cup granulated sugar
- 1 tablespoon instant yeast
- 1 teaspoon salt
- 1 cup whole milk, lukewarm
- 2 large eggs
- 1 teaspoon vanilla extract
- 1 cup cold unsalted butter (for lamination)
For Filling:
- 8 ounces cream cheese, softened
- ¼ cup powdered sugar
- 1 teaspoon vanilla extract
- OR ½ cup fruit preserves of choice
Step-by-Step Instructions
Step 1: In a large bowl, whisk together flour, sugar, yeast, and salt. In a separate bowl, whisk together milk, eggs, and vanilla.
Step 2: Pour wet ingredients into dry ingredients and mix until a shaggy dough forms. Knead for 5-7 minutes until smooth and elastic.
Step 3: Shape into a rectangle about 8×10 inches, wrap tightly in plastic wrap, and refrigerate for at least 2 hours or overnight.
Step 4: While dough chills, place the 1 cup cold butter between two sheets of parchment paper. Pound with a rolling pin and shape into a 6×8-inch rectangle. Refrigerate until needed.
Step 5: Remove dough from refrigerator and roll into a 10×16-inch rectangle. Place the butter rectangle in the center.
Step 6: Fold the dough over the butter like a letter, enclosing it completely. Turn 90 degrees, then roll into a 10×20-inch rectangle.
Step 7: Fold the dough into thirds like a letter again. Wrap and refrigerate for 30 minutes. This is your first fold.
Step 8: Repeat the rolling and folding process two more times (for a total of 3 folds), chilling for 30 minutes between each fold.
Step 9: After the final fold, refrigerate for at least 4 hours or overnight before shaping.
Step 10: Roll the dough to ¼-inch thickness. Cut into 4-inch squares. Place 1-2 tablespoons of filling in the center of each square.
Step 11: Fold corners to center to create a pinwheel shape, or fold in half diagonally for triangles. Place on parchment-lined baking sheets, spacing them 3 inches apart.
Step 12: Cover loosely and let rise at room temperature for 1-2 hours until puffy. Preheat oven to 375°F. Brush with beaten egg and bake for 18-22 minutes until deep golden brown. Cool on a wire rack before serving.
Enjoy these bakery-quality pastries made in your own kitchen!