

I first encountered Japanese cotton cheesecake at a friend’s birthday party and was instantly captivated by its cloudlike texture. It was unlike any cheesecake I’d ever tasted—incredibly light, barely sweet, and it practically melted on my tongue. When I asked how she made it, she admitted she’d been intimidated by the technique for years before finally trying. She encouraged me to give it a shot, promising it wasn’t as difficult as it looked. Now Japanese cotton cheesecake is one of my proudest baking achievements, and watching the cake rise like a soufflé in the oven never gets old. Every time I make it, people are amazed by how something so impressive can come from such simple ingredients.
Why You’ll Love Japanese Cotton Cheesecake
Japanese cotton cheesecake creates a remarkably light and airy dessert that’s completely different from dense New York-style cheesecake. It has a delicate, cotton-soft texture that jiggles gently when you move it, earning it the nickname “jiggly cake.” The flavor is subtly sweet with a hint of lemon, making it perfect for people who find traditional cheesecakes too heavy or rich. Despite its impressive appearance and soufflé-like texture, the technique is quite manageable once you understand the key steps. The cake is naturally less sweet than most desserts, which many adults appreciate. It’s also lighter in calories than regular cheesecake, though you’d never guess from how satisfying it tastes. The experience of serving a tall, jiggly, golden cheesecake always impresses guests and makes you feel like a professional baker. Best of all, it’s naturally gluten-free when you omit the small amount of flour or use a gluten-free substitute.
What Is Japanese Cotton Cheesecake?
Japanese cotton cheesecake is a hybrid dessert that combines elements of traditional cheesecake with airy soufflé, characterized by its exceptionally light, fluffy texture. The secret lies in folding whipped egg whites into the cream cheese batter, creating air pockets that make the cake rise dramatically during baking. Unlike dense Western cheesecakes, Japanese cotton cheesecake contains less cream cheese and more eggs, resulting in a cake that’s springy, soft, and almost cloudlike. It’s baked in a water bath at a lower temperature to ensure gentle, even cooking that prevents cracking and maintains moisture. The cake typically rises high during baking, then settles and deflates slightly as it cools—this is completely normal and expected. The finished texture should be bouncy and jiggly, with a delicate crumb that’s somewhere between cake and soufflé. This style of cheesecake originated in Japan in the 1960s and has become beloved worldwide for its unique texture.
Common Mistakes to Avoid
The most critical mistake with Japanese cotton cheesecake is not whipping the egg whites to the proper stiffness. They should form stiff, glossy peaks that hold their shape but aren’t dry or grainy. Underwhipped whites won’t provide enough lift; overwhipped whites will deflate when folded in.
Folding the egg whites too vigorously deflates all those carefully created air bubbles. Use a gentle hand and fold with a spatula in sweeping motions from the bottom up, turning the bowl as you go. Stop as soon as no white streaks remain.
Skipping the water bath or not wrapping the pan properly causes uneven baking and cracking. The pan must be wrapped tightly in aluminum foil to prevent water from seeping in, and the water should come halfway up the sides for proper steam.
Opening the oven door during baking causes the cake to collapse. The temperature drop is devastating to this delicate cake. Keep the door closed until the minimum baking time has passed.
Overbaking creates a dry, dense cake rather than the desired jiggly texture. The cake should still wobble significantly in the center when you remove it, as it continues cooking from residual heat.
Removing the cake from the pan too soon causes it to collapse or tear. Let it cool completely in the pan, then chill before attempting to remove.
Finally, expecting the cake to stay tall after cooling leads to disappointment. The deflation is natural and doesn’t mean you did anything wrong.
How to Know When Your Cheesecake Is Done
A properly baked Japanese cotton cheesecake should be deeply golden brown on top with no wet or pale spots. The surface should look set and slightly puffy, though it will deflate as it cools.
The cake should jiggle significantly when you gently shake the pan. This is the signature characteristic—if it’s completely firm, it’s overbaked. The center should wobble like jello while the edges are more set.
Insert a toothpick about two inches from the center. It should come out with a few moist crumbs but not wet batter. Don’t test the very center, which will be slightly underdone even when the cake is perfect.
The cake will have risen dramatically during baking, possibly even above the rim of the pan. This is normal and expected with Japanese cotton cheesecake.
Typical baking time is 70-80 minutes at 320°F, but ovens vary. Start checking around 65 minutes, looking for that deep golden color and characteristic jiggle.
After turning off the oven, leave the cake inside with the door slightly ajar for 30 minutes. This gradual cooling prevents dramatic deflation and cracking.
The edges should pull away slightly from the pan when fully cooked, though they’ll settle back as the cake cools.
What to Serve With Japanese Cotton Cheesecake
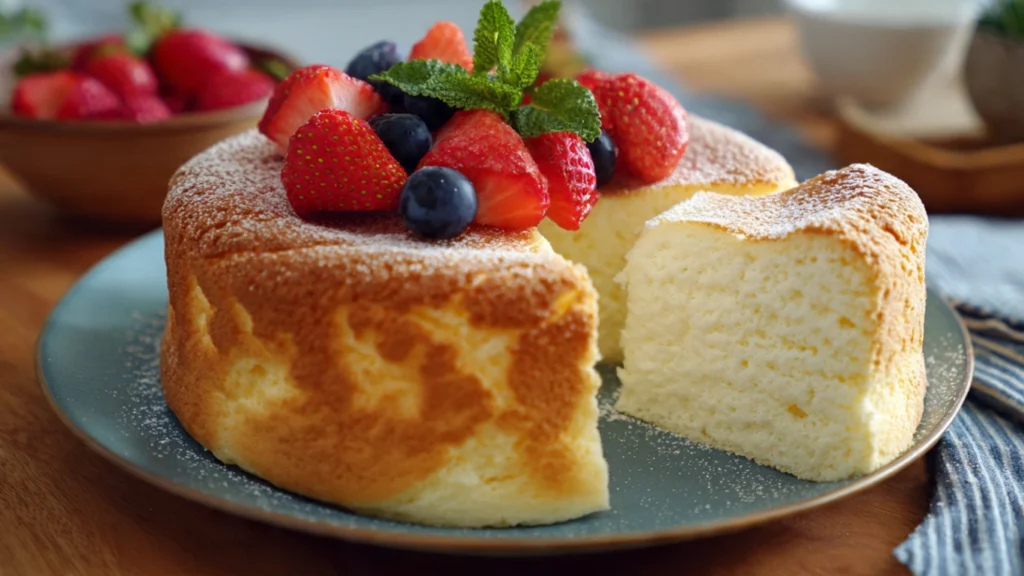
Japanese cotton cheesecake is delicious with just a light dusting of powdered sugar on top. The subtle sweetness doesn’t need much enhancement.
Fresh berries, especially strawberries or raspberries, provide a lovely tart contrast and add beautiful color to each plate. A small handful alongside each slice is ideal.
A drizzle of berry coulis or fruit compote adds sweetness and visual appeal without overwhelming the delicate cake flavor. Strawberry or mixed berry work particularly well.
Green tea or matcha latte makes an authentic Japanese pairing that complements the cake’s subtle flavors beautifully. The slight bitterness balances the sweetness perfectly.
Lightly sweetened whipped cream adds richness without heaviness. Keep it minimally sweetened to let the cake shine.
A small scoop of vanilla ice cream creates a lovely temperature contrast, especially nice if you serve the cake slightly warm from the oven.
Hot coffee or Earl Grey tea provides a traditional café-style presentation that highlights the cake’s sophisticated, not-too-sweet profile.
Storage Tips
Store Japanese cotton cheesecake covered loosely with plastic wrap in the refrigerator for up to 4 days. The texture changes slightly as it chills—it becomes denser and more like traditional cheesecake but remains delicious.
This cake tastes wonderful at different temperatures. Cold from the fridge offers a firmer texture, while room temperature showcases the original fluffy quality. Let refrigerated cake sit out for 30 minutes before serving.
You can freeze Japanese cotton cheesecake successfully for up to 1 month. Wrap individual slices tightly in plastic wrap, then aluminum foil. Thaw overnight in the refrigerator.
The cake naturally deflates as it cools, which is completely normal. Don’t be alarmed if your tall, puffy cake shrinks—this doesn’t mean you did anything wrong.
Never store the cake in an airtight container while it’s still warm, as condensation will make the surface wet and sticky. Wait until completely cool.
The top crust may soften during storage as moisture from the interior migrates upward. This is normal and doesn’t affect the delicious taste.
For the fluffiest texture, this cake is best enjoyed within 24 hours of baking, though it remains tasty for several days refrigerated.
Estimated Nutrition (Per Slice, 8 Servings)
Calories: 245 | Total Fat: 16g | Saturated Fat: 9g | Cholesterol: 155mg | Sodium: 180mg | Total Carbohydrates: 18g | Dietary Fiber: 0g | Sugars: 16g | Protein: 8g
Note: Nutritional information is approximate and varies based on specific ingredients and slice size.
Recipe Overview
Prep Time: 30 minutes
Cook Time: 80 minutes
Total Time: 3 hours (including cooling)
Difficulty: Medium-Advanced
Servings: 8 slices
Ingredients
- 8 ounces cream cheese, softened
- 6 tablespoons unsalted butter
- ½ cup whole milk
- 6 large eggs, separated
- ⅔ cup granulated sugar, divided
- ¾ cup cake flour
- 2 tablespoons cornstarch
- ¼ teaspoon salt
- 1 tablespoon lemon juice
- 1 teaspoon vanilla extract
- ¼ teaspoon cream of tartar
Step-by-Step Instructions
Step 1: Preheat oven to 320°F. Line the bottom of an 8-inch round cake pan with parchment paper. Wrap the outside of the pan completely with two layers of heavy-duty aluminum foil, ensuring no gaps.
Step 2: In a heatproof bowl set over simmering water, melt cream cheese, butter, and milk together, stirring frequently until smooth. Remove from heat and let cool for 10 minutes.
Step 3: Whisk egg yolks and ⅓ cup sugar in a separate bowl until pale and thick, about 2 minutes. Add this to the cream cheese mixture and whisk until smooth.
Step 4: Sift cake flour, cornstarch, and salt together. Add to the cream cheese mixture and whisk until completely smooth with no lumps. Stir in lemon juice and vanilla extract.
Step 5: In a large, clean mixing bowl, beat egg whites and cream of tartar with an electric mixer on medium speed until foamy. Gradually add the remaining ⅓ cup sugar while beating, then increase to high speed.
Step 6: Continue beating until stiff, glossy peaks form. The whites should stand straight up when you lift the beaters but still look smooth and shiny, not dry or grainy.
Step 7: Add about one-third of the egg whites to the cream cheese batter. Fold gently with a spatula using broad strokes from the bottom up, just until incorporated.
Step 8: Add the remaining egg whites and fold very gently until no white streaks remain. Be patient and use a light touch—overmixing deflates the batter.
Step 9: Pour the batter into the prepared pan, smoothing the top. Tap the pan gently on the counter several times to release large air bubbles.
Step 10: Place the cake pan in a larger roasting pan. Fill the roasting pan with hot water until it reaches halfway up the sides of the cake pan, creating a water bath.
Step 11: Bake for 70-80 minutes without opening the oven door. The top should be deeply golden and the cake should jiggle significantly when gently shaken. Turn off the oven, crack the door slightly, and let the cake cool in the oven for 30 minutes.
Step 12: Remove from oven and water bath. Let cool to room temperature in the pan, about 1 hour. The cake will deflate—this is normal. Refrigerate for at least 2 hours before removing from pan and slicing.
Enjoy this incredibly light and jiggly masterpiece that’s sure to impress!


