
My mom’s fruit cobbler was legendary in our neighborhood—she’d make it whenever someone’s fruit trees were producing more than they could handle. I remember her dropping biscuit dough on top of bubbling peaches, berries, or whatever fruit was in season, then pulling a golden, crusty-topped masterpiece from the oven an hour later. I thought it required some secret baking skill until she showed me how ridiculously simple it was. Now this fruit cobbler recipe is my answer to summer’s abundance and winter’s frozen fruit sales. It works with literally any fruit, requires minimal effort, and always disappears within hours of coming out of the oven.
Why You’ll Love This Fruit Cobbler Recipe
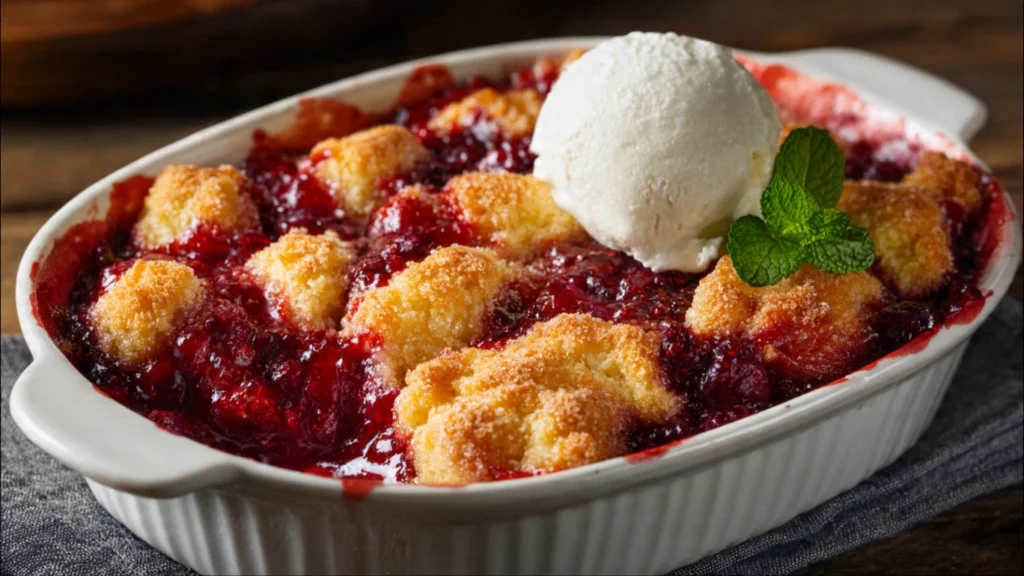
This fruit cobbler recipe creates a rustic, homey dessert with sweet, syrupy fruit bubbling beneath a golden, biscuit-like topping that’s crispy on top and tender underneath. Unlike precise pies requiring perfect crusts, cobbler is forgiving and actually benefits from its imperfect, rustic appearance. You can use fresh, frozen, or even canned fruit, making it a year-round dessert option regardless of season. The recipe comes together in about 15 minutes of hands-on work, with the oven doing most of the labor. It’s incredibly versatile—swap fruits based on what’s available or what sounds good, adjust sweetness to taste, and add spices to complement your chosen fruit. The topping is basically drop biscuits, so there’s no rolling or cutting required. Cobbler serves a crowd beautifully, looking impressive in its baking dish while requiring none of the fuss of layer cakes or elaborate desserts. Best of all, it fills your kitchen with the most incredible aroma while baking.
What Is Fruit Cobbler?
Fruit cobbler is a classic American dessert consisting of sweetened fruit topped with a biscuit-like dough that bakes into a golden, slightly crispy topping over bubbling fruit filling. This fruit cobbler recipe produces the traditional Southern-style version where spoonfuls of thick biscuit dough are dropped over the fruit, creating a cobbled appearance—hence the name. The topping bakes up fluffy and tender underneath where it touches the fruit, while developing a crispy, golden crust on top. Cobbler differs from crisp (which has a crumbly streusel topping) and pie (which has pastry above and below). It’s simpler than both, requiring no rolling, crimping, or precise measurements. Good cobbler should have generous amounts of fruit that’s soft and syrupy but not mushy, topped with biscuit that’s cooked through, golden brown, and substantial enough to soak up some fruit juice without becoming soggy. It’s been a staple of American home cooking since colonial times, particularly in the South where it’s considered essential comfort food.
Common Mistakes to Avoid
The biggest mistake with this fruit cobbler recipe is using too much or too little sugar in the fruit layer. The right amount depends on your fruit’s natural sweetness and tartness—taste and adjust before baking.
Not tossing the fruit with a thickener like cornstarch or flour creates a soup instead of syrupy fruit. The thickener is essential for the right consistency.
Making the biscuit topping too thin creates a cake-like layer instead of fluffy biscuits. The dough should be thick enough to drop in generous spoonfuls that hold their shape.
Completely covering the fruit with topping prevents steam from escaping and can make everything soggy. Leave some gaps for the fruit to bubble through.
Using a baking dish that’s too small causes overflow in the oven. Fruit bubbles up significantly, so leave at least an inch of space at the top.
Baking at too low a temperature means the topping won’t brown properly before the fruit overcooks. Cobbler needs 375°F to get that golden crust.
Finally, serving it too soon means the fruit hasn’t had time to thicken. Let it rest 15-20 minutes after baking for the best texture.
How to Know When Your Cobbler Is Done
The biscuit topping should be deeply golden brown on top, not pale yellow. Deep color indicates the biscuits are fully baked and will have that desired crispy crust.
The fruit should be bubbling vigorously around the edges and through any gaps in the topping. This bubbling shows the fruit is hot and the thickener has activated.
Insert a toothpick into one of the biscuit sections. It should come out clean or with just a few moist crumbs, not wet batter.
This fruit cobbler recipe typically requires 40-50 minutes at 375°F. Start checking at 35 minutes, as different fruits and ovens vary.
The biscuit topping should feel firm when you press it lightly, not soft or doughy. It should spring back slightly under gentle pressure.
The fruit juices should look thick and syrupy, not thin and watery. If they’re still very liquid-looking, the cobbler needs more time.
A wonderful, fruity aroma should fill your kitchen when it’s done. You’ll know it—that unmistakable smell of baked fruit and buttery biscuit.
What to Serve With Fruit Cobbler
This fruit cobbler recipe is absolutely perfect with vanilla ice cream. The contrast of warm cobbler and cold ice cream is one of life’s simple pleasures.
Freshly whipped cream, lightly sweetened, provides a lighter alternative to ice cream while still adding creamy richness.
A drizzle of heavy cream over the warm cobbler creates a luxurious sauce as it melts into the fruit and biscuit.
Serve it for breakfast with a dollop of Greek yogurt for a more acceptable morning presentation. The fruit makes it practically healthy, right?
Strong black coffee or hot tea makes an excellent beverage pairing, especially for afternoon or after-dinner servings.
Custard sauce or crème anglaise creates an elegant presentation perfect for dinner parties.
Some people love sharp cheddar cheese with fruit cobbler, especially peach cobbler. The sweet-savory combination is surprisingly delicious.
Storage Tips
Store leftover cobbler covered with aluminum foil or plastic wrap at room temperature for up to 2 days. The topping will soften over time but remains delicious.
For longer storage, refrigerate covered cobbler for up to 5 days. Bring to room temperature or warm slightly before serving.
To refresh leftover cobbler, warm individual servings in the microwave for 30-45 seconds or reheat the whole dish in a 350°F oven for 15-20 minutes.
This fruit cobbler recipe doesn’t freeze well once baked—the biscuit topping becomes soggy when thawed. However, you can freeze the unbaked fruit filling.
Prepare the fruit layer, freeze in the baking dish, then add fresh topping when ready to bake. This gives you that fresh-baked quality.
Never store warm cobbler in an airtight container, as trapped steam makes everything soggy. Always let it cool completely first and use breathable covering.
The topping will never be as crispy as when freshly baked, but warming it helps restore some texture.
Estimated Nutrition (Per Serving, 8 Servings)
Calories: 285 | Total Fat: 9g | Saturated Fat: 5g | Cholesterol: 35mg | Sodium: 240mg | Total Carbohydrates: 48g | Dietary Fiber: 3g | Sugars: 28g | Protein: 4g
Note: Nutritional information is approximate and varies significantly based on fruit type and amount of added sugar.
Recipe Overview
Prep Time: 15 minutes
Cook Time: 45 minutes
Total Time: 1 hour 15 minutes (including cooling)
Difficulty: Easy
Servings: 8 servings
Ingredients
For the Fruit Filling:
- 6 cups fresh or frozen fruit (peaches, berries, cherries, or mixed)
- ½ to ¾ cup granulated sugar (adjust based on fruit sweetness)
- 2 tablespoons cornstarch or flour
- 1 tablespoon lemon juice
- 1 teaspoon vanilla extract
- ¼ teaspoon cinnamon (optional)
For the Biscuit Topping:
- 1½ cups all-purpose flour
- ½ cup granulated sugar
- 2 teaspoons baking powder
- ½ teaspoon salt
- 6 tablespoons cold unsalted butter, cut into pieces
- ¾ cup whole milk
- 1 teaspoon vanilla extract
Step-by-Step Instructions
Step 1: Preheat your oven to 375°F. Grease a 9×13-inch baking dish or similar 3-quart baking dish with butter or cooking spray.
Step 2: If using fresh fruit, wash and prepare it—peel and slice peaches, pit cherries, hull strawberries, etc. If using frozen fruit, you can use it straight from the freezer without thawing.
Step 3: In a large bowl, combine the fruit, sugar (starting with the smaller amount), cornstarch, lemon juice, vanilla, and cinnamon if using. Toss gently to coat the fruit evenly. Taste and add more sugar if needed.
Step 4: Pour the fruit mixture into the prepared baking dish, spreading it evenly. Set aside while you make the topping.
Step 5: In a medium bowl, whisk together flour, sugar, baking powder, and salt until well combined.
Step 6: Add the cold butter pieces. Using a pastry cutter, two forks, or your fingers, cut the butter into the flour mixture until it resembles coarse crumbs with some pea-sized pieces remaining.
Step 7: In a small bowl or measuring cup, stir together the milk and vanilla extract.
Step 8: Pour the milk mixture into the flour mixture and stir gently with a fork just until a thick, shaggy dough forms. Don’t overmix—the dough should be lumpy.
Step 9: Drop the biscuit dough by large spoonfuls (about ¼ cup each) over the fruit, spacing them somewhat evenly. Don’t worry about complete coverage—gaps are good and allow fruit to bubble through.
Step 10: Sprinkle a tablespoon of sugar over the biscuit topping for extra crunch and sweetness if desired.
Step 11: Place the baking dish on a rimmed baking sheet to catch any drips. Bake for 40-50 minutes until the topping is golden brown and the fruit is bubbling vigorously.
Step 12: Remove from the oven and let cool for 15-20 minutes before serving. This allows the fruit to thicken properly. Serve warm with ice cream or whipped cream.
Enjoy this timeless American dessert that celebrates whatever fruit is in season!