
I have a vivid memory of my dad carrying a store-bought ice cream cake to the table every single year on my birthday, the candles flickering as everyone sang. It was the highlight of the whole party. When I grew up and started hosting celebrations of my own, I realized that making ice cream cake dessert recipes from scratch at home was not only way easier than I’d imagined — it was also so much better. The layers are thicker, the flavors are exactly what you want, and there’s something deeply satisfying about pulling a homemade frozen showstopper out of the freezer and watching people’s eyes light up. The first time I made one, my husband said it was better than anything we’d ever ordered. I’ve never looked back.
Why You’ll Love It
Among all the ice cream cake dessert recipes out there, this layered classic stands out because it’s endlessly customizable, incredibly simple to assemble, and always guaranteed to impress. You choose your favorite ice cream flavors, your preferred crust, and your toppings — so every version you make feels personal and special. There’s no baking involved, the steps are genuinely straightforward, and most of the “work” is just waiting for the freezer to do its thing. It’s perfect for birthdays, summer parties, potlucks, or any time you want a dessert that looks like it came from a professional bakery without the professional effort or price tag.
What Is It?
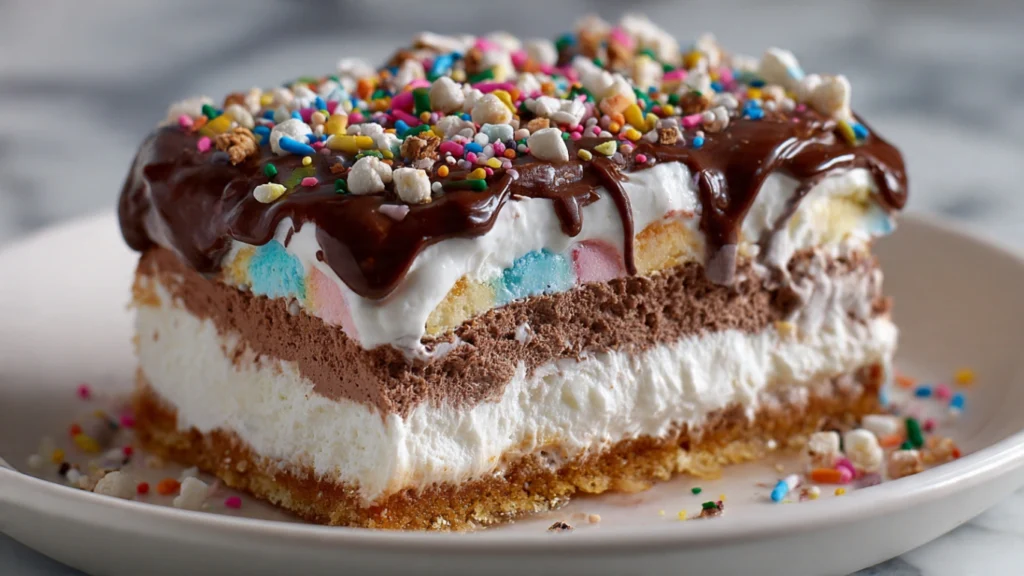
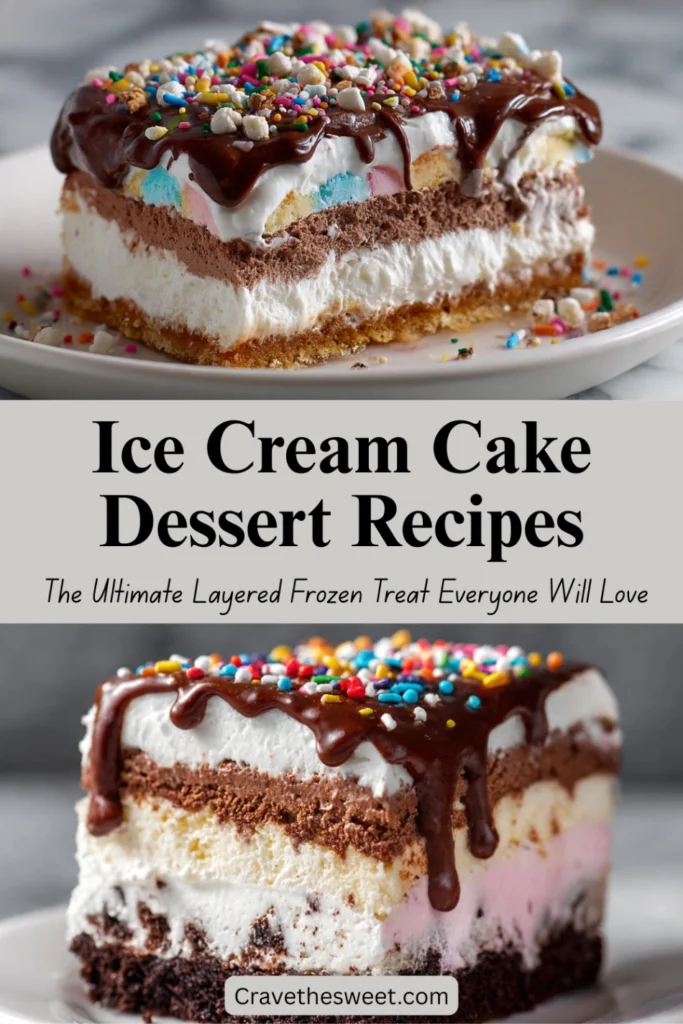
Ice cream cake dessert recipes are frozen layered desserts that combine a crunchy cookie or brownie crust with multiple flavors of ice cream, a creamy middle layer — often whipped topping or fudge — and a decorated frozen top. Unlike traditional cakes, there’s no batter to mix and nothing to bake. The structure comes entirely from freezing each layer in sequence until the whole thing is a solid, sliceable masterpiece. This particular recipe uses a classic chocolate cookie crust, a layer of chocolate ice cream, a hot fudge ribbon, a layer of vanilla ice cream, and a whipped cream topping finished with crushed cookies and chocolate drizzle. It’s familiar, rich, nostalgic, and completely irresistible.
Common Mistakes to Avoid
Using ice cream that’s too melted. Soft and spreadable is the goal — not liquid. If your ice cream melts into a pour-able consistency, it will seep into the crust and make the whole structure soggy and formless. Let it soften just enough to spread smoothly, about 10–12 minutes on the counter.
Not freezing between layers. This is the step that beginners tend to skip, thinking it’s unnecessary. It absolutely isn’t. Each layer must be frozen solid before the next one goes on. If you rush it, your layers will bleed into each other and the whole cake will be a muddy swirl instead of clean, defined stripes.
Forgetting to line the pan. Always line your springform pan with plastic wrap or parchment before you start. Trying to remove a frozen ice cream cake from an unlined pan is a frustrating and often destructive experience. A little prep at the start saves you a lot of heartbreak at the end.
Cutting the cake rock-solid. Slicing a completely frozen-through cake is difficult and results in crumbling, jagged pieces. Let the cake rest at room temperature for 5–10 minutes before you cut it. Run your knife under warm water and wipe it dry between slices for the cleanest, most beautiful cuts.
Overloading on toppings before freezing. Add heavier garnishes like chocolate chips or candy pieces after the cake is frozen and just before serving. Adding them too early means they can sink into the whipped topping and create an uneven surface.
How to Know It’s Done
With ice cream cake dessert recipes, doneness means the cake is completely frozen through from crust to top. Press the center of the cake gently — it should feel completely firm with no give at all. The sides should look solid and hold their shape when you release the springform ring. The whipped topping on top should be stiff and frozen, not soft or glossy. If there’s any softness in the center, give it another hour in the freezer. The minimum freeze time for this recipe is 6 hours, but an overnight freeze is truly the gold standard for clean slices and well-set layers. When you slice and the layers are distinct and beautiful, you’ll know it was worth the wait.
What to Serve With It
This cake is already a complete dessert on its own, but a few thoughtful extras take it from wonderful to unforgettable. A warm pitcher of hot fudge sauce on the side lets guests drizzle their own slice, which is always a crowd-pleasing touch. A bowl of freshly whipped cream gives everyone the option to add a little extra cloud of sweetness. Fresh seasonal berries — strawberries, raspberries, or blueberries — add color and a bright tartness that contrasts the rich chocolate and vanilla beautifully. For celebrations, sparkler candles pressed into the top right before serving create a genuinely magical moment. Keep the accompaniments simple and let the cake be the star.
Storage Tips
In the freezer: Ice cream cake is a freezer dessert and should stay there until about 10 minutes before you’re ready to serve. Once fully assembled and set, wrap the cake tightly in plastic wrap and then cover with aluminum foil to protect against freezer burn. It keeps well for up to 2 weeks.
After slicing: Press a sheet of plastic wrap directly against any exposed ice cream on the cut surface before re-wrapping. This prevents ice crystals from forming on the edges and keeps the texture smooth.
Do not refrigerate: The refrigerator is too warm for this cake. It will soften, lose its shape, and eventually melt into a soupy mess. Always go straight from freezer to table.
Make-ahead tip: This is one of the best make-ahead desserts in the world of ice cream cake dessert recipes. Assemble it up to 3 days in advance, keep it wrapped in the freezer, and just add any fresh garnishes right before serving.
Estimated Nutrition (Per Slice, Based on 12 Servings)
- Calories: ~410
- Total Fat: 22g
- Saturated Fat: 13g
- Carbohydrates: 50g
- Sugar: 36g
- Protein: 6g
- Sodium: 260mg
Note: Nutrition values are estimates and vary based on specific ice cream brands and portion sizes.
Recipe Overview
- Prep Time: 25 minutes
- Freeze Time: 6 hours minimum (overnight preferred)
- Total Time: 6 hours 25 minutes
- Difficulty: Easy — no baking required
- Servings: 12 slices
Ingredients
For the Chocolate Cookie Crust:
- 30 chocolate sandwich cookies, finely crushed (about 2½ cups)
- 5 tablespoons unsalted butter, melted
For the Ice Cream Layers:
- 1.5 quarts chocolate ice cream, slightly softened
- 1.5 quarts vanilla ice cream, slightly softened
For the Fudge Ribbon:
- ¾ cup hot fudge sauce, warmed slightly until pourable (then cooled to room temperature)
For the Whipped Topping:
- 2 cups heavy whipping cream, very cold
- 3 tablespoons powdered sugar
- 1 teaspoon pure vanilla extract
For Garnish:
- ½ cup crushed chocolate sandwich cookies
- 3 tablespoons chocolate syrup for drizzling
- Optional: chocolate chips, sprinkles, or whole cookies for decoration
Step-by-Step Instructions
Step 1: Prep Your Pan
Line a 9-inch springform pan with plastic wrap, pressing it as smoothly as possible along the bottom and up the sides. This step is non-negotiable — it’s what allows you to release and unmold your finished cake cleanly. Lightly spray the plastic wrap with non-stick cooking spray. Place the lined pan in the freezer while you prepare the crust.
Step 2: Make the Crust
Crush the chocolate sandwich cookies into fine crumbs using a food processor, or seal them in a large zip-top bag and crush with a rolling pin. Transfer the crumbs to a medium bowl and add the melted butter. Stir until every crumb is evenly coated and the mixture holds together when pressed between your fingers. Remove the pan from the freezer, pour in the crumb mixture, and press it firmly and evenly across the bottom using the flat bottom of a measuring cup or drinking glass. Pack it tightly — a well-pressed crust holds its shape beautifully. Freeze for 30 minutes.
Step 3: Add the Chocolate Ice Cream Layer
Remove the chocolate ice cream from the freezer about 12 minutes before you need it, letting it soften just enough to spread. Once the crust is firm, spoon the softened chocolate ice cream over the crust in large dollops and spread it into a smooth, even layer with a rubber spatula or offset spatula. Work gently so you don’t disturb the crust below. Smooth the top as flat as possible. Return the pan to the freezer and freeze for at least 45 minutes to 1 hour, until the chocolate layer is completely firm to the touch.
Step 4: Add the Fudge Ribbon
Warm the hot fudge sauce gently until it’s just pourable, then let it cool to room temperature — you want it spreadable but not hot enough to melt the ice cream layer beneath it. Once the chocolate ice cream layer is frozen solid, pour the cooled fudge sauce over it and spread into a thin, even ribbon using the back of a spoon. Return the pan to the freezer for another 20–30 minutes until the fudge layer is set and firm.
Step 5: Add the Vanilla Ice Cream Layer
Soften the vanilla ice cream the same way — about 12 minutes on the counter. Once the fudge layer is solid, spoon the softened vanilla ice cream over it and spread into a smooth, even layer. Take your time here for clean, professional-looking layers — it’s one of the things that makes homemade ice cream cake dessert recipes look so impressive when sliced. Smooth the top completely flat. Return to the freezer and freeze for at least 1 hour until completely firm.
Step 6: Make the Whipped Cream Topping
In a large chilled bowl, beat the cold heavy whipping cream with an electric hand mixer on medium-high speed until it begins to thicken. Add the powdered sugar and vanilla extract, then continue beating until stiff peaks form — the whipped cream should hold its shape firmly when you lift the beaters. Don’t overbeat or it will turn grainy.
Step 7: Top and Decorate
Remove the pan from the freezer. Spread the whipped cream topping over the vanilla ice cream layer in a thick, even coat. Use a spatula to create swirls or keep it smooth — both look beautiful. Sprinkle the crushed chocolate sandwich cookies generously over the top, then drizzle chocolate syrup in a zigzag pattern over everything. Add any additional garnishes you like — chocolate chips, sprinkles, or a ring of whole cookies around the edge.
Step 8: Final Freeze
Cover the decorated cake loosely with plastic wrap, being careful not to press down and disturb the topping. Return to the freezer for a final freeze of at least 4 hours, or overnight for the best results. When you’re ready to serve, let the cake sit at room temperature for 8–10 minutes, release the springform ring, peel back the plastic wrap, and slice with a warm knife.
Every slice is a little celebration — and now you’ve made it yourself.


