
Growing up, there was exactly one cake that appeared at every single birthday in our house — that iconic rectangular ice cream cake from the drive-through dairy shop down the road, with its signature layer of chocolate fudge crunch hidden between the vanilla and chocolate ice cream. My brother and I used to fight over the corner pieces because the crunch layer was thickest there. Years later, when I moved to a small town without one of those shops nearby, I found myself genuinely missing that cake for my daughter’s fifth birthday. So I did what any determined parent does — I figured it out myself. After a few experiments in my kitchen, I cracked the recipe. That crunch layer? Completely achievable at home. This copycat Dairy Queen ice cream cake is so close to the original that my family couldn’t tell the difference, and now I make it every single year.
Why You’ll Love It
This copycat Dairy Queen ice cream cake gives you everything you love about the original — that signature fudge crunch layer, the soft vanilla and chocolate ice cream combination, the whipped topping, the whole beautiful package — at a fraction of the cost and with complete control over every ingredient. A store-bought version can run anywhere from $30 to $50 depending on size. This homemade version feeds 12 people for significantly less. Beyond the savings, there’s the satisfaction of making something from scratch that tastes this good. You can customize the ice cream flavors, adjust the sweetness, and make it exactly the size you need. It’s also a wonderful make-ahead dessert, which takes all the stress out of party planning.
What Is It?
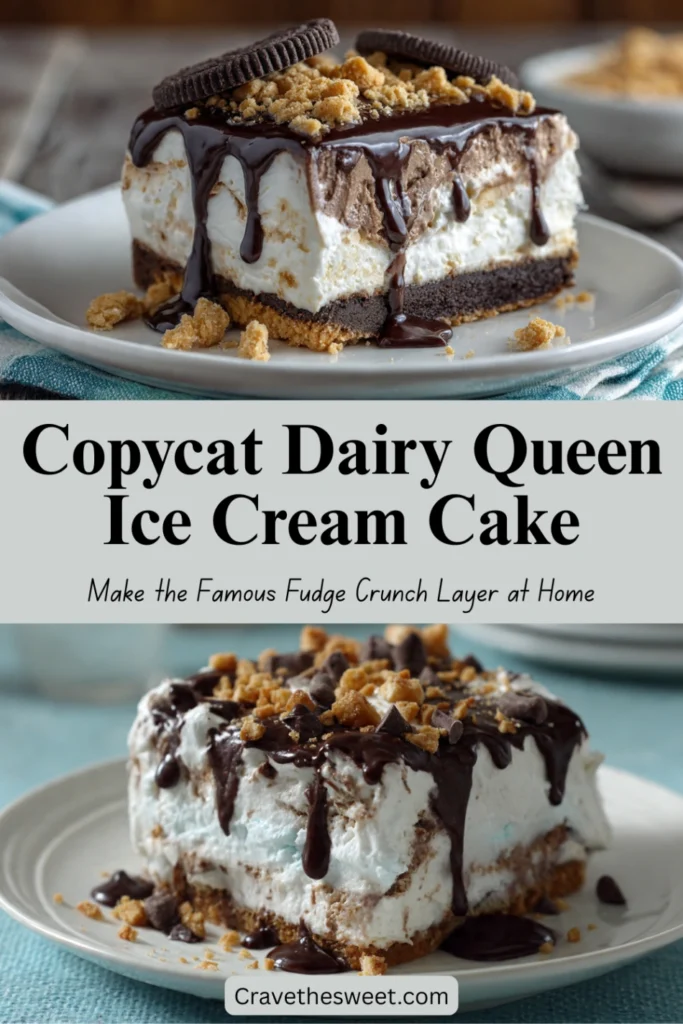
A copycat Dairy Queen ice cream cake is a homemade recreation of the beloved fast-food chain’s signature frozen dessert. The defining characteristic of this cake — the thing that sets it apart from every other ice cream cake — is the famous fudge crunch layer. In the original, this is a layer of crushed chocolate cookies mixed with fudge that sits between the vanilla and chocolate ice cream layers, creating a slightly firm, deeply chocolatey ribbon of texture in every single bite. The homemade version replicates this using chocolate sandwich cookie crumbs and hot fudge sauce, and it works beautifully. The cake is finished with a coating of whipped topping and simple piped decorations, just like the original.
Common Mistakes to Avoid
Getting the fudge crunch layer wrong. This is the heart of the copycat Dairy Queen ice cream cake, so it deserves attention. The fudge crunch layer needs to be spread thinly and evenly — if it’s too thick, it becomes difficult to slice cleanly. Mix your cookie crumbs with just enough fudge to bind them without making the mixture wet or overly soft.
Not freezing each layer long enough. Every layer in this cake needs to be completely frozen before the next is added. Rushing this is the number one reason homemade ice cream cakes fall apart or look messy when cut. Plan for at least 45 minutes to an hour of solid freeze time between each layer.
Using regular whipped cream instead of stabilized topping. Regular freshly whipped cream does not hold up well in the freezer over multiple hours — it can become icy and grainy. Use frozen whipped topping, thawed, or make a stabilized whipped cream with a small amount of cream cheese or gelatin to ensure it stays smooth and beautiful throughout freezing.
Forgetting to line the pan. Always line your pan with plastic wrap before you start. Trying to remove a fully frozen cake from an unlined pan is an exercise in frustration that usually ends with a cracked cake.
Slicing too soon. Let the fully assembled cake sit at room temperature for 8–10 minutes before cutting. Use a knife run under hot water and dried between each slice for clean, photo-worthy pieces.
How to Know It’s Done
Your copycat Dairy Queen ice cream cake is fully set and ready to serve when the entire cake — from the cookie crust at the very bottom through all the layers to the whipped topping on top — feels completely firm when pressed. There should be no soft spots, no give in the center, and the whipped topping should be frozen stiff rather than fluffy and yielding. The minimum freeze time after the final assembly is 4 hours, but overnight freezing is strongly recommended, especially if you want to pipe decorative rosettes on top that hold their shape perfectly. When you slice into a fully set cake, the fudge crunch layer will be visible as a clean, distinct ribbon between the two ice cream layers.
What to Serve With It
This cake is a complete dessert all on its own and needs very little accompaniment. That said, a warm drizzle of hot fudge sauce over each slice right at the table is a beautiful touch that leans fully into the chocolate theme. A small bowl of rainbow sprinkles on the side lets kids customize their own plates, which is always a hit at birthday parties. Fresh strawberries or raspberries on the plate add a colorful, slightly tart contrast that balances the richness of the chocolate and ice cream layers. For adults, a cup of hot black coffee alongside a cold slice of this copycat Dairy Queen ice cream cake is an unexpectedly perfect pairing — the bitterness of the coffee plays wonderfully against all that sweet, creamy chocolate.
Storage Tips
In the freezer: Once fully assembled and decorated, wrap the cake tightly in plastic wrap followed by a layer of heavy-duty aluminum foil. This double wrap prevents freezer burn and keeps the whipped topping from absorbing any off flavors from the freezer. Stored properly, this cake keeps well for up to 2 weeks.
After cutting: Press plastic wrap directly against the exposed ice cream on the cut face of the remaining cake before re-wrapping and returning it to the freezer. This simple step prevents icy crystals from forming on the cut surface.
Do not refrigerate: The refrigerator will melt your cake within an hour or two. This is a freezer-only dessert — keep it frozen until about 10 minutes before serving.
Piped decorations: If you’ve piped whipped topping rosettes on top, freeze the finished cake uncovered for 30 minutes first until the decorations are completely firm, then wrap. This prevents the plastic wrap from flattening your beautiful piped details.
Estimated Nutrition (Per Slice, Based on 12 Servings)
- Calories: ~420
- Total Fat: 22g
- Saturated Fat: 13g
- Carbohydrates: 52g
- Sugar: 38g
- Protein: 5g
- Sodium: 310mg
Note: These are estimates and will vary based on specific ice cream brands, cookie brands, and serving sizes.
Recipe Overview
- Prep Time: 30 minutes
- Freeze Time: 6 hours minimum (overnight preferred)
- Total Time: 6 hours 30 minutes
- Difficulty: Easy — beginner-friendly, no baking required
- Servings: 12 slices
Ingredients
For the Crust:
- 25 chocolate sandwich cookies, finely crushed (about 2 cups crumbs)
- 4 tablespoons unsalted butter, melted
For the Fudge Crunch Layer (the signature layer):
- 1½ cups chocolate sandwich cookie crumbs (about 15 cookies)
- ½ cup hot fudge sauce, slightly warmed and stirred smooth
For the Ice Cream Layers:
- 1.5 quarts vanilla ice cream, slightly softened
- 1.5 quarts chocolate ice cream, slightly softened
For the Whipped Topping:
- 2 containers (8 oz each) frozen whipped topping, thawed
- OR: 2 cups heavy whipping cream + 3 tablespoons powdered sugar + 1 teaspoon vanilla, whipped to stiff peaks with ½ teaspoon unflavored gelatin dissolved in 1 tablespoon warm water
For Decoration:
- ¼ cup chocolate syrup for drizzling
- Rainbow sprinkles or chocolate sprinkles
- Extra whipped topping in a piping bag fitted with a star tip for rosettes
Step-by-Step Instructions
Step 1: Prepare Your Pan
Line a 9×13-inch baking dish or a 9-inch springform pan with plastic wrap, pressing it smoothly along the bottom and all the way up the sides with a few inches of overhang. Lightly spray the plastic wrap with non-stick cooking spray. Place the lined pan in the freezer while you get started on the crust — a cold pan helps the first layer set quickly and keeps everything firm from the foundation up.
Step 2: Make the Cookie Crust
Crush 25 chocolate sandwich cookies into fine crumbs using a food processor, or place them in a sealed zip-top bag and crush with a rolling pin until completely uniform. Transfer to a bowl and stir in the melted butter until every crumb is evenly coated. Remove the pan from the freezer, pour in the crumb mixture, and use the flat bottom of a measuring cup to press it down firmly and evenly across the entire bottom. Really pack it — every corner, every edge. A firmly pressed crust is the foundation your copycat Dairy Queen ice cream cake needs to hold together beautifully when sliced. Freeze for 30 minutes.
Step 3: Add the Vanilla Ice Cream Layer
Let the vanilla ice cream sit at room temperature for 10–12 minutes until softened to a spreadable consistency — not melted, just pliable. Once the crust is frozen solid, spoon large dollops of vanilla ice cream over the crust and use a rubber spatula or offset spatula to spread it into a perfectly smooth, level layer. Work gently and quickly. Smooth the top as flat as possible, since this is the surface the fudge crunch layer will sit on. Return to the freezer and freeze for a full hour until completely solid.
Step 4: Make and Add the Fudge Crunch Layer
This is the step that defines a true copycat Dairy Queen ice cream cake, so take your time with it. Crush 15 chocolate sandwich cookies into fine crumbs. Warm the hot fudge sauce gently until stirrable, then let it cool slightly — it should be thick and sticky, not hot. Combine the cookie crumbs and fudge sauce in a bowl and stir until the crumbs are evenly coated and the mixture holds together in clumps. Once the vanilla layer is completely frozen, drop spoonfuls of the fudge crunch mixture across the entire surface and press it gently into a thin, even layer using the back of a spoon or your clean fingertips. It doesn’t need to be perfectly smooth — a slightly rustic texture is completely fine and authentic. Return to the freezer for 30 minutes.
Step 5: Add the Chocolate Ice Cream Layer
Soften the chocolate ice cream the same way — 10–12 minutes on the counter. Once the fudge crunch layer is set, spoon the chocolate ice cream over it and spread carefully into an even, smooth layer. This is your final ice cream layer, so spend a moment making the top completely level. Return to the freezer and freeze for a full hour until rock solid.
Step 6: Add the Whipped Topping
Spread the thawed whipped topping (or your freshly stabilized whipped cream) over the frozen chocolate ice cream layer in a generous, even coat. Use an offset spatula to create a smooth surface. If you want to add decorative swirls or texture on top, now is the time — use the back of a spoon to create gentle peaks across the surface. For piped rosettes, fill a piping bag fitted with a large star tip and pipe a border of rosettes around the edge and a few in the center.
Step 7: Decorate
Drizzle chocolate syrup in a back-and-forth zigzag pattern over the whipped topping. Add a generous scatter of rainbow or chocolate sprinkles. If you like, crumble a few extra cookie crumbs across the center for a finished, bakery-style look.
Step 8: Final Freeze
Place the fully assembled and decorated cake in the freezer uncovered for 30 minutes to allow the decorations to set firmly, then cover loosely with plastic wrap and freeze for a minimum of 4 hours — overnight is ideal. When you’re ready to serve, let the cake rest at room temperature for 8–10 minutes, then slice with a warm sharp knife. Watch that fudge crunch layer reveal itself in every slice — that’s the moment that makes all the effort absolutely worth it.


