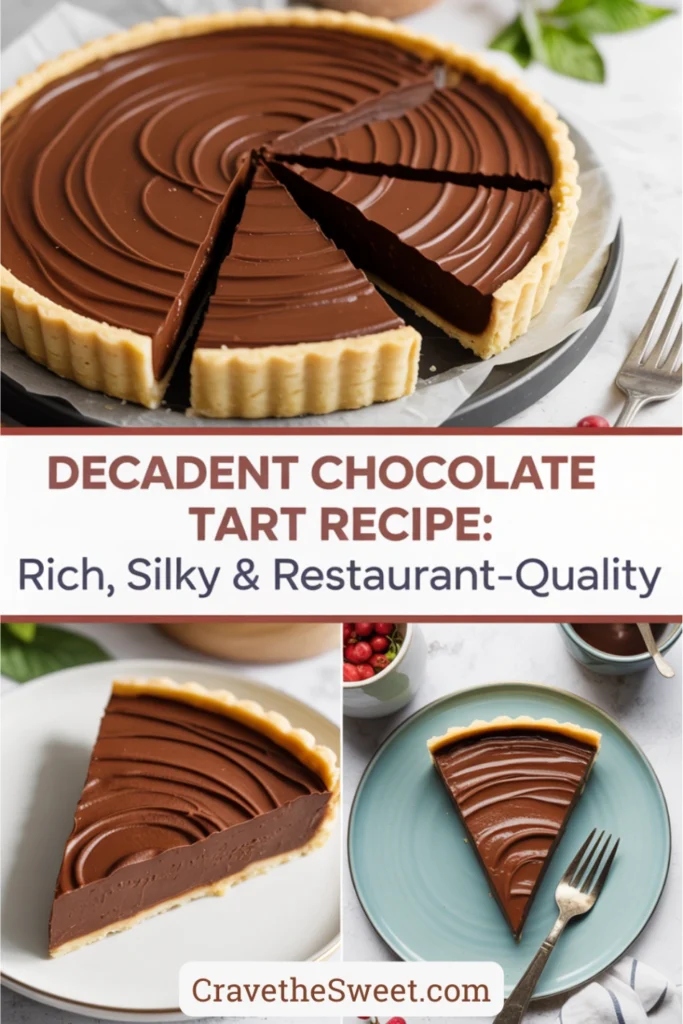
I’ll never forget the first time I ordered a chocolate tart at a fancy French restaurant for my anniversary dinner. When the waiter set that glossy, mirror-like slice in front of me, I thought it was almost too beautiful to eat. Almost. That first bite was pure heaven, a silky smooth chocolate filling encased in a buttery, crisp crust that shattered perfectly with each forkful. I was convinced something so elegant and refined could only be made by professional pastry chefs with years of training. Then a chef friend let me in on a secret: chocolate tarts are actually one of the easiest impressive desserts to make at home. This chocolate tart recipe has been my go-to showstopper ever since, fooling everyone into thinking I spent hours slaving away when it really takes minimal effort and basic techniques.
Why You’ll Love This Chocolate Tart Recipe
This dessert delivers maximum impact with surprisingly little effort, making it perfect for both experienced bakers and adventurous beginners. The chocolate filling is incredibly rich and velvety with an intense, pure chocolate flavor that melts on your tongue. Unlike cakes that can be fussy and temperamental, tarts are quite forgiving and straightforward to assemble. The buttery, crisp crust provides the perfect textural contrast to the smooth filling, creating that professional bakery experience in every bite. What makes this chocolate tart recipe particularly appealing is how elegant it looks with minimal decoration. A simple dusting of cocoa powder or a few fresh berries transforms it into a stunning centerpiece worthy of any special occasion. It’s also incredibly versatile, equally at home at a formal dinner party or a casual family gathering. The tart can be made a day ahead, which means less stress when you’re entertaining guests.
What Is a Chocolate Tart?
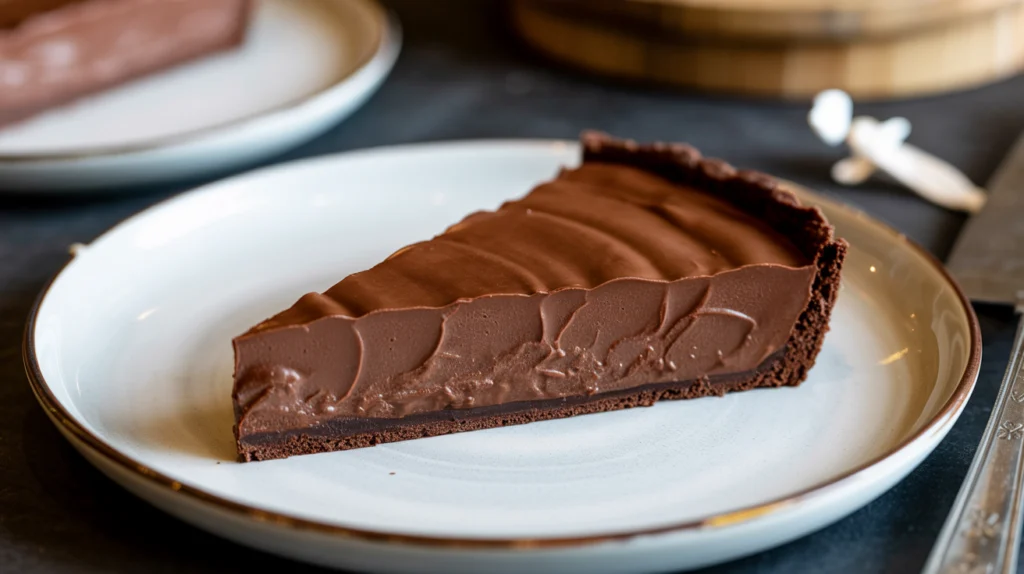
A chocolate tart consists of two main components: a sweet pastry crust called pâte sucrée and a rich chocolate filling, typically made from chocolate ganache. Unlike chocolate pie, which often has a lighter, mousse-like filling, a proper chocolate tart features a dense, fudgy filling that’s intensely chocolatey. The crust is pre-baked until golden and crisp, then filled with the chocolate mixture and chilled until set. Traditional French chocolate tarts use high-quality dark chocolate and heavy cream as the base for the filling, sometimes with butter added for extra richness and shine. The result is a sophisticated dessert with a smooth, truffle-like center and a crisp, cookie-like crust. This chocolate tart recipe follows the classic French technique while remaining accessible for home bakers. The tart is typically served at room temperature or slightly chilled, sliced into thin wedges since the filling is so rich.
Common Mistakes to Avoid
The biggest mistake when making chocolate tarts is overworking the pastry dough. When you handle dough too much or mix it too long, you develop the gluten in the flour, resulting in a tough, chewy crust instead of a tender, crumbly one. Mix just until the dough comes together, then stop. Another common error is not chilling the dough adequately before rolling. Warm dough becomes sticky, tears easily, and shrinks excessively during baking. Always chill your dough for at least 30 minutes. Many bakers also skip blind baking or don’t do it properly, leading to a soggy bottom crust. Make sure to fully bake your crust until it’s golden brown before adding the filling. When making the chocolate filling, adding cream that’s too hot can cause the chocolate to seize and become grainy. Let your cream cool slightly before pouring it over the chopped chocolate. Cutting the tart while it’s still warm creates messy slices, so resist the temptation and let it chill completely. Finally, using low-quality chocolate dramatically affects the final taste. Since this chocolate tart recipe relies on chocolate as the star ingredient, invest in good quality chocolate with at least 60 percent cacao.
How to Know When Your Tart Is Done
Knowing when your tart components are properly finished ensures perfect results. For the crust, you’ll blind bake it first. After removing the pie weights, the bottom should look dry and lightly golden, not pale or wet. The edges should be a deeper golden brown. If the bottom still looks pale or shiny, return it to the oven for a few more minutes. A properly baked crust will feel firm and crisp to the touch once cooled, not soft or bendable. For the chocolate filling, you don’t actually bake it. Instead, you’ll pour the warm ganache into the pre-baked shell and chill it until set. The filling is done chilling when it feels firm to the touch and doesn’t jiggle when you gently shake the pan. This typically takes at least two to three hours in the refrigerator. The surface should look smooth and matte rather than shiny and liquid. If you insert a knife into the center, it should come out mostly clean with just a thin coating of chocolate. The filling will continue to firm up even more as it sits, so don’t worry if it seems slightly soft at first.
What to Serve With Chocolate Tart
Because this chocolate tart recipe creates such a rich, intense dessert, it pairs best with accompaniments that provide contrast and balance. Lightly sweetened whipped cream is the classic pairing, its light, airy texture and subtle sweetness cutting through the density of the chocolate. Fresh raspberries or strawberries add a pop of color and a slight tartness that complements the chocolate beautifully. A small scoop of vanilla ice cream creates a lovely temperature contrast if you’re serving the tart at room temperature. For an elegant presentation, dust the plate with cocoa powder and add a fresh mint sprig. Coffee is the perfect beverage pairing, especially a strong espresso or cappuccino that echoes the chocolate notes. For wine lovers, a ruby port or late-harvest dessert wine provides a sophisticated accompaniment. Some people enjoy a sprinkle of flaky sea salt on top, which enhances the chocolate flavor and adds a sophisticated touch. A drizzle of salted caramel sauce or raspberry coulis on the plate creates an Instagram-worthy presentation while adding complementary flavors.
Storage Tips for Maximum Freshness
Proper storage keeps your chocolate tart tasting fresh and maintaining its perfect texture. Once the tart has set completely, cover it loosely with plastic wrap or aluminum foil, being careful not to let the wrap touch the chocolate surface as it can mar the glossy finish. Store in the refrigerator for up to four days. The tart actually tastes best when removed from the refrigerator about 20 to 30 minutes before serving, allowing it to come closer to room temperature. This softens the filling slightly and allows the full chocolate flavor to shine through. If you need to store it longer, this chocolate tart recipe freezes well for up to two months. Wrap the entire tart tightly in plastic wrap, then in aluminum foil. Thaw overnight in the refrigerator before serving. The crust can also be made ahead and frozen unbaked for up to three months or baked for up to one month. This makes it easy to have a head start when you’re planning to make the tart for a special occasion.
Estimated Nutrition Information
Per serving (based on 12 slices): Approximately 385 calories, 26g fat, 36g carbohydrates, 5g protein, 95mg cholesterol, 125mg sodium. Values will vary based on specific chocolate and ingredients used.
Recipe Overview
Prep Time: 30 minutes (plus chilling time)
Cook Time: 25 minutes
Total Time: 3 hours 30 minutes (including chilling)
Difficulty: Medium
Servings: 10 to 12 slices
Ingredients
For the crust:
- 1 and 1/4 cups all-purpose flour
- 1/4 cup granulated sugar
- 1/4 teaspoon salt
- 1/2 cup cold unsalted butter, cut into small cubes
- 1 large egg yolk
- 2 to 3 tablespoons ice water
For the chocolate filling:
- 12 ounces high-quality dark chocolate (60-70% cacao), finely chopped
- 1 and 1/4 cups heavy cream
- 3 tablespoons unsalted butter, softened
- 1 teaspoon vanilla extract
- Pinch of salt
Step-by-Step Instructions
Start by making the tart crust. In a food processor, pulse together the flour, sugar, and salt until combined. Add the cold butter cubes and pulse about 10 to 12 times until the mixture resembles coarse crumbs with some pea-sized pieces of butter remaining. Add the egg yolk and pulse a few times. Then add ice water one tablespoon at a time, pulsing after each addition, until the dough just begins to come together. It should look crumbly but hold together when pinched.
Turn the dough out onto a work surface and gently press it into a disk. Wrap tightly in plastic wrap and refrigerate for at least 30 minutes or up to two days. This chilling time is crucial for this chocolate tart recipe as it relaxes the gluten and firms up the butter.
When ready to bake, preheat your oven to 375°F. On a lightly floured surface, roll out the chilled dough into a circle about 12 inches in diameter and one-eighth inch thick. Carefully transfer the dough to a 9-inch tart pan with a removable bottom, pressing it gently into the corners and up the sides. Trim any excess dough by rolling your rolling pin across the top of the pan. Prick the bottom all over with a fork to prevent puffing during baking.
Line the dough with parchment paper or aluminum foil and fill with pie weights, dried beans, or rice. This blind baking technique prevents the crust from puffing up. Bake for 15 minutes, then carefully remove the weights and parchment. Continue baking for another 10 to 12 minutes until the crust is golden brown all over. Remove from the oven and let cool completely on a wire rack.
While the crust cools, prepare your chocolate filling. Place the chopped chocolate in a large heatproof bowl. In a small saucepan, heat the heavy cream over medium heat until it just begins to simmer around the edges. Don’t let it come to a full boil. Remove from heat and let it cool for about one minute.
Pour the warm cream over the chopped chocolate and let it sit undisturbed for two minutes. This allows the chocolate to melt gently. Then, starting from the center, stir slowly with a whisk or spatula until the mixture is completely smooth and glossy. Add the softened butter, vanilla extract, and salt, stirring until everything is fully incorporated and silky smooth.
Pour the chocolate filling into the cooled tart shell, using a spatula to spread it evenly if needed. Gently tap the pan on the counter a few times to release any air bubbles and smooth the surface. Refrigerate the tart for at least two to three hours, or until the filling is completely set and firm to the touch.
Before serving, remove the outer ring of the tart pan by placing the tart on a large can or sturdy glass and letting the ring drop down. Transfer the tart to a serving plate. Let it sit at room temperature for 20 to 30 minutes before slicing for the best texture and flavor.
To slice cleanly, dip a sharp knife in hot water, wipe it dry, and cut. Clean and reheat the knife between each slice for those picture-perfect wedges that make this chocolate tart recipe look bakery-perfect every single time.