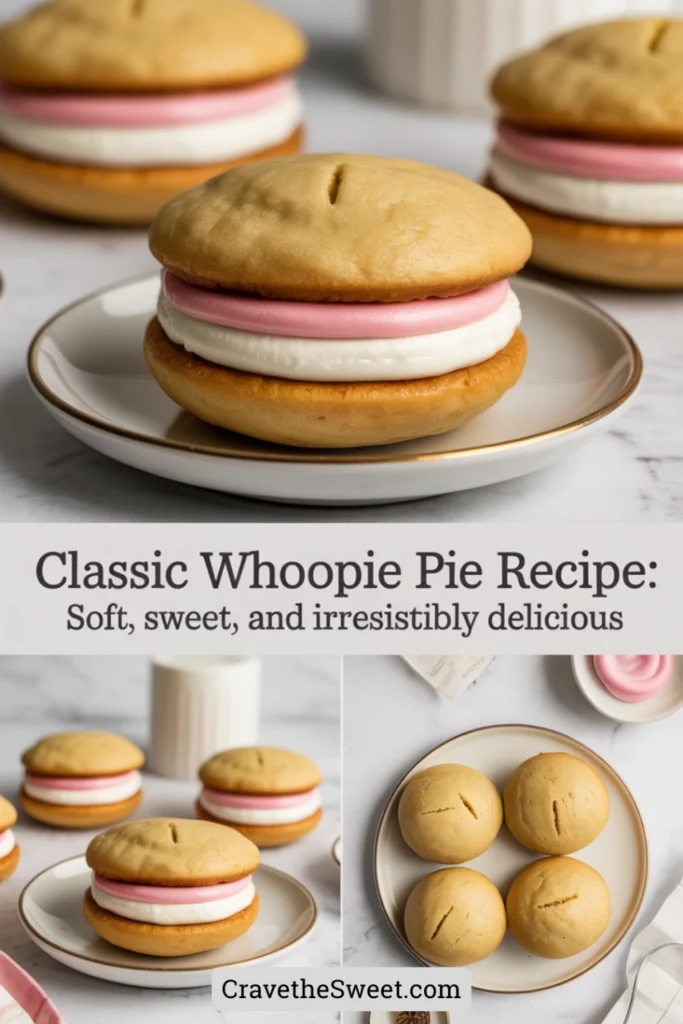
My grandmother used to make whoopie pies for every family gathering, and as a child, I thought they were the most magical dessert in the world. Two soft, cake-like cookies sandwiching a cloud of sweet cream filling—what’s not to love? When she passed away, I was determined to recreate her recipe. After many attempts and phone calls to aunts and cousins trying to piece together her method, I finally cracked the code. Now, this whoopie pie recipe is one of my most treasured possessions, and every time I make them, I’m transported back to her cozy kitchen. I’m excited to share this foolproof recipe with you so you can create your own sweet memories.
Why You’ll Love This Whoopie Pie Recipe
These treats are absolutely addictive. The cake portions are incredibly soft and tender with a rich chocolate flavor that’s not too sweet. The filling is light, fluffy, and perfectly sweet, creating the ideal balance with the chocolate cakes. What makes this whoopie pie recipe special is how the flavors and textures work together—you get a little bit of everything in each bite. They’re also surprisingly easy to make, even though they look impressive and bakery-quality. Unlike traditional cookies that can become hard or stale quickly, whoopie pies stay soft and delicious for days. They’re perfect for lunch boxes, bake sales, parties, or just because you want something special. Kids absolutely love them, and adults appreciate the nostalgic, homemade quality. Plus, you can customize the filling flavors or even make different colored cakes for holidays and celebrations.
What Are Whoopie Pies?
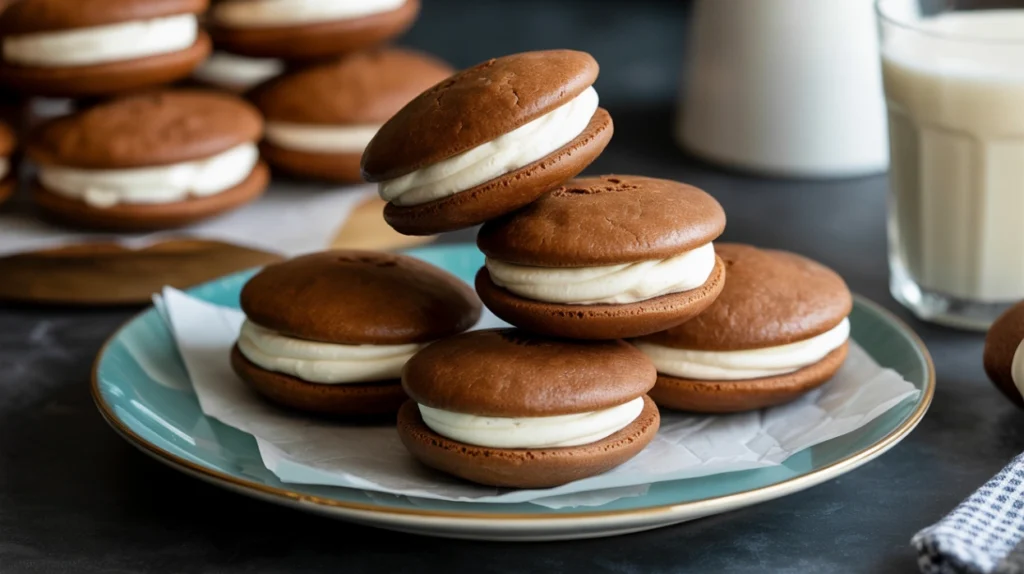
Whoopie pies are classic American desserts consisting of two round, cake-like chocolate cookies with a sweet cream filling sandwiched between them. Despite the name, they’re not actually pies at all. The origin story is debated, with both Maine and Pennsylvania claiming to have invented them. According to Pennsylvania Dutch tradition, Amish women would make them from leftover cake batter, and when children found them in their lunch boxes, they’d shout “Whoopie!” The traditional version features chocolate cakes with a marshmallow cream filling, though variations exist with different flavors. The cakes have a texture somewhere between a cookie and a cake—soft, pillowy, and slightly springy. They’re typically about three to four inches in diameter, making them the perfect handheld treat. The filling is usually made with shortening and marshmallow fluff or a cooked flour-based frosting, creating a stable filling that won’t melt or seep out.
Common Mistakes to Avoid
The most common mistake with this whoopie pie recipe is making the cakes too flat or too puffy. You want them dome-shaped but not overly rounded. This comes down to proper scooping and not overmixing the batter. Another error is baking them too long, which makes them dry instead of soft and cake-like. They should still look slightly underdone when you remove them from the oven. Some people make their cakes too large, which creates an unwieldy sandwich that’s hard to eat. Stick to about two tablespoons of batter per cake. Using cold ingredients can also cause problems—make sure your eggs and any dairy are at room temperature for the smoothest batter. Don’t skip the step of letting the cakes cool completely before filling them. If they’re even slightly warm, the filling will melt and squish out. Another mistake is making the filling too stiff or too loose. It should be spreadable but hold its shape. Finally, some bakers try to stack whoopie pies, but they’re delicate and will squish—store them in a single layer.
How to Know When Your Whoopie Pies Are Done
The cakes should spring back when you gently touch the top. They’ll look set and slightly puffed, with a matte finish rather than shiny. The edges might just barely start to look dry. When you touch one lightly with your finger, it shouldn’t leave an indentation. Insert a toothpick into the center of one cake—it should come out clean or with just a tiny crumb attached. The bottoms should be lightly browned but not dark. Remember, these continue to set as they cool, so it’s better to slightly underbake than overbake them. If they look a bit soft in the center when you remove them from the oven, that’s perfect. They should feel light when you pick them up, not dense or heavy. Once cooled completely, they should be tender and soft throughout with no hard or crispy edges. If you’re unsure, bake a test cake first to get your timing right.
What to Serve With Whoopie Pies
This whoopie pie recipe creates treats that are perfect on their own, but there are great pairings. A cold glass of milk is the classic companion—it cuts through the sweetness beautifully. Hot coffee or tea also pairs wonderfully, especially for adult gatherings. For kids’ parties, serve them alongside fresh fruit to balance the sweetness. Ice cream and whoopie pies make an indulgent combination—try making ice cream sandwiches by replacing the cream filling with softened vanilla ice cream. They’re excellent as part of a dessert spread with brownies, cookies, and other treats. For a fancy presentation at gatherings, arrange them on a tiered cake stand. Some people enjoy dipping the edges in sprinkles or chopped nuts before the filling sets, which adds extra flavor and a professional bakery look. During holidays, you can dust them with powdered sugar or cocoa powder for an elegant touch.
Storage and Freezing Tips
Store your whoopie pies in an airtight container at room temperature for up to three days. Layer them in a single layer with parchment paper between layers if you need to stack them. Room temperature storage keeps them at the perfect soft texture. You can refrigerate them for up to five days, but they may firm up slightly. Let them sit at room temperature for about 20 minutes before eating if you’ve refrigerated them. These freeze beautifully for up to two months. Wrap each whoopie pie individually in plastic wrap, then place them all in a freezer-safe container or bag. This individual wrapping prevents them from sticking together and makes it easy to grab just one or two at a time. To thaw, leave them at room temperature for about an hour. You can also freeze the unfilled cakes for up to three months and make the filling fresh when you’re ready to assemble them.
Estimated Nutrition Information
Per whoopie pie: Approximately 285 calories, 11g fat, 44g carbohydrates, 1g fiber, 31g sugar, 3g protein. These are definitely a treat rather than an everyday food, but they’re worth the indulgence for special occasions. You can reduce the sugar in the cakes slightly if you prefer a less sweet version, though the filling needs its sweetness to achieve the right texture and flavor.
Recipe Overview
Prep Time: 25 minutes
Cook Time: 12 minutes
Total Time: 45 minutes (plus cooling time)
Difficulty: Easy to Medium
Servings: 12 whoopie pies
Ingredients
For the cakes:
- 2 cups all-purpose flour
- 1/2 cup unsweetened cocoa powder
- 1 and 1/4 teaspoons baking soda
- 1/2 teaspoon salt
- 1/2 cup unsalted butter, softened
- 1 cup packed brown sugar
- 1 large egg, room temperature
- 1 teaspoon vanilla extract
- 1 cup buttermilk, room temperature
For the filling:
- 1/2 cup unsalted butter, softened
- 1 and 1/4 cups powdered sugar
- 1 and 1/2 cups marshmallow fluff
- 1 teaspoon vanilla extract
Step-by-Step Instructions
Preheat your oven to 350°F. Line two large baking sheets with parchment paper or silicone baking mats. Don’t skip this step—the cakes can stick without it.
In a medium bowl, whisk together the flour, cocoa powder, baking soda, and salt. Make sure the cocoa powder is well distributed with no lumps. Set this bowl aside.
In a large mixing bowl, beat the softened butter and brown sugar together with an electric mixer on medium speed until light and fluffy, about three minutes. Make sure to scrape down the sides of the bowl occasionally.
Add the egg and vanilla extract to the butter mixture. Beat on medium speed until fully combined and the mixture looks smooth and creamy.
Now you’ll alternate adding the dry ingredients and buttermilk. Add about one-third of the flour mixture to the butter mixture and mix on low speed just until combined. Then add half the buttermilk and mix again. Continue alternating, ending with the flour mixture. Mix each addition just until you don’t see streaks—don’t overmix.
The batter should be thick but scoopable, similar to cake batter. If it seems too thick, you can add a tablespoon of buttermilk.
Using a cookie scoop or two tablespoons, drop rounded portions of batter onto your prepared baking sheets. Space them about two inches apart as they’ll spread slightly. You should get about 24 cakes total. Try to make them all the same size so they pair up nicely.
Bake for 11 to 13 minutes until the cakes spring back when lightly touched. Don’t overbake—they should still look slightly soft in the center.
Remove from the oven and let the cakes cool on the baking sheet for five minutes, then transfer them to a wire cooling rack. Let them cool completely before filling, at least 30 minutes. They need to be completely cool or the filling will melt.
While the cakes cool, make your filling. Beat the softened butter in a large bowl with an electric mixer until smooth and creamy, about two minutes.
Add the powdered sugar and beat on low speed until combined, then increase to medium-high and beat until fluffy, about two minutes.
Add the marshmallow fluff and vanilla extract. Beat on medium speed until everything is well combined and the filling is light and fluffy, about three minutes. The filling should hold its shape but still be spreadable.
Once your cakes are completely cool, match them up by size. Turn half of the cakes flat-side up. These will be your bottoms.
Scoop about two tablespoons of filling onto each bottom cake. You can use a piping bag for neater results, or simply use a spoon or small offset spatula.
Place a top cake on each filled bottom, flat side down, and gently press to spread the filling to the edges. Don’t press too hard or the filling will squish out.
Your whoopie pies are ready to enjoy immediately, or you can store them in an airtight container.
This whoopie pie recipe brings back wonderful memories every time I make it. The combination of soft chocolate cakes and sweet, fluffy filling creates pure magic that appeals to kids and adults alike.