

My daughter’s eighth birthday was approaching, and she had one specific request: an ice cream cake with her favorite flavors. The problem? Store-bought versions cost a fortune and never quite hit the mark. That’s when I discovered how ridiculously simple it is to make ice cream cake at home. Armed with just a few ingredients and a springform pan, I created a showstopper that had kids and adults alike asking for the recipe. The best part? It cost half the price of a bakery version and tasted ten times better. Now ice cream cake is my go-to for every celebration, and I’m thrilled to show you exactly how easy it really is.
Why You’ll Love This Easy Homemade Ice Cream Cake Recipe
This recipe removes all the intimidation factor from making ice cream cake while delivering professional-looking results. You don’t need an ice cream maker, special molds, or advanced baking skills. What you do get is complete control over flavors, fillings, and decorations, meaning you can customize it for anyone’s preferences. Kids love choosing their favorite ice cream combinations, making this a fun family project that doubles as entertainment and dessert prep.
The texture is absolutely perfect—creamy ice cream layers with crunchy cookie crumbs and a rich fudge center that doesn’t freeze rock-hard. Unlike store-bought versions that can taste artificial or overly sweet, your homemade ice cream cake will have clean, authentic flavors. Plus, you can make this several days ahead, which takes the stress out of party planning. It’s budget-friendly, impressive, and guaranteed to be the highlight of any celebration.
What Is Ice Cream Cake?
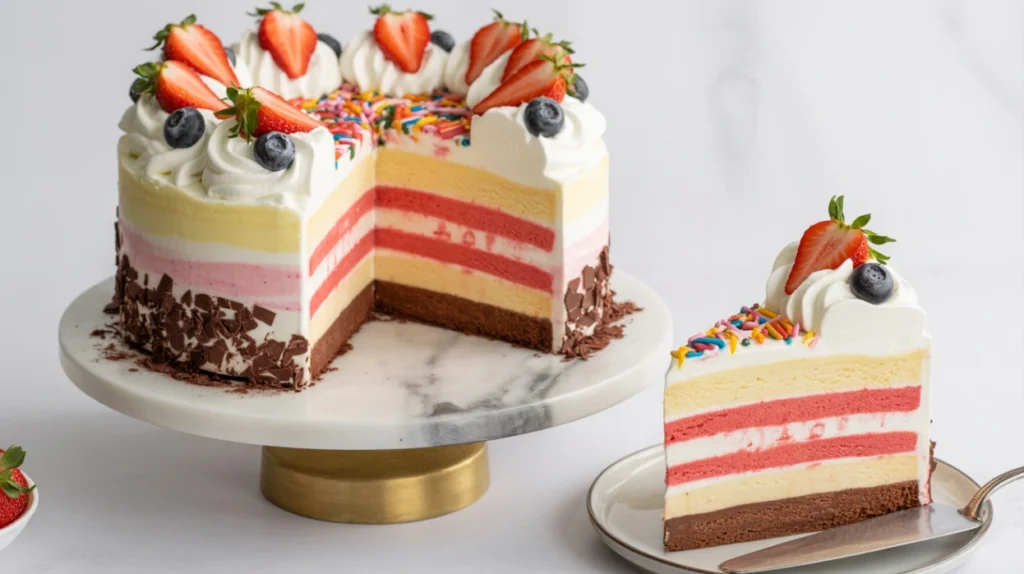
Ice cream cake is exactly what it sounds like—a frozen dessert that combines layers of ice cream with cake, cookies, or other mix-ins, all assembled in a cake-like format. Traditional versions feature alternating layers of ice cream flavors separated by cookie crumbs or thin cake layers, often with fudge or caramel swirled throughout. The whole creation is frozen solid, then frosted with whipped cream or more ice cream for a stunning presentation.
This easy homemade ice cream cake recipe uses a no-bake approach with store-bought ice cream, crushed cookies for the base and middle layer, and a homemade fudge sauce that adds richness without freezing into an impenetrable block. The result is a dessert that slices beautifully, holds its shape at room temperature for serving, and delivers that perfect combination of creamy, crunchy, and sweet in every bite.
Common Mistakes to Avoid
The number one mistake people make is not letting the ice cream soften enough before spreading. Rock-hard ice cream is impossible to work with and will crack your cookie base. Let it sit at room temperature for about 10 minutes until it’s spreadable but not melted. Another common error is rushing between layers. Each layer needs adequate freezing time to set properly, or everything will blend together into a mushy mess.
Don’t skip lining your pan with plastic wrap or parchment paper. This step makes removing the finished ice cream cake so much easier and prevents it from sticking. Many people also make their layers too thick, which makes the cake difficult to slice through and eat. Keep each ice cream layer around one to one and a half inches thick for the best texture and easier serving.
Finally, avoid using ice cream flavors that are too chunky or have large pieces of candy. These make spreading difficult and can create uneven layers. If you love chunky flavors, consider chopping the add-ins smaller or using them as a topping instead of mixing them into the layers.
How to Know Your Ice Cream Cake Is Done
Your ice cream cake is ready when it’s been frozen for at least four hours and feels completely solid when you press the top gently. The edges should be firm, and when you run a knife around the perimeter, it should cut cleanly without dragging soft ice cream. If you’ve added a whipped cream frosting layer, it should be frozen smooth without any wet or shiny spots.
The true test comes when you remove the springform pan sides. If the cake holds its shape perfectly without sagging or melting at the edges, you’re good to go. For the cleanest slices, freeze overnight if you have time. A fully set ice cream cake will cut into neat pieces that hold together beautifully on the plate rather than collapsing into soup.
What to Serve With Ice Cream Cake
Honestly, ice cream cake is so rich and satisfying that it needs very little accompaniment. However, a few strategic additions can enhance the experience. Fresh berries scattered on the plate add color, freshness, and a tart element that balances the sweetness. A drizzle of chocolate or caramel sauce on the plate before placing each slice creates a restaurant-quality presentation.
Hot fudge or caramel sauce served on the side lets guests add extra decadence if they want it. Crushed cookies, chopped nuts, or rainbow sprinkles in small bowls allow everyone to customize their slice. For adult celebrations, a shot of espresso poured over the slice or a splash of liqueur like Kahlua or Bailey’s transforms this into an sophisticated dessert.
Beverage-wise, cold milk is a classic pairing that kids especially love. Coffee and ice cream cake is a match made in heaven, with the bitter notes complementing the sweet frozen layers. For parties, consider serving alongside sparkling water with fresh fruit to cleanse the palate between bites.
Storage Tips for Maximum Freshness
Store your ice cream cake in the freezer wrapped tightly in plastic wrap, then covered with aluminum foil to prevent freezer burn. It will stay fresh for up to two weeks, though it’s usually devoured much faster. If you’ve decorated with whipped cream, be aware that it may develop ice crystals after about five days, affecting the appearance but not the taste.
For longer storage up to one month, wrap individual slices separately so you can grab single servings without thawing the entire cake. This is perfect for portion control or having dessert ready whenever a craving hits. Always store ice cream cake away from strong-smelling foods in your freezer, as it can absorb odors.
When you’re ready to serve, remove the cake from the freezer and let it sit at room temperature for 5-10 minutes. This slight softening makes it much easier to slice cleanly. Use a sharp knife dipped in hot water and wiped dry between cuts for the neatest slices.
Estimated Nutrition Information
Per slice (based on 12 servings): Approximately 380 calories, 18g fat, 50g carbohydrates, 5g protein, 1g fiber. These numbers vary significantly based on which ice cream flavors you choose and how much fudge or toppings you add. This is definitely a special occasion treat rather than an everyday dessert.
Recipe Overview
Prep Time: 30 minutes
Cook Time: 0 minutes (no baking required)
Total Time: 30 minutes active time (plus 4-6 hours freezing time)
Difficulty Level: Easy
Servings: 12 slices
Ingredients
For the Cookie Base:
- 24 chocolate sandwich cookies, crushed into fine crumbs
- 4 tablespoons unsalted butter, melted
For the Ice Cream Layers:
- 1½ quarts vanilla ice cream
- 1½ quarts chocolate ice cream (or any flavor combination you prefer)
For the Fudge Layer:
- ½ cup heavy cream
- 1 cup semi-sweet chocolate chips
- 2 tablespoons unsalted butter
- 2 tablespoons light corn syrup
For the Topping:
- 2 cups heavy whipping cream
- ¼ cup powdered sugar
- 1 teaspoon vanilla extract
- Sprinkles, crushed cookies, or chocolate shavings for decoration
Step-by-Step Instructions
Step 1: Line a 9-inch springform pan with plastic wrap, leaving overhang on the sides for easy removal. This step is crucial for getting your cake out intact.
Step 2: Crush cookies into fine crumbs using a food processor or by placing them in a sealed bag and crushing with a rolling pin.
Step 3: Mix cookie crumbs with melted butter until the mixture resembles wet sand and holds together when pressed.
Step 4: Press cookie mixture firmly into the bottom of your prepared pan, creating an even layer. Use the bottom of a measuring cup to pack it down. Freeze for 15 minutes.
Step 5: Remove vanilla ice cream from the freezer and let soften at room temperature for 10 minutes until spreadable.
Step 6: Spread softened vanilla ice cream evenly over the cookie base, smoothing with an offset spatula. Freeze for 1 hour until firm.
Step 7: While the first layer freezes, make your fudge sauce. Heat heavy cream in a small saucepan until it just begins to simmer.
Step 8: Remove cream from heat and add chocolate chips, butter, and corn syrup. Let sit for 2 minutes, then whisk until completely smooth. Let cool to room temperature.
Step 9: Pour cooled fudge sauce over the frozen vanilla layer, spreading evenly. Sprinkle with additional cookie crumbs if desired. Freeze for 30 minutes.
Step 10: Soften chocolate ice cream the same way you did the vanilla, about 10 minutes at room temperature.
Step 11: Spread chocolate ice cream over the fudge layer, smoothing the top completely. Freeze for at least 2 hours or overnight.
Step 12: When ready to finish, beat heavy whipping cream with powdered sugar and vanilla until stiff peaks form.
Step 13: Spread whipped cream over the top and sides of the frozen cake, creating swirls and patterns as desired.
Step 14: Decorate immediately with sprinkles, cookie crumbs, or chocolate shavings while the whipped cream is still soft.
Step 15: Freeze for at least 1 more hour before serving. Run a knife around the edges, release the springform, and use the plastic wrap to lift the cake onto your serving plate.
This easy homemade ice cream cake recipe proves that impressive desserts don’t have to be complicated. With basic ingredients and a little freezer time, you’ll create a celebration-worthy treat that tastes better than anything from a store!


