

My first experience making trifle was for my mother-in-law’s birthday dinner, and I was terrified. I wanted to impress her with something elegant but didn’t have much baking confidence. A friend suggested trifle, assuring me it was foolproof since there was no actual baking involved—just assembly. I’ll never forget carrying that glass bowl to dinner, seeing all those gorgeous layers visible through the sides. When I served it and everyone raved about how beautiful and delicious it was, I felt like a pastry chef. The best part? My mother-in-law asked for the recipe, and I had to admit how incredibly simple it was. This trifle recipe has been my secret weapon for impressing guests ever since.
Why You’ll Love This Trifle Recipe
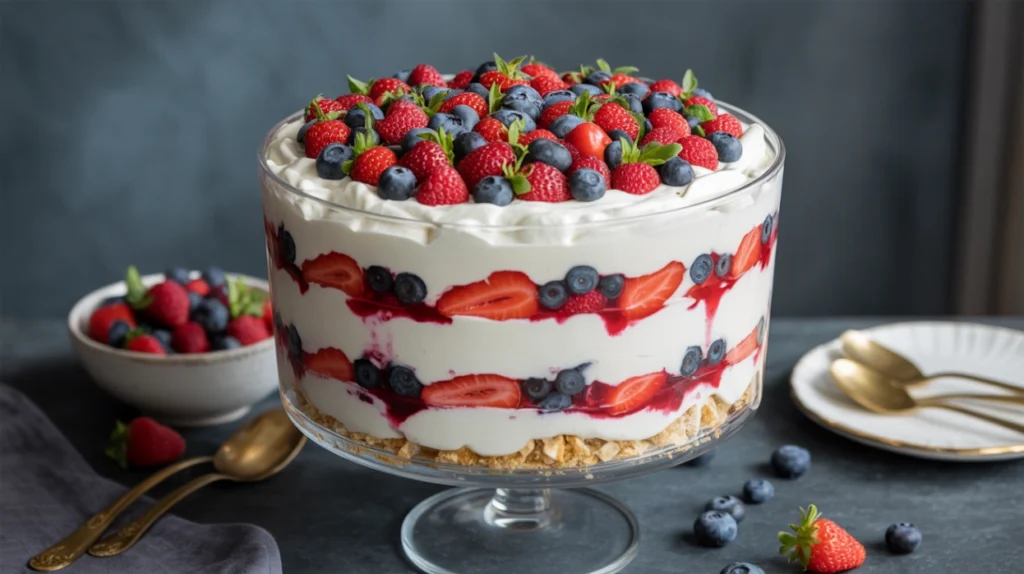
This dessert is absolutely stunning with its beautiful layers of cake, custard, fruit, and cream all visible through a clear glass bowl. It tastes as good as it looks, with creamy pudding, juicy berries, fluffy cake, and whipped topping all coming together in perfect harmony. What makes this trifle recipe special is how impressive it looks with minimal effort. There’s no baking required, no frosting to spread, and no worrying about things looking perfect—the layered presentation is naturally beautiful. It’s incredibly forgiving for beginners since you’re just stacking ingredients. The recipe easily feeds a crowd, making it perfect for holidays, potlucks, and parties. You can also customize it endlessly with different fruits, cake flavors, or pudding types. Best of all, it must be made ahead, which eliminates last-minute stress when entertaining. The flavors actually improve after sitting, as the cake soaks up moisture from the custard and fruit.
What Is a Trifle?
Trifle is a classic British dessert consisting of layers of sponge cake or ladyfingers, custard or pudding, fruit, and whipped cream, traditionally served in a clear glass bowl to show off the layers. The dessert dates back to the 1500s in England, though early versions were quite different from today’s trifles. Traditional English trifle often includes sherry-soaked cake and homemade custard, while American versions typically use instant pudding and skip the alcohol. The cake pieces soak up moisture from the pudding and fruit juices, creating a wonderfully soft, flavor-melded dessert. The key is proper layering—you want distinct stripes visible through the bowl. Trifles can be made in a large glass bowl for serving family-style, or in individual glasses or jars for personal portions. The dessert is especially popular during holidays, particularly Christmas in England. While the classic version uses berries, you can use almost any fruit, and variations exist with chocolate, lemon, or tropical flavors.
Common Mistakes to Avoid
The biggest mistake with this trifle recipe is making the layers too thick. You want multiple thin layers rather than a few thick ones, which creates more visual interest and better flavor distribution in each serving. Another error is using cake that’s too soft or fresh. Slightly stale or day-old cake works better because fresh cake can become too mushy when it absorbs moisture. Some people make their pudding too thin, which causes it to seep between layers and make everything soggy. Follow the package directions carefully for proper thickness. Not letting the pudding cool completely before assembling is another mistake—warm pudding will melt your whipped topping. Using a bowl that’s too small forces you to make the layers too thick and creates an unbalanced ratio. A large, deep trifle bowl or straight-sided glass bowl works best. Don’t skip draining your fruit—excess juice makes the dessert watery. Finally, not refrigerating long enough means the layers won’t set and the flavors won’t meld. At least four hours is essential, though overnight is ideal.
How to Know When Your Trifle Is Ready
Unlike baked desserts, trifle doesn’t require doneness testing in the traditional sense. However, it does need proper chilling time for the best results. The trifle is ready to serve after it’s been refrigerated for at least four hours, though six hours or overnight is ideal. During this time, the cake will soften as it absorbs moisture from the pudding and fruit, the pudding will set firmly, and all the flavors will meld together beautifully. When you scoop into it with a large spoon, the layers should hold together reasonably well rather than being soupy or sliding apart. The whipped topping should be firm and cold. The fruit juices should have been absorbed by the cake rather than pooling at the bottom. You should be able to see distinct layers through the sides of your glass bowl—if everything has blended together into one uniform color, you’ve used too much liquid or not enough structure. The top layer of whipped cream should look fresh and fluffy, not melted or separated.
What to Serve With Trifle
This trifle recipe creates such a complete dessert that it rarely needs accompaniments. The cake, cream, custard, and fruit all combine to make a satisfying ending to any meal. However, certain pairings enhance the experience. Coffee or tea is traditional, especially for afternoon tea service. The slight bitterness balances the sweetness nicely. For a British-style presentation, serve it alongside small cookies or shortbread. Fresh berries on the side add a pop of color to the plate, though the trifle itself usually contains fruit. A drizzle of berry sauce or chocolate sauce over individual portions adds extra elegance for special occasions. For adult gatherings, serve with dessert wine or champagne. Some people enjoy it with a splash of sherry or liqueur drizzled over their portion, following the traditional British method. The trifle works perfectly as part of a dessert buffet alongside other treats like brownies and cookies, giving guests variety.
Storage and Make-Ahead Tips
Trifle is actually best when made ahead—in fact, it requires advance preparation. You can assemble it up to 24 hours before serving, and it will only improve as it sits. Store it covered with plastic wrap in the refrigerator until ready to serve. If making more than a day ahead, add the final whipped cream layer just a few hours before serving to keep it looking fresh. Leftover trifle stays fresh covered in the refrigerator for up to three days, though the texture will soften considerably. The cake will become very soft and the layers will blend together more, but it’s still delicious. You can prepare components ahead in stages—make the pudding two days before, cut the cake the day before, and assemble the morning of your event. Individual trifles in glasses or jars are perfect for portion control and can be covered with plastic wrap individually. Don’t freeze trifle—the texture of the whipped topping and pudding doesn’t survive freezing and thawing well.
Estimated Nutrition Information
Per serving (based on 12 servings): Approximately 340 calories, 14g fat, 48g carbohydrates, 2g fiber, 36g sugar, 5g protein. This is definitely an indulgent dessert, though the fresh fruit does provide vitamins and the portions can be controlled by serving size. The light, airy nature of the dessert makes it feel less heavy than many other rich desserts.
Recipe Overview
Prep Time: 25 minutes
Cook Time: 0 minutes (no baking)
Total Time: 4 hours 25 minutes (including chilling)
Difficulty: Easy
Servings: 12
Ingredients
For the layers:
- 1 pound cake or angel food cake, cut into 1-inch cubes
- 2 boxes (3.4 ounces each) instant vanilla pudding mix
- 3 cups cold milk
- 3 cups mixed fresh berries (strawberries, blueberries, raspberries)
- 8 ounces whipped topping (Cool Whip), thawed
- 1/4 cup strawberry or raspberry jam (optional)
- Fresh berries and mint for garnish
Step-by-Step Instructions
Cut your pound cake or angel food cake into roughly one-inch cubes. If using fresh cake, let it sit out for a few hours to dry slightly, or lightly toast the pieces in a 300°F oven for 10 minutes. Set aside.
Prepare the instant pudding by whisking the pudding mix with the cold milk according to package directions. Whisk for about two minutes until smooth and thickened. Place in the refrigerator to set while you prepare the other components, at least five minutes.
Wash and prepare your berries. Hull and slice the strawberries. Leave blueberries and raspberries whole. Pat them dry with paper towels to remove excess moisture. If using jam, place it in a small microwave-safe bowl and warm for 15 seconds to make it pourable, then set aside.
Choose your serving bowl—a large glass trifle bowl or any clear glass bowl that holds at least 3 quarts works perfectly. You want people to see those beautiful layers.
Now you’re ready to assemble. Start with about one-third of the cake cubes on the bottom of your bowl, creating an even layer. Press them down gently to create a compact base.
If using jam, drizzle about one-third of it over the cake layer. This adds extra flavor and helps bind things together.
Spread about one-third of the pudding over the cake layer, spreading it carefully to the edges of the bowl so it’s visible.
Add about one-third of the mixed berries over the pudding, distributing them evenly. Try to get some berries against the sides of the bowl for a nice visual effect.
Spread about one-third of the whipped topping over the berries, again spreading to the edges.
Repeat these layers two more times: cake, jam, pudding, berries, and whipped topping. You should end up with three complete sets of layers, finishing with whipped topping on top.
For the final layer, you can pipe the whipped topping decoratively using a piping bag with a star tip, or simply spread it smoothly with a spatula.
Garnish the top with fresh berries arranged in an attractive pattern. Add a few small mint leaves for a pop of color if desired.
Cover the bowl carefully with plastic wrap, making sure it doesn’t touch the top of the trifle. Refrigerate for at least four hours, though overnight is ideal.
When ready to serve, use a large spoon to scoop portions, making sure to go all the way to the bottom so each serving includes all the layers. Serve in bowls or on dessert plates.
This trifle recipe has saved me countless times when I need an impressive dessert without the stress. The beautiful layers and delicious combination of flavors always wow guests, and I love that the hardest part is simply arranging everything in a bowl.


