I was always intimidated by petit fours until I attended a bridal shower where the hostess served the most beautiful bite-sized cakes I’d ever seen. Each one was perfectly glazed, decorated with delicate flowers, and looked like it came from a fancy French patisserie. When I complimented her, she surprised me by admitting they were homemade and much simpler than they looked. She explained that the secret was using a dense pound cake, cutting it into small squares, and covering everything with a poured fondant glaze. Inspired, I tried making them the next weekend, and she was absolutely right. This petit four recipe has since become my signature for tea parties, showers, and any time I want to create something that looks professionally elegant but doesn’t require advanced pastry skills.
Why You’ll Love This Petit Four Recipe
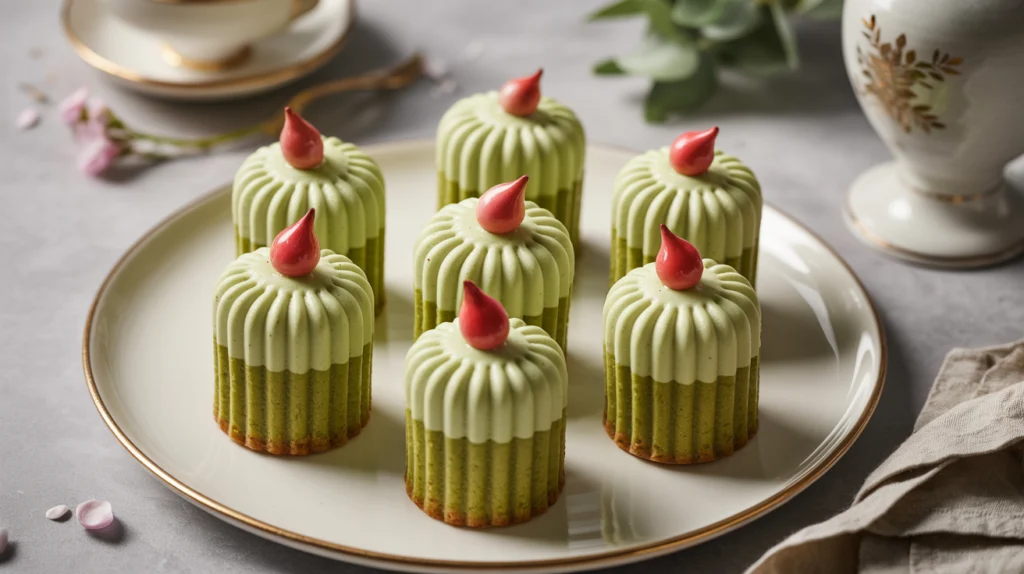
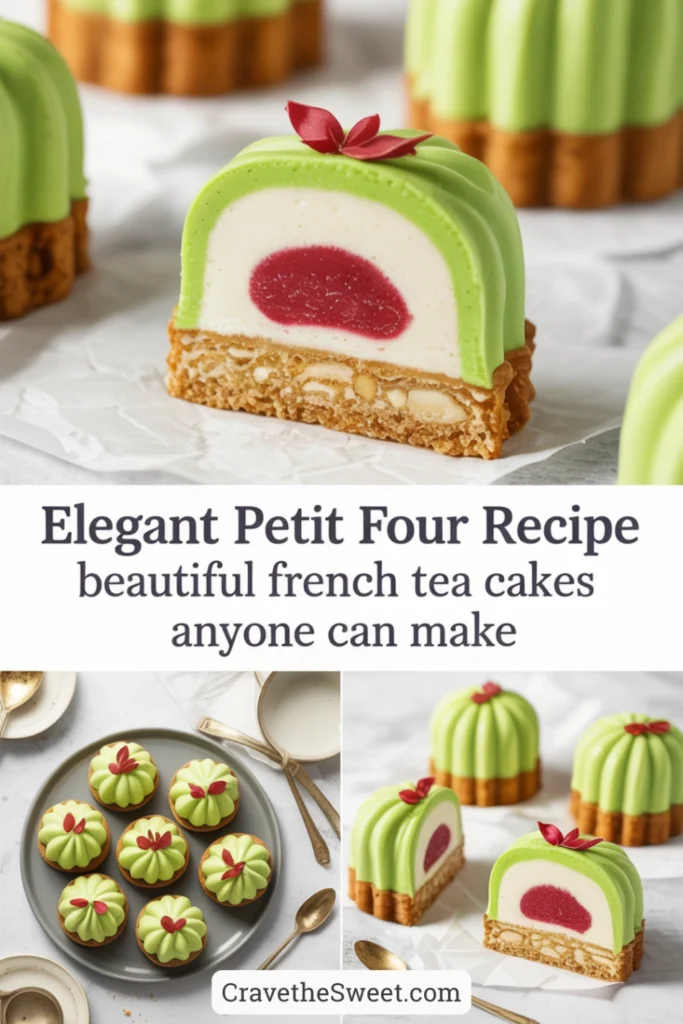
These little cakes are absolutely stunning with their smooth, glossy glaze and delicate decorations. Each bite-sized piece is rich and satisfying without being overwhelming. What makes this petit four recipe special is how impressive they look despite using straightforward techniques. The dense cake holds its shape perfectly when cut into small squares, and the poured fondant creates that signature smooth finish. They’re wonderfully versatile—you can customize the colors and decorations for any occasion from weddings to baby showers to tea parties. The recipe allows for creativity with different cake flavors, fillings, and glaze colors. Despite their fancy appearance, petit fours are quite practical since they can be made entirely ahead of time. They’re also the perfect size for events where people are standing and mingling—no plates or forks required.
What Are Petit Fours?
Petit fours are small, bite-sized French confections traditionally served with tea or coffee. The name literally means “small oven” in French, referring to the low temperature at which they were originally baked. Classic petit fours consist of small squares or rectangles of cake, often layered with jam or buttercream, then completely covered with a smooth fondant or glaze and decorated. They became popular in 18th century France and have been a staple of elegant entertaining ever since. There are actually three categories of petit fours: petit fours glacé (iced cakes), petit fours sec (dry cookies), and petit fours frais (fresh fruit confections). This recipe focuses on the most common type—petit fours glacé. The key characteristics are their small size (usually one to two bites), perfect geometric shape, smooth coating, and delicate decoration.
Common Mistakes to Avoid
The biggest mistake with this petit four recipe is using a cake that’s too soft or crumbly. You need a dense, sturdy cake like pound cake that can be cut cleanly and hold its shape. Regular fluffy layer cake will fall apart. Another error is not freezing the cut cake pieces before glazing. Frozen cakes are much easier to handle and coat—the glaze sets immediately on the cold surface. Some people make their glaze too thick, which creates a lumpy coating rather than a smooth finish. The glaze should be thin enough to pour but thick enough to coat. Not straining the glaze is another mistake—any lumps will be visible on the finished petit fours. Using a regular fork to dip the cakes causes too much glaze to pool at the bottom. A specialized dipping fork or a regular fork with the center tines removed works better. Trying to decorate them before the glaze is completely set causes smears and ruins the smooth finish.
How to Know When They’re Done
The cake portion is properly baked when a toothpick inserted in the center comes out clean and the top springs back when lightly touched. The cake should be golden brown and pulling away slightly from the pan edges. An instant-read thermometer should register around 200°F in the center. After baking, the cake needs to cool completely before cutting—warm cake will crumble and won’t cut cleanly. Once cut into squares and filled (if using filling), the pieces are ready to glaze after being frozen for at least 30 minutes until firm. The glaze is the right consistency when it coats the back of a spoon but still drips off easily. After glazing, the petit fours are done when the glaze has set completely—it should be dry to the touch and no longer sticky, which takes about 30 minutes to an hour at room temperature. The finished petit fours should have a smooth, glossy coating with no cake showing through.
What to Serve With Petit Fours
This petit four recipe creates cakes that are traditionally served with tea or coffee, and this pairing is perfect. Earl Grey, Darjeeling, or English breakfast tea all complement the sweet cakes beautifully. They’re ideal for afternoon tea service alongside finger sandwiches and scones. Champagne or sparkling wine pairs wonderfully for celebrations like weddings or showers. The petit fours are sweet enough that they need no accompaniment, though some people enjoy them with fresh berries on the side. They’re perfect for dessert tables at events where people are mingling—the small size means guests can easily grab one or two while standing. For formal dinners, serve one or two per person with coffee as a light ending to the meal. They also work well as edible party favors when boxed in small gift boxes.
Storage and Make-Ahead Tips
Petit fours store beautifully and actually benefit from being made ahead. The unglazed, unfilled cake can be baked up to three days in advance—wrap tightly and keep at room temperature. You can also freeze the baked cake for up to two months. The cut, filled, but unglazed squares can be frozen for up to one month. Complete the glazing after thawing. Once glazed and decorated, petit fours keep well in an airtight container at room temperature for up to four days. They can also be refrigerated for up to one week, though condensation may form when brought back to room temperature. For best presentation, make them one to two days before your event. This allows the glaze to set completely and the flavors to meld, but they still look fresh. When transporting, place them in a single layer in a container and keep cool. Don’t stack them or the decorations will smudge.
Estimated Nutrition Information
Per petit four (based on 48 pieces): Approximately 110 calories, 4g fat, 17g carbohydrates, less than 1g fiber, 12g sugar, 1g protein. These are definitely indulgent treats meant for special occasions. The small size makes portion control easy—one or two satisfies your sweet tooth without overdoing it.
Recipe Overview
Prep Time: 45 minutes
Cook Time: 35 minutes
Total Time: 3 hours (including freezing and setting time)
Difficulty: Medium
Servings: 48 petit fours
Ingredients
For the cake:
- 1 cup unsalted butter, softened
- 1 and 1/2 cups granulated sugar
- 4 large eggs, room temperature
- 2 teaspoons vanilla extract
- 2 cups all-purpose flour
- 1 teaspoon baking powder
- 1/2 teaspoon salt
- 1/2 cup whole milk
For the filling (optional):
- 1 cup raspberry or apricot jam
For the glaze:
- 4 cups powdered sugar
- 1/2 cup light corn syrup
- 1/3 cup water
- 1 teaspoon vanilla extract
- Food coloring (optional)
For decoration:
- Small fondant flowers, dragees, or royal icing details
Step-by-Step Instructions
Preheat your oven to 325°F. Grease a 9×13-inch baking pan, line it with parchment paper, and grease the parchment.
In a large bowl, beat the softened butter and sugar with an electric mixer on medium-high speed for four to five minutes until very light and fluffy.
Add eggs one at a time, beating well after each addition. Add vanilla and mix until combined.
In a separate bowl, whisk together flour, baking powder, and salt.
With the mixer on low speed, add the flour mixture in three additions, alternating with the milk in two additions. Begin and end with flour. Mix just until combined after each addition.
Pour the batter into the prepared pan and spread evenly. Tap the pan on the counter to release air bubbles.
Bake for 32 to 38 minutes until golden brown and a toothpick inserted in the center comes out clean. Let cool in the pan for 10 minutes, then turn out onto a wire rack to cool completely.
Once completely cool, use a long serrated knife to trim all the edges to create straight sides. This ensures uniform petit fours.
If using filling, slice the cake horizontally into two layers. Spread jam on the bottom layer and place the top layer back on. Press gently.
Cut the cake into 1-inch squares using a sharp knife. You should get about 48 squares. Place them on a parchment-lined baking sheet and freeze for at least 30 minutes until very firm.
While the cakes freeze, make the glaze. Combine powdered sugar, corn syrup, water, and vanilla in a medium saucepan over low heat. Stir constantly until smooth and warm—it should be about 100°F, just warm to the touch.
Strain the glaze through a fine-mesh sieve to remove any lumps. Add food coloring if desired. The glaze should be thin enough to pour smoothly but thick enough to coat. If too thick, add water a teaspoon at a time. If too thin, add more powdered sugar.
Set a wire cooling rack over a baking sheet to catch drips. This glaze can be reused, so the baking sheet catches the excess.
Remove frozen cake squares from the freezer. Working with one at a time, place a cake square on a dipping fork (or regular fork) and lower it into the glaze. Spoon glaze over the top to coat completely.
Lift the petit four out, letting excess glaze drip back into the bowl. Gently tap the fork on the edge of the bowl to remove more excess.
Use a small knife to slide the petit four off the fork onto the wire rack. Repeat with remaining squares, working quickly while they’re frozen.
Let the glazed petit fours sit at room temperature until the glaze is completely set, about 30 minutes to one hour.
Once set, carefully transfer them to a serving platter using an offset spatula. Decorate with small fondant flowers, dragees, or piped royal icing details.
If you want multiple glaze colors, divide the glaze into separate bowls and tint each one. Glaze some petit fours in each color.
This petit four recipe has made me the go-to baker for elegant events among my friends and family. The beautiful little cakes with their smooth glaze and delicate decorations create an impressive display that belies how simple they actually are to make at home.