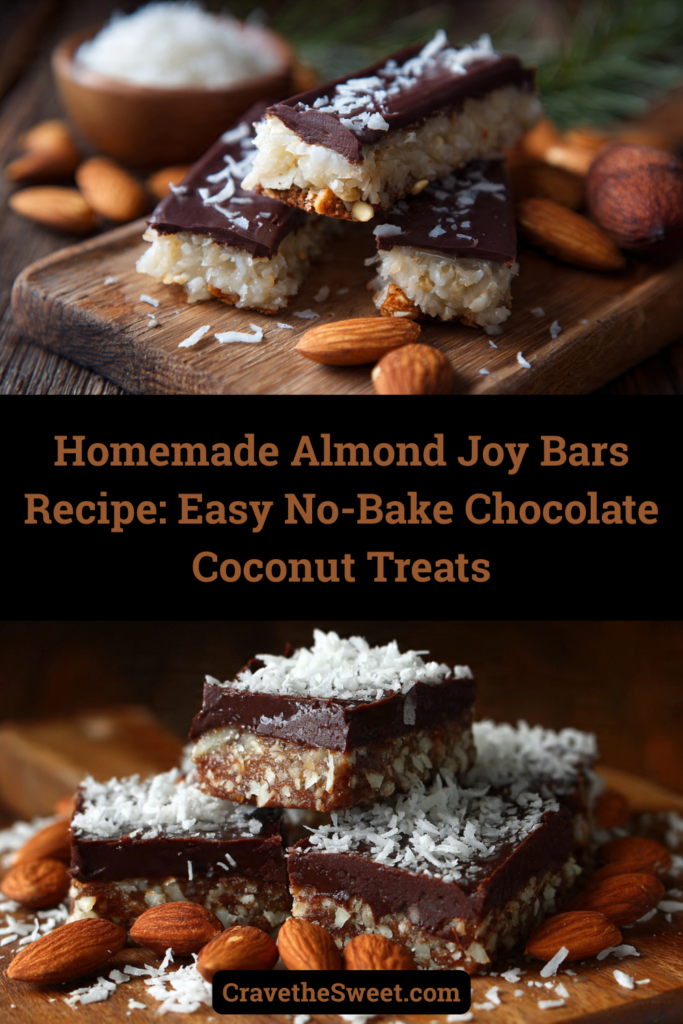
The first time I made almond joy bars at home, I was skeptical that anything homemade could match my favorite candy bar. But after one bite of that creamy coconut filling topped with crunchy almonds and rich chocolate, I was completely hooked. Now I make these treats regularly, and they disappear within hours every single time.
Why You’ll Love This Almond Joy Bars Recipe
These homemade bars are incredibly simple to make and require no baking whatsoever. You’ll save money compared to buying candy bars at the store, plus you can control exactly what goes into them. The combination of sweet coconut, buttery almonds, and smooth chocolate creates that perfect candy bar experience we all crave. Best of all, they taste even better than store-bought because the ingredients are fresher and you can customize the sweetness to your liking. Kids and adults absolutely love these treats, making them perfect for parties, gifts, or just satisfying your sweet tooth.
What Is an Almond Joy Bar?
An almond joy bar is a classic American candy that features a sweet coconut center topped with whole almonds and covered in chocolate. The traditional version has been around since 1946, but making your own almond joy bars recipe at home gives you a fresher, more flavorful version. The base consists of shredded coconut mixed with sweetened condensed milk and a bit of powdered sugar to create that signature creamy texture. Each bar gets topped with crunchy almonds before being dipped or drizzled with melted chocolate. The result is a three-layer treat that delivers the perfect balance of textures and flavors in every bite.
Common Mistakes to Avoid
One of the biggest mistakes people make with this almond joy bars recipe is not chilling the coconut mixture long enough before adding the chocolate. If the base is too soft, the chocolate won’t set properly and you’ll end up with a messy treat. Always refrigerate for at least two hours.
Another common error is using chocolate chips that are too thick when melted. Add a small amount of coconut oil to your chocolate to help it melt smoothly and create a thinner coating that sets beautifully.
Don’t skip pressing the coconut mixture firmly into the pan. Loose coconut won’t hold together well when you cut the bars, and they’ll crumble apart. Use the back of a measuring cup or your hands to pack everything down tightly.
Finally, avoid cutting the bars while the chocolate is still soft. Let everything set completely in the refrigerator for best results, otherwise you’ll have chocolate smears and uneven cuts.
How to Know Your Almond Joy Bars Are Done
Since this is a no-bake recipe, you’re not looking for traditional doneness indicators like browning or rising. Instead, your almond joy bars are ready when the coconut base feels firm to the touch after chilling. Press gently on the center—it should spring back slightly rather than leaving an indentation.
The chocolate coating should be completely set and no longer glossy or tacky. When you touch it lightly with your finger, it shouldn’t leave any chocolate on your skin. This usually takes about one to two hours in the refrigerator.
When you cut into the bars, they should slice cleanly with a sharp knife. If the coconut filling is still oozing or the layers are separating, they need more chilling time.
What to Serve With Almond Joy Bars
These bars are rich and sweet, so they pair wonderfully with beverages that can balance that sweetness. A strong cup of black coffee cuts through the chocolate beautifully, while cold milk is always a classic choice that kids especially enjoy.
For a dessert spread, serve your almond joy bars alongside fresh berries. The tartness of raspberries or strawberries provides a nice contrast to the sweet coconut and chocolate.
Ice cream makes an excellent companion too. Vanilla ice cream keeps things simple, but you could also try coconut or chocolate ice cream for a more indulgent experience.
If you’re serving these at a party, consider pairing them with other no-bake treats like peanut butter cups or chocolate-covered pretzels to create a candy bar dessert table.
Storage Tips for Your Homemade Treats
Store your almond joy bars in an airtight container in the refrigerator for up to two weeks. Layer them between sheets of parchment paper to prevent sticking. The cool temperature keeps the chocolate firm and the coconut filling fresh.
These bars also freeze exceptionally well. Wrap individual bars in plastic wrap, then place them in a freezer-safe container or bag. They’ll keep for up to three months frozen. When you’re ready to enjoy one, let it thaw in the refrigerator for a few hours or at room temperature for about thirty minutes.
Avoid storing these bars at room temperature for extended periods, especially in warm weather. The chocolate will soften and the bars can become messy to handle.
Estimated Nutrition Information
Per bar (based on 16 servings): Approximately 245 calories, 16g fat, 25g carbohydrates, 3g protein, 2g fiber. These bars are treats meant to be enjoyed in moderation as part of a balanced diet.
Recipe Overview
Prep Time: 20 minutes
Chill Time: 3 hours
Total Time: 3 hours 20 minutes
Difficulty: Easy
Servings: 16 bars
Ingredients
For the coconut filling:
- 3 cups sweetened shredded coconut
- 1 cup sweetened condensed milk
- 1/2 cup powdered sugar
- 1 teaspoon vanilla extract
- Pinch of salt
For topping:
- 48 whole almonds (about 3 per bar)
- 2 cups semi-sweet chocolate chips
- 2 tablespoons coconut oil
Step-by-Step Instructions
Step 1: Prepare your pan
Line an 8×8 inch baking pan with parchment paper, leaving some overhang on the sides. This makes removing the bars much easier later.
Step 2: Make the coconut base
In a large mixing bowl, combine the shredded coconut, sweetened condensed milk, powdered sugar, vanilla extract, and salt. Stir everything together until well combined and the mixture holds together when pressed.
Step 3: Press into pan
Transfer the coconut mixture to your prepared pan. Press down firmly and evenly using the back of a measuring cup or your hands. Make sure the surface is as smooth and level as possible.
Step 4: Add almonds
Press the whole almonds gently into the top of the coconut layer in rows. You want them to stick but not sink completely into the mixture. Space them evenly so each bar will have about three almonds.
Step 5: First chill
Place the pan in the refrigerator and chill for at least two hours until the coconut layer is very firm.
Step 6: Melt the chocolate
When the coconut base is firm, melt the chocolate chips and coconut oil together. You can do this in the microwave in thirty-second intervals, stirring between each, or use a double boiler on the stove.
Step 7: Add chocolate layer
Pour the melted chocolate over the chilled coconut layer, spreading it evenly to cover everything completely. The chocolate should cover the almonds as well.
Step 8: Final chill
Return the pan to the refrigerator and chill for at least one hour until the chocolate is completely set and firm.
Step 9: Cut and serve
Lift the bars out of the pan using the parchment paper overhang. Place on a cutting board and use a sharp knife to cut into sixteen bars. For the cleanest cuts, wipe your knife with a warm cloth between each slice.
Step 10: Enjoy
Your homemade almond joy bars are ready to enjoy! Store any leftovers in an airtight container in the refrigerator.
This almond joy bars recipe brings the nostalgic candy bar flavor right to your kitchen with minimal effort. The no-bake method means anyone can make these successfully, and the results taste absolutely incredible. Give this recipe a try and experience how much better homemade candy can be!