
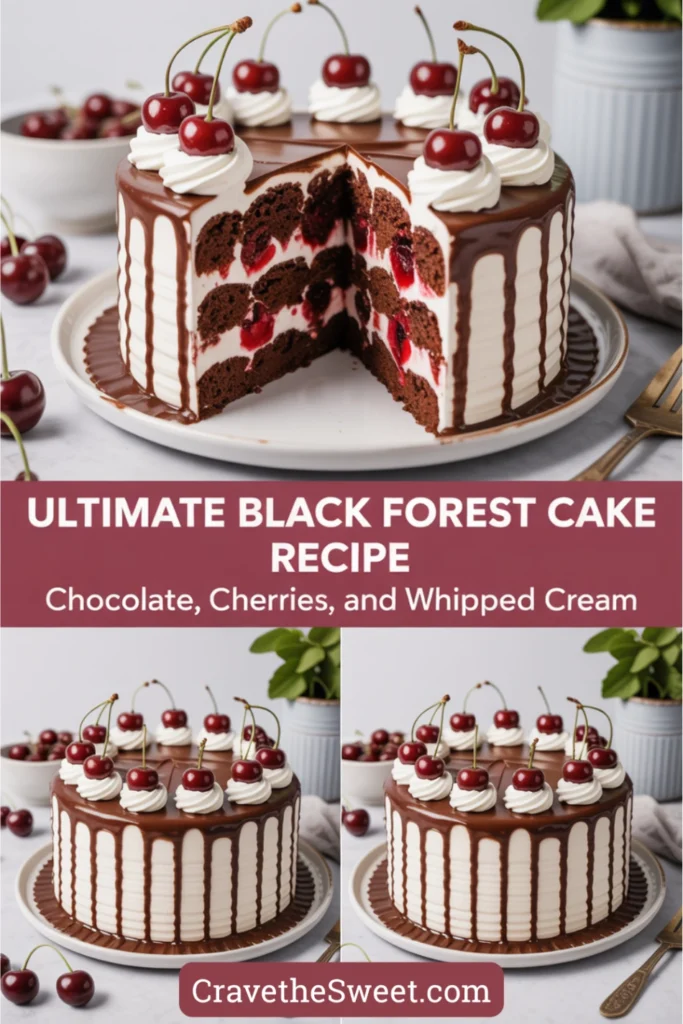
My husband’s birthday was coming up, and he’d been dropping hints about wanting something special. When I asked what kind of cake he wanted, he immediately said Black Forest cake, remembering one his grandmother used to make when he was little. I’ll be honest, I was terrified. It seemed like such an elaborate, fancy dessert that only professional bakers could pull off. But I decided to give it a try anyway, and to my complete surprise, it wasn’t nearly as complicated as I thought. The look on his face when I brought out that towering chocolate cake with cherries and whipped cream was absolutely priceless. Now this black forest cake recipe has become our special occasion tradition, and I’m always amazed at how something so impressive can actually be quite manageable with the right instructions.
Why You’ll Love This Black Forest Cake Recipe
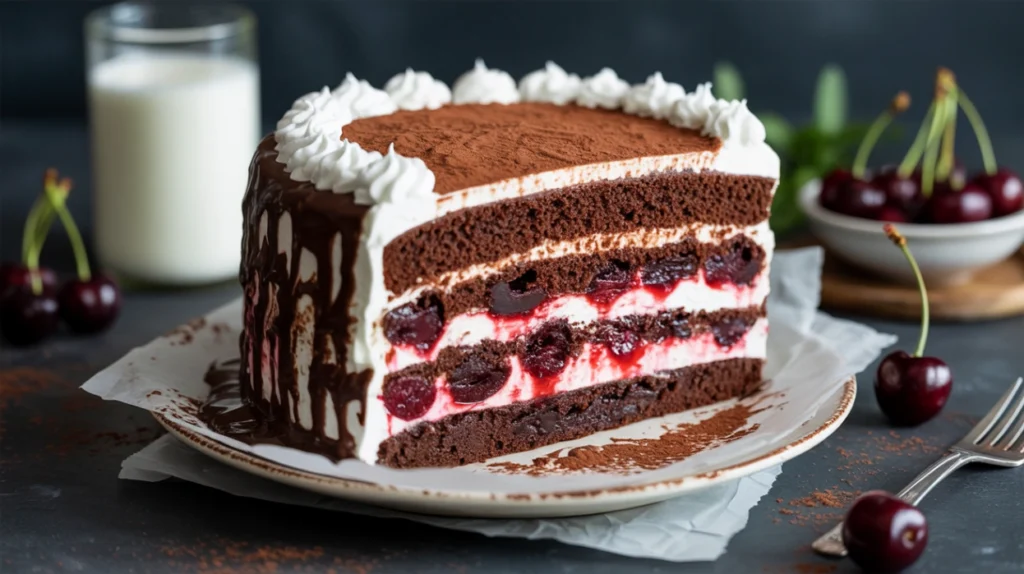
This stunning dessert combines everything people love about cake into one spectacular creation. You get rich, moist chocolate cake layers that aren’t overly sweet, tart cherries that cut through the richness beautifully, and clouds of light whipped cream that bring everything together. The combination of flavors and textures is absolutely divine. Each bite gives you chocolate, fruit, and cream all at once. While it looks like something from a fancy bakery, this black forest cake recipe breaks down the process into simple, manageable steps that anyone can follow. You don’t need special equipment or professional skills. The recipe also offers flexibility since you can make the cake layers ahead of time and assemble everything later. It’s perfect for birthdays, anniversaries, holidays, or any celebration that deserves something extra special. Your guests will be incredibly impressed, and you’ll feel like a baking superstar.
What Is Black Forest Cake?
Black Forest cake, known as Schwarzwälder Kirschtorte in German, originated in the Black Forest region of southwestern Germany. This classic dessert traditionally consists of several layers of chocolate sponge cake soaked with kirsch, a clear cherry brandy made from sour cherries. Between the layers, you’ll find sweetened whipped cream and cherries. The entire cake is then covered in more whipped cream and decorated with chocolate shavings, maraschino cherries, or fresh cherries. The name comes from the Black Forest region famous for its sour cherries and kirsch production. While the traditional version uses kirsch, many American versions use cherry juice or cherry extract instead, making it more family-friendly. The cake became popular worldwide in the 1930s and remains a beloved classic. What makes this black forest cake recipe special is the contrast between the rich chocolate cake, the light airy cream, and the burst of tart cherry flavor. It’s a perfect balance that keeps you coming back for another slice.
Common Mistakes to Avoid
One of the most common mistakes with this black forest cake recipe is using whipping cream that’s too warm. Your cream, bowl, and beaters should all be cold. Pop the bowl and beaters in the freezer for ten minutes before whipping. Warm cream simply won’t whip to stiff peaks and will end up soupy. Another error is overwhipping the cream. Stop as soon as you see stiff peaks forming. If you continue beating, the cream will turn grainy and eventually separate into butter. Watch it carefully during the last minute of whipping. Many people also make the mistake of assembling the cake while the layers are still warm. Warm cake will melt the whipped cream instantly, creating a disaster. Always let your cake layers cool completely, or better yet, chill them in the refrigerator before assembly. This makes them easier to handle and less likely to crumble. Don’t skip draining the cherries thoroughly. Excess cherry liquid will make your cake layers soggy and cause the whipped cream to break down. Pat them dry with paper towels after draining. Also, be careful not to over-soak the cake layers with cherry syrup. A light brush is all you need. Too much liquid makes the cake fall apart. Finally, don’t rush the assembly process. Take your time spreading each layer evenly for a professional-looking result.
How to Know When Your Cake Is Done
The cake layers are ready when a toothpick inserted into the center comes out clean or with just a few moist crumbs attached. The tops should spring back when lightly pressed with your finger, and the cake should start pulling away slightly from the sides of the pans. The surface will look set and dry, not wet or jiggly. For this black forest cake recipe, the layers should bake for about twenty-five to thirty minutes at 350 degrees Fahrenheit. Every oven is slightly different, so start checking at the twenty-three minute mark. The cakes will be a deep chocolate brown color. If you smell burning or see the edges getting too dark, reduce your oven temperature slightly. Remember that the cakes will continue cooking slightly from residual heat even after you remove them from the oven, so it’s better to take them out when they’re just done rather than overbaking them. Overbaked chocolate cake becomes dry and crumbly instead of moist and tender.
What to Serve With Black Forest Cake
This impressive dessert is honestly a complete experience on its own and doesn’t need much accompaniment. However, a cup of freshly brewed coffee or espresso pairs beautifully with the chocolate and cuts through the richness of the cream. Hot chocolate is another excellent choice, especially for chocolate lovers. If you’re serving this black forest cake recipe at a dinner party, consider offering a dessert wine like a late harvest Riesling or a ruby Port. The sweetness and fruitiness complement the cherries wonderfully. For a non-alcoholic option, cherry juice or a cherry Italian soda echoes the cherry flavor in the cake. Some people enjoy a glass of cold milk, which is classic and comforting. If you want to add something to the plate, fresh raspberries or strawberries on the side add a pop of color and extra freshness. A small scoop of vanilla ice cream can also be nice, though the cake is quite rich on its own. For a German-themed dinner party, serve it after a hearty meal as the grand finale.
Storage Tips for Maximum Freshness
Because this black forest cake recipe includes whipped cream, proper storage is essential. The assembled cake must be refrigerated at all times. Cover it loosely with plastic wrap or place it under a cake dome to prevent it from absorbing refrigerator odors. The cake will stay fresh for up to three days in the refrigerator, though it’s best enjoyed within two days for optimal texture and flavor. The whipped cream will start to weep after a few days, and the cake layers may become slightly soggy from the moisture. If you need to make the cake ahead, consider baking the layers in advance. Wrap cooled cake layers tightly in plastic wrap and store at room temperature for up to two days or freeze for up to three months. Thaw frozen layers in the refrigerator overnight before assembling. You can also prepare the cherry filling ahead and store it in an airtight container in the refrigerator for up to a week. However, don’t whip the cream or assemble the cake until the day you plan to serve it. Whipped cream doesn’t hold up well overnight and is best made fresh. If you have leftover slices, store them in airtight containers in the refrigerator. Bring the cake to cool room temperature about twenty minutes before serving for the best flavor and texture. The chocolate cake should be soft, not hard from the cold.
Estimated Nutrition Information
Per slice (based on 12 servings): Approximately 420 calories, 24g fat, 48g carbohydrates, 2g fiber, 35g sugar, and 5g protein. This is a rich, indulgent dessert meant for special occasions. The whipped cream and chocolate contribute most of the calories and fat, while the cherries add some fiber and vitamins.
Recipe Overview
Prep Time: 45 minutes
Cook Time: 30 minutes
Total Time: 2 hours (includes cooling and assembly)
Difficulty Level: Intermediate
Servings: 12 slices
Ingredients
For the Chocolate Cake:
- 1 and 3/4 cups all-purpose flour
- 2 cups granulated sugar
- 3/4 cup unsweetened cocoa powder
- 2 teaspoons baking soda
- 1 teaspoon baking powder
- 1 teaspoon salt
- 2 large eggs, at room temperature
- 1 cup strong brewed coffee, cooled
- 1 cup whole milk, at room temperature
- 1/2 cup vegetable oil
- 2 teaspoons vanilla extract
For the Cherry Filling:
- 2 cans (14.5 ounces each) pitted tart cherries in juice
- 1/2 cup granulated sugar
- 3 tablespoons cornstarch
- 1/4 teaspoon almond extract
For the Whipped Cream:
- 3 cups heavy whipping cream, cold
- 1/3 cup powdered sugar
- 2 teaspoons vanilla extract
For Assembly and Decoration:
- 1/4 cup cherry juice (reserved from filling)
- Chocolate shavings or curls
- Fresh or maraschino cherries for garnish
Step-by-Step Instructions
Start by preheating your oven to 350 degrees Fahrenheit. Grease two nine-inch round cake pans generously with butter or cooking spray. Line the bottoms with parchment paper circles, then grease the paper as well. This ensures your cakes will release easily. Dust the pans lightly with cocoa powder instead of flour for a cleaner look on your chocolate cake.
In a large mixing bowl, whisk together the flour, sugar, cocoa powder, baking soda, baking powder, and salt until well combined and no lumps remain. This dry mixture forms the base of your black forest cake recipe.
In a separate bowl, beat the eggs lightly with a fork. Add the cooled coffee, milk, vegetable oil, and vanilla extract. Mix until everything is well combined. The coffee enhances the chocolate flavor without making the cake taste like coffee.
Pour the wet ingredients into the dry ingredients and mix with an electric mixer on medium speed for about two minutes. The batter will be quite thin and pourable, which is exactly what you want. This thin batter creates an incredibly moist cake.
Divide the batter evenly between your prepared pans. A kitchen scale helps ensure even layers, but eyeballing it works fine too. Each pan should be about half to two-thirds full.
Bake for twenty-five to thirty minutes, rotating the pans halfway through for even baking. Test for doneness with a toothpick starting at twenty-five minutes. When done, the tops will spring back when touched.
Remove the cakes from the oven and let them cool in the pans for ten minutes on wire racks. Then carefully run a knife around the edges and invert the cakes onto the racks. Peel off the parchment paper and let the cakes cool completely, about one hour. For easier assembly later, you can wrap the cooled layers in plastic wrap and refrigerate them for thirty minutes to firm them up.
While the cakes cool, make your cherry filling. Drain the canned cherries, reserving one-quarter cup of the juice for brushing the cake layers later. Place the drained cherries in a medium saucepan. In a small bowl, mix the sugar and cornstarch together, then add this mixture to the cherries. Cook over medium heat, stirring constantly, until the mixture thickens and becomes glossy, about five to seven minutes. Remove from heat and stir in the almond extract. Transfer to a bowl and let cool completely. You can speed this up by placing the bowl in the refrigerator.
When you’re ready to assemble your black forest cake recipe, prepare the whipped cream. Make sure your heavy cream is very cold. Place your mixing bowl and beaters in the freezer for ten minutes beforehand. Pour the cold cream into the chilled bowl and begin beating on medium speed. As it starts to thicken, add the powdered sugar and vanilla extract. Increase the speed to medium-high and continue beating until stiff peaks form. This usually takes about three to four minutes. Be careful not to overwhip. Stop as soon as the cream holds its shape when you lift the beaters.
Now for assembly. If your cake layers have domed tops, use a long serrated knife to level them off so they stack evenly. Place one cake layer on your serving plate or cake stand. Brush the top with half of the reserved cherry juice for moisture and extra flavor.
Spread about one cup of whipped cream evenly over the first layer, creating a border around the edge. Spoon half of the cherry filling over the whipped cream, staying away from the edges to prevent the filling from squeezing out.
Carefully place the second cake layer on top, cut side down for a flat top. Brush with the remaining cherry juice. Now use the remaining whipped cream to frost the entire cake. Start with the sides, then move to the top. Use a spatula to create swirls or keep it smooth, whatever you prefer.
Press chocolate shavings gently into the sides of the cake. You can make these by running a vegetable peeler along a chocolate bar. Create a decorative border on top with additional chocolate shavings or curls.
Finally, garnish with fresh or maraschino cherries on top. Space them evenly around the edge or create a pattern in the center.
Refrigerate the assembled cake for at least one hour before slicing. This allows everything to set and makes cutting much cleaner. Use a sharp knife dipped in hot water and wiped dry between each slice for the neatest pieces.
This black forest cake recipe creates a show-stopping dessert that tastes even better than it looks, and believe me, it looks incredible!


