
I discovered the magic of homemade chocolate pudding during a power outage when I couldn’t make anything requiring an oven or mixer. With just a saucepan and whisk, I transformed basic pantry ingredients into the most incredible dessert I’d ever tasted. The pudding was silky smooth, intensely chocolatey, and nothing like the artificial-tasting instant pudding from boxes. My kids, who usually turn their noses up at homemade desserts in favor of store-bought treats, couldn’t believe I’d made it myself. That night, I realized that sometimes the simplest recipes create the most memorable moments.
Why You’ll Love This Chocolate Pudding Recipe
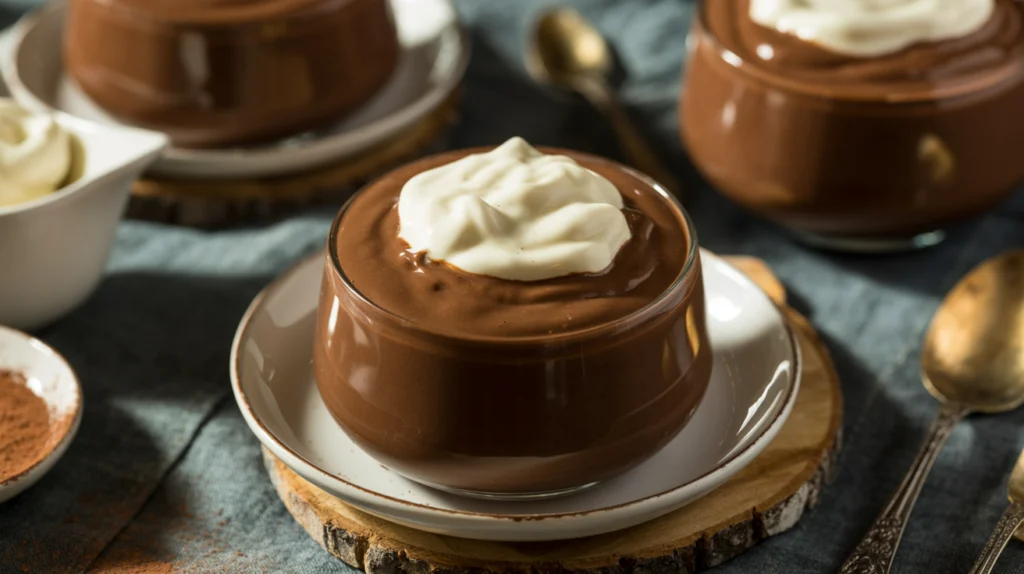
This homemade pudding is incredibly creamy and smooth with a deep, rich chocolate flavor that tastes luxurious yet comforting. Unlike instant pudding mixes, this version contains no artificial flavors or preservatives—just real ingredients you can actually pronounce. The texture is perfectly thick and spoonable, coating your spoon in a velvety layer that melts on your tongue.
What makes this chocolate pudding recipe exceptional is its simplicity. You need only six basic ingredients and about fifteen minutes of active cooking time. No special equipment required beyond a saucepan and a whisk. The technique is straightforward enough for beginners, yet the results taste like something from a fancy restaurant dessert menu.
This pudding is also wonderfully versatile. Serve it warm for a comforting treat on cold days, or chill it for a refreshing summer dessert. It works beautifully as a simple weeknight dessert, layered in parfaits for special occasions, or as a filling for cream pies. Kids absolutely love it, making it perfect for lunchboxes or after-school snacks. Adults appreciate the sophisticated chocolate flavor that’s not overly sweet. Best of all, this recipe costs a fraction of what you’d pay for premium pudding cups at the store, and it tastes infinitely better.
What Is Chocolate Pudding?
Chocolate pudding is a creamy, spoonable dessert made by cooking milk, sugar, cocoa powder, and a thickening agent together until smooth and thick. The traditional thickener is cornstarch, though some recipes use flour or egg yolks. The mixture is heated while stirring constantly until it thickens, then cooled to set into that signature pudding texture.
Unlike custard, which relies primarily on eggs for thickening, this chocolate pudding recipe uses cornstarch as the main thickener with eggs added for richness and stability. The cornstarch creates a smooth, glossy texture without the eggy flavor that some custards can have. Cocoa powder provides the chocolate flavor, though many recipes also include melted chocolate for extra depth and richness.
The process is essentially making a chocolate-flavored white sauce or béchamel that sets as it cools. The key is cooking the mixture long enough to activate the cornstarch’s thickening power while stirring constantly to prevent lumps and scorching. Once properly cooked and cooled, the pudding transforms into that beloved creamy dessert that brings comfort and satisfaction in every spoonful.
Common Mistakes to Avoid
The most common mistake with this chocolate pudding recipe is not whisking constantly while cooking. Cornstarch-thickened mixtures can develop lumps or scorch on the bottom of the pan if left unstirred. Keep whisking the entire time the pudding is on the heat, making sure to scrape the bottom and corners of the pan where scorching is most likely to occur.
Another frequent error is removing the pudding from heat too early. The mixture needs to come to a full boil and cook for one to two minutes at a boil to fully activate the cornstarch. If you remove it too soon, the pudding will be thin and runny even after chilling. You’ll know it’s ready when you see large bubbles breaking through the surface and the pudding has noticeably thickened.
Using low-quality cocoa powder significantly affects the final flavor. Choose a good quality unsweetened cocoa powder for the best chocolate taste. Dutch-processed cocoa creates a smoother, less acidic flavor, while natural cocoa powder has a more intense chocolate taste. Either works, but the quality matters more than the type.
Many people also skip straining the pudding, which removes any small lumps that may have formed during cooking. Even experienced cooks occasionally get tiny lumps, and straining ensures perfectly smooth pudding every time. It only takes a minute and makes a noticeable difference in texture.
Finally, not pressing plastic wrap directly onto the pudding surface creates a skin on top as it cools. This skin is harmless but unpleasant to eat. Press the wrap right onto the pudding before refrigerating to prevent skin formation.
How to Know Your Chocolate Pudding Is Done
During cooking, you’ll notice the mixture going through distinct stages. It starts thin and milky, gradually thickening as the temperature rises. When it’s almost ready, you’ll see the first bubbles breaking through the surface. Keep cooking and whisking—these early bubbles don’t mean it’s done yet.
The pudding is properly cooked when it reaches a full, rolling boil with large bubbles breaking through the entire surface, not just around the edges. At this stage, the pudding should coat the back of your spoon thickly. If you run your finger through the coating on the spoon, the line should stay clear without running back together. This typically takes eight to ten minutes of constant whisking over medium heat.
The texture will be thick but still pourable when hot—it thickens considerably more as it cools. Don’t expect it to be spoonable right off the stove. After removing from heat and adding vanilla and butter, the pudding will look glossy and smooth. Once chilled for at least two hours, the pudding should be thick enough to hold its shape on a spoon and have a creamy, smooth consistency throughout.
What to Serve With Chocolate Pudding
This chocolate pudding recipe is delicious on its own, but several accompaniments take it to the next level. Whipped cream is the classic topping—a dollop of freshly whipped cream adds lightness and contrast to the rich chocolate. For extra indulgence, use sweetened whipped cream or even chocolate whipped cream.
Fresh berries provide a wonderful tart contrast to the sweet pudding. Raspberries work especially well, as their slight acidity cuts through the richness perfectly. Sliced strawberries or blackberries are also excellent choices. Sliced bananas create a classic banana-chocolate combination that many people love.
For added texture, sprinkle crushed cookies on top—chocolate wafers, graham crackers, or vanilla wafers all work beautifully. Chopped nuts like toasted almonds or pecans add crunch and sophisticated flavor. A sprinkle of flaky sea salt enhances the chocolate flavor and provides that trendy sweet-salty combination.
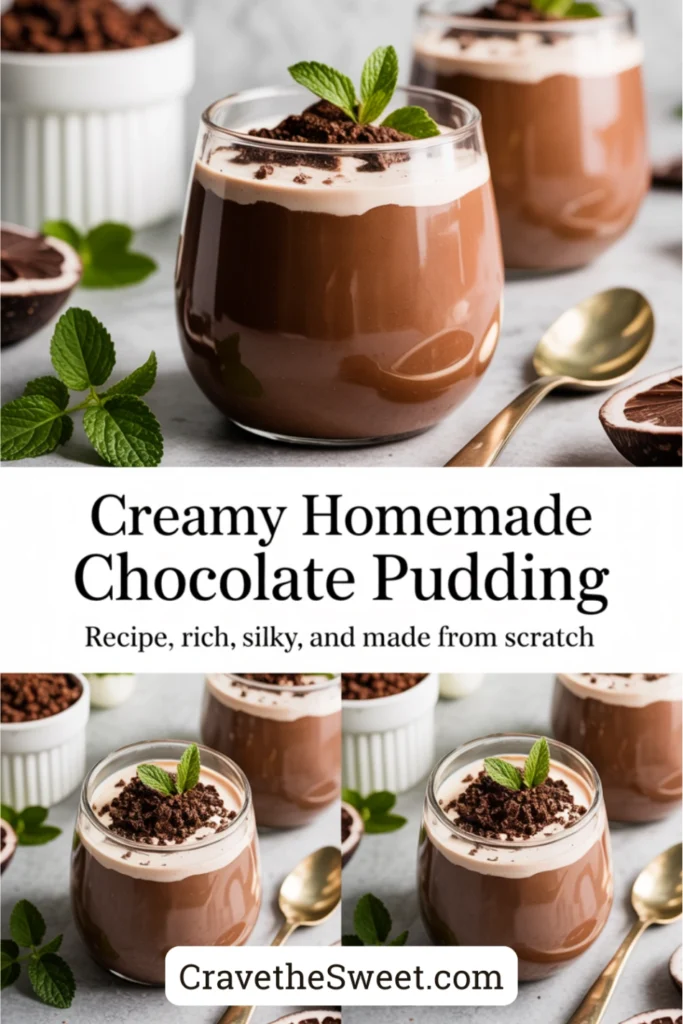
This pudding makes an excellent base for layered desserts. Create parfaits by layering pudding with whipped cream and crushed cookies in clear glasses. Use it as a filling for cream pies with a graham cracker or chocolate cookie crust. It’s also wonderful as a filling for chocolate cupcakes or as a layer in trifles.
For beverages, serve with cold milk for a nostalgic combination, or offer coffee or espresso for adults. Hot chocolate makes a double-chocolate treat that chocolate lovers adore.
Storage Tips
Store chocolate pudding in an airtight container in the refrigerator for up to four days. Press plastic wrap directly onto the surface before covering with a lid to prevent skin formation. If a skin does form, simply remove it with a spoon before serving—the pudding underneath is perfectly fine.
The pudding thickens considerably in the refrigerator. If it becomes too thick after a day or two, whisk in a tablespoon of milk to loosen it slightly and restore the creamy texture. Stir thoroughly before serving to ensure smooth consistency throughout.
This chocolate pudding recipe can be made one or two days in advance, which makes it perfect for meal prep or party planning. The flavor actually improves slightly after sitting, as it allows time for all the flavors to meld together. Just remember to keep it properly covered and refrigerated.
Freezing chocolate pudding is not recommended. The texture changes significantly when frozen and thawed, becoming grainy and separated. It’s best enjoyed fresh from the refrigerator within a few days of making.
Individual portions can be stored in small containers with lids, making them perfect for lunchboxes or grab-and-go snacks. Mason jars or small glass containers work beautifully and look appealing when serving to guests.
Estimated Nutrition Information
One serving of this chocolate pudding recipe (based on 6 servings) contains approximately 240 calories. Each serving provides about 5 grams of protein from the milk and eggs, 38 grams of carbohydrates, and 8 grams of fat from the butter and whole milk. The sugar content is around 28 grams per serving.
You’ll get about 15% of your daily calcium needs from the milk in each serving, plus small amounts of iron from the cocoa powder—roughly 6% of your daily value. Dark chocolate provides antioxidants and minerals like magnesium, though in modest amounts. Each serving contains approximately 140 milligrams of sodium.
These estimates are based on using whole milk and following the recipe as written. Using low-fat or skim milk reduces the fat and calorie content by about 40 calories per serving, though the pudding will be slightly less creamy. Reducing the sugar is possible but will affect both sweetness and texture, as sugar also contributes to the pudding’s body.
While chocolate pudding is a treat dessert, it does provide calcium and protein from dairy, making it more nutritious than many other desserts. Enjoy it mindfully as part of a balanced diet.
Recipe Overview
Prep Time: 5 minutes
Cook Time: 10 minutes
Chill Time: 2 hours
Total Time: 2 hours 15 minutes
Difficulty: Easy
Servings: 6
Ingredients
- 2 and 1/2 cups whole milk
- 1/2 cup granulated sugar
- 1/3 cup unsweetened cocoa powder
- 3 tablespoons cornstarch
- 1/4 teaspoon salt
- 2 large egg yolks
- 2 tablespoons unsalted butter
- 1 teaspoon vanilla extract
Step-by-Step Instructions
In a medium saucepan, whisk together the sugar, cocoa powder, cornstarch, and salt until well combined. This dry mixing prevents lumps from forming when you add the liquid. Make sure there are no clumps of cocoa powder—break them up with the back of a spoon if needed.
Add the egg yolks to the dry mixture and whisk until smooth. The mixture will be thick and paste-like at this stage. Don’t worry—this is exactly right.
Pour in about half a cup of the milk and whisk vigorously until the mixture is smooth and the dry ingredients are dissolved. This gradual addition prevents lumps. Once smooth, whisk in the remaining milk until everything is well combined. The mixture should be thin and smooth with no lumps.
Place the saucepan over medium heat. Begin whisking immediately and don’t stop. Continue whisking constantly, making sure to scrape the bottom and corners of the pan. The mixture will seem unchanged for several minutes—keep whisking and be patient.
After about six to eight minutes, the mixture will begin to thicken noticeably. You’ll feel resistance as you whisk. Continue cooking and whisking until the pudding comes to a full boil with large bubbles breaking through the surface across the entire pan, not just around the edges.
Once boiling, continue whisking and cooking for one to two minutes more. The pudding should be thick enough to coat the back of a spoon heavily. When you run your finger through the coating, it should leave a clear line. The mixture will still be pourable at this stage but noticeably thicker than when you started.
Remove the pan from heat immediately. Add the butter and vanilla extract, whisking until the butter melts completely and incorporates smoothly into the pudding. The pudding should look glossy and smooth.
For the silkiest texture, strain the pudding through a fine-mesh strainer into a clean bowl. Use a rubber spatula to press it through, which removes any small lumps that may have formed. This step is optional but highly recommended for perfectly smooth pudding.
Divide the pudding among six serving bowls or pour it into one large serving dish. Press plastic wrap directly onto the surface of the pudding in each container to prevent skin formation. The plastic wrap should touch the entire surface with no air gaps.
Refrigerate for at least two hours until completely chilled and set. The pudding will thicken considerably as it cools. Once chilled, remove the plastic wrap and serve as is or with your favorite toppings.
This chocolate pudding recipe creates the kind of creamy, satisfying dessert that brings smiles to faces young and old. The rich chocolate flavor and silky smooth texture prove that homemade truly is better, and once you see how easy it is, you’ll never go back to instant pudding again.


