
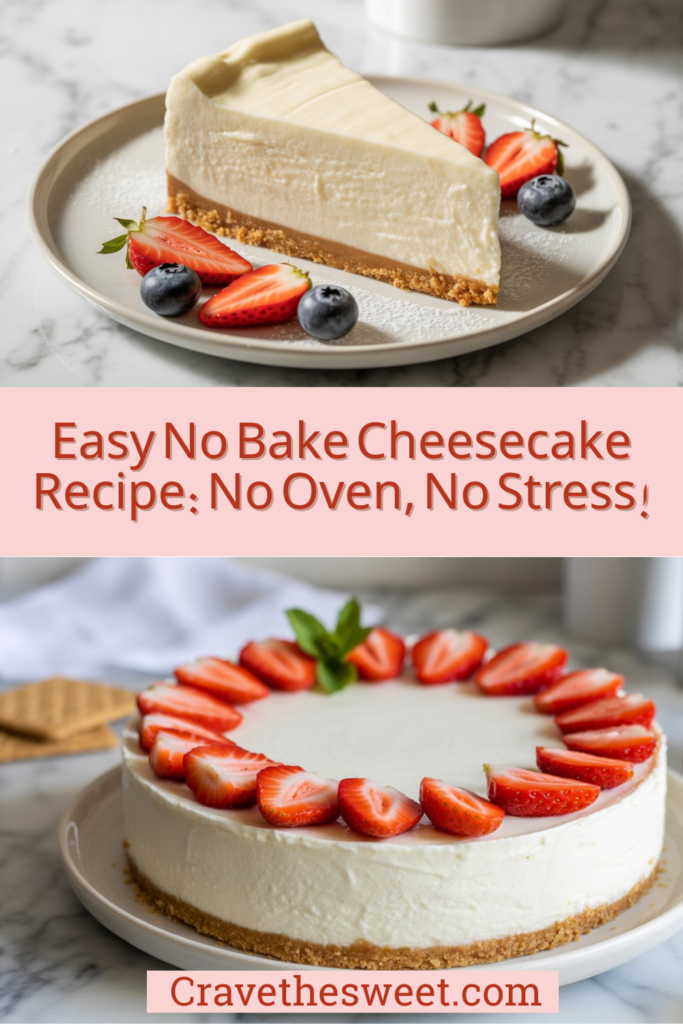
I’ll never forget the first time I attempted a traditional baked cheesecake. I followed every instruction carefully, used a water bath, checked the temperature religiously, and still ended up with a massive crack right down the center. My husband assured me it tasted amazing, but I felt defeated. Then my neighbor shared her easy no bake cheesecake recipe, and everything changed. No water bath drama, no cracks, no anxiety about oven temperatures. Just smooth, creamy perfection every single time. I made it for our next family gathering, and my aunt actually asked if I’d ordered it from a fancy dessert shop. That compliment sealed the deal. This has been my signature dessert ever since, and I’ve probably made it fifty times over the past few years.
Why You’ll Love This Easy No Bake Cheesecake Recipe
This dessert removes every stressful element from cheesecake making while delivering that luxurious, creamy texture everyone craves. You don’t need any special baking skills or expensive equipment. A mixing bowl, a hand mixer, and a springform pan are all you need to create something truly spectacular. The beauty of this easy no bake cheesecake recipe is that it’s genuinely foolproof. There’s no risk of overbaking, underbaking, or dealing with that dreaded cracked surface that seems to plague traditional cheesecakes.
The make-ahead factor is genuinely life-changing when you’re planning a dinner party or holiday meal. You can prepare this dessert the day before, freeing up your time and mental energy for other dishes. During summer months, keeping your kitchen cool becomes effortless since the oven stays off completely. The texture is lighter and more mousse-like than traditional baked versions, which many people actually prefer. Kids love helping make it because there’s no hot oven involved, making it a wonderful family activity.
The ingredient list is straightforward with items you probably already have in your kitchen. No exotic additions or hard-to-find specialty items required. Plus, this base recipe is incredibly versatile. Once you master the basic version, you can experiment with different flavors, toppings, and variations to suit any occasion or preference.
What Is a No Bake Cheesecake?
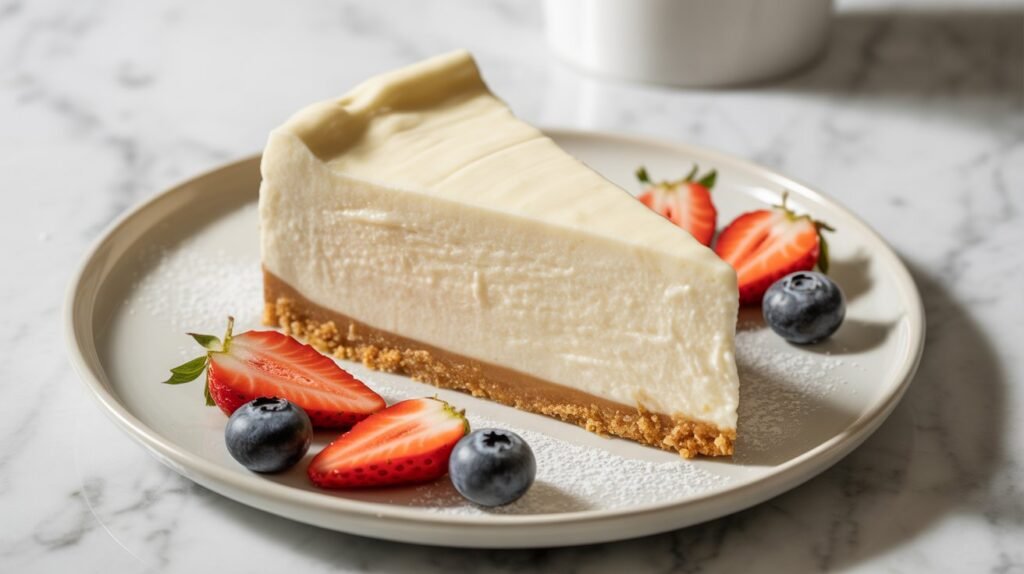
An easy no bake cheesecake recipe creates that signature tangy, creamy dessert without any oven time whatsoever. Traditional cheesecakes use eggs and heat to set the filling into that dense, custard-like consistency. The no bake version achieves its structure through a different method entirely. The base combines cream cheese with powdered sugar and flavorings, then incorporates whipped heavy cream to create volume and lightness. Your refrigerator does all the work, transforming the fluffy mixture into a firm, sliceable dessert over several hours.
The crust typically uses graham crackers mixed with melted butter and a touch of sugar, pressed firmly into the bottom of a springform pan. Some variations include chocolate cookie crusts, vanilla wafer crusts, or even pretzel crusts for a sweet-and-salty twist. The filling stays naturally firm thanks to the cream cheese acting as the main stabilizer, while the whipped cream provides that airy, melt-in-your-mouth quality.
Some recipes incorporate gelatin for extra stability, especially in warmer climates or if you need the cheesecake to hold up for extended periods. However, a well-made version without gelatin sets beautifully when given proper chilling time. The result tastes distinctly different from baked cheesecake but equally delicious in its own right. It’s lighter, fluffier, and has a more delicate mouthfeel that feels almost cloud-like.
Common Mistakes to Avoid
The number one mistake I see people make with this easy no bake cheesecake recipe is rushing the cream cheese softening process. Cold cream cheese creates lumps that refuse to incorporate smoothly no matter how long you beat the mixture. Those lumps will show up in your finished dessert as little cream cheese bits that ruin the silky texture. Always leave your cream cheese on the counter for at least one hour, preferably ninety minutes, before you begin. It should feel soft when you press it with your finger.
Another frequent error involves the graham cracker crust. If you don’t crush the crackers finely enough, your crust will crumble and fall apart when you slice the cheesecake. I use a food processor for the most consistent results, but a rolling pin and sealed plastic bag work perfectly if you don’t have one. The mixture should resemble coarse sand. Also, don’t skimp on pressing the crust firmly into the pan. Use the bottom of a measuring cup or glass to really pack it down. A loose crust creates a messy serving experience.
Overwhipping the heavy cream is surprisingly easy to do and can ruin your filling’s texture. You want stiff peaks, but if you continue beating past that point, you’ll end up with butter. Watch carefully as you whip, and stop the mixer as soon as the cream holds firm peaks. When folding the whipped cream into the cream cheese mixture, use a gentle hand. Vigorous stirring deflates all those air bubbles you worked to create, resulting in a dense, heavy filling instead of that light, fluffy texture you’re aiming for.
Finally, don’t cut corners on chilling time. I know waiting is hard when you’re excited to taste your creation, but patience is absolutely crucial. This easy no bake cheesecake recipe needs a minimum of four hours to set properly, though overnight is ideal. Cutting into it too early results in a soupy mess that won’t hold its shape.
How to Know It’s Done
Unlike baked goods that require temperature checks or toothpick tests, determining doneness for this dessert is straightforward. Your cheesecake is ready when it’s been thoroughly chilled for at least four hours and the filling has firmed up completely. The surface should no longer look wet or shiny. When you gently press the center with your fingertip, it should feel firm with just a slight give, similar to pressing a ripe avocado.
Give the pan a very gentle shake. A properly set cheesecake will jiggle slightly as one cohesive unit, but the center shouldn’t ripple like liquid. If waves move across the surface or the middle looks loose, it needs more time in the refrigerator. The edges might pull away ever so slightly from the pan sides, which is a good sign of proper setting.
Before removing the springform ring, run a thin knife or offset spatula around the entire perimeter. The blade should move smoothly without dragging through sticky, unset filling. When you do release the ring, the sides should look smooth and hold their shape perfectly. If you’re still unsure, remember that extra chilling time never hurts this dessert. It only improves as it sits.
What to Serve With Your No Bake Cheesecake
Fresh berries remain my top recommendation for accompanying this dessert. Strawberries, blueberries, blackberries, and raspberries all provide a tart contrast that cuts through the rich creaminess beautifully. You can arrange them artfully on top before serving, or place them on the side of each plate. A quick berry compote made by warming mixed berries with sugar and a splash of lemon juice creates an elegant sauce that looks and tastes professional.
Chocolate lovers should try a chocolate ganache drizzle. Simply heat heavy cream until it just begins to simmer, pour it over chopped chocolate, and stir until smooth. Drizzle over individual slices for a stunning presentation. Caramel sauce is another winner, especially salted caramel, which adds a sophisticated sweet-salty dimension.
For a lighter accompaniment, fresh whipped cream with a hint of vanilla makes each bite even more luxurious. Crushed nuts like pecans or almonds add textural contrast and a subtle earthy flavor. During fall, try topping slices with spiced apple compote or pumpkin butter. At Christmas, crushed candy canes or cherry pie filling turn this into a festive showstopper.
A simple dusting of cocoa powder or powdered sugar right before serving adds visual appeal. Lemon curd creates a bright, tangy topping that’s absolutely divine. Coffee or espresso makes an excellent beverage pairing, as the slight bitterness balances the dessert’s sweetness perfectly. For special occasions, a small glass of dessert wine or champagne elevates the entire experience.
Storage Tips
This easy no bake cheesecake recipe stores exceptionally well, making it perfect for meal prep or advance party planning. Keep your finished cheesecake covered in the refrigerator for up to five days without any loss of quality. I cover mine with plastic wrap, making sure to press it gently against any exposed surfaces to prevent drying. Then I add a layer of aluminum foil over the entire pan for extra protection.
If you’ve already sliced the cheesecake, individual pieces can be stored in airtight containers with parchment paper between layers. This prevents them from sticking together and makes grabbing a quick dessert incredibly convenient. The cheesecake actually tastes better after sitting for a day or two, as the flavors have time to meld and develop.
For longer storage, freezing works beautifully. Wrap individual slices tightly in plastic wrap, then place them in freezer-safe bags with all the air pressed out. Properly wrapped slices keep for up to three months in the freezer. When you’re ready to enjoy one, simply transfer it to the refrigerator and let it thaw overnight. The texture remains remarkably smooth and creamy after freezing, though I do think fresh is always best when possible.
Never leave your cheesecake sitting at room temperature for more than two hours. The dairy content makes it highly perishable, and bacteria can grow quickly in warm conditions. If you’re serving it at a party or gathering, consider placing the serving platter over a larger plate filled with ice to keep it cool.
Estimated Nutrition Per Slice
Calories: 420, Total Fat: 32g, Saturated Fat: 19g, Cholesterol: 95mg, Sodium: 310mg, Total Carbohydrates: 30g, Dietary Fiber: 1g, Sugars: 24g, Protein: 6g
These numbers are estimates based on standard ingredients and a 12-slice serving size. Your actual nutrition may vary depending on specific brands used and portion sizes. If you’re looking to lighten this up, reduced-fat cream cheese can be substituted, though the texture won’t be quite as rich and creamy.
Recipe Overview
Prep Time: 25 minutes
Chill Time: 4 hours (overnight preferred)
Total Time: 4 hours 25 minutes
Difficulty Level: Easy
Servings: 12 generous slices
Ingredients
For the graham cracker crust:
- 2 cups graham cracker crumbs (about 16 full crackers)
- 6 tablespoons unsalted butter, melted
- 3 tablespoons granulated sugar
- Pinch of salt
For the creamy filling:
- 24 ounces cream cheese, softened to room temperature
- 1 cup powdered sugar, sifted
- 2 teaspoons pure vanilla extract
- 1 tablespoon fresh lemon juice
- 2 cups heavy whipping cream, cold
- Optional: 1 teaspoon lemon zest for extra brightness
Step-by-Step Instructions
Begin by preparing your springform pan. A 9-inch pan works perfectly for this recipe. Make sure it’s completely clean and dry before starting.
Create the crust by placing graham crackers in a food processor and pulsing until you have fine crumbs with no large pieces remaining. If you don’t have a food processor, place the crackers in a large zip-top bag, seal it, and crush them with a rolling pin until finely ground. Transfer the crumbs to a medium mixing bowl.
Add the melted butter, sugar, and a pinch of salt to the graham cracker crumbs. Stir everything together with a fork until the mixture resembles wet sand and holds together when you squeeze a handful. The consistency should be similar to damp beach sand.
Pour the crumb mixture into your springform pan. Use your hands to press it firmly and evenly across the bottom of the pan. Pay special attention to the edges where the bottom meets the sides. Use the bottom of a flat measuring cup or a small glass to really pack it down, creating a compact, solid layer. Press the crumbs about one inch up the sides if you’d like a taller crust edge. Place the pan in the refrigerator while you prepare the filling.
In a large mixing bowl, beat the softened cream cheese with an electric mixer on medium speed for about three minutes. Scrape down the sides of the bowl periodically. The cream cheese should look completely smooth, fluffy, and light in color with no lumps remaining.
Add the sifted powdered sugar to the cream cheese. Beat on low speed initially to prevent a sugar cloud, then increase to medium speed and beat for about two minutes until fully incorporated and creamy. The mixture should look fluffy and pale.
Add the vanilla extract, lemon juice, and lemon zest if using. Beat for another thirty seconds until everything is evenly distributed. Taste the mixture at this point. It should be sweet with a lovely tang from the lemon juice.
In a separate clean bowl, pour in the cold heavy whipping cream. Using clean beaters, whip the cream on medium-high speed. Start on low to prevent splattering, then increase the speed. Watch carefully as the cream transforms. It will first become frothy, then develop soft peaks, and finally reach stiff peaks. This takes about four to five minutes. You’ll know you’ve reached stiff peaks when you lift the beaters and the cream stands straight up without drooping. Stop immediately to avoid overwhipping.
Now comes the crucial folding step. Add about one-third of the whipped cream to the cream cheese mixture. Using a rubber spatula, gently fold it in with wide, sweeping motions. Scrape down the sides and bottom of the bowl, then fold through the center. This first addition lightens the cream cheese mixture, making it easier to incorporate the rest of the whipped cream.
Add the remaining whipped cream to the bowl. Fold very gently, using the same wide, sweeping motion. Turn the bowl as you fold, working slowly and deliberately. The goal is to combine everything while preserving as many air bubbles as possible. Stop folding as soon as you no longer see white streaks. A few small streaks are fine. Overmixing will deflate the filling and make it dense.
Remove the crust from the refrigerator. Pour the filling over the crust, using your spatula to spread it evenly to all edges. Smooth the top with a gentle back-and-forth motion. Tap the pan lightly on the counter a few times to release any air bubbles.
Cover the entire pan with plastic wrap, being careful not to let it touch the surface of the filling. Alternatively, you can tent the plastic wrap over the pan. Refrigerate for at least four hours, though overnight is truly better. The longer it chills, the firmer it becomes.
When you’re ready to serve, remove the cheesecake from the refrigerator. Run a thin knife or offset spatula around the entire edge, between the filling and the pan sides. This ensures a clean release. Carefully unlatch and remove the springform ring.
For the neatest slices, dip a sharp knife in hot water, wipe it dry, and make your cut. Clean the knife and dip it in hot water again between each slice. This creates those perfect, professional-looking pieces.
Serve your easy no bake cheesecake recipe immediately, topped with your favorite accompaniments. Watch as everyone marvels at your seemingly impressive baking skills, and enjoy every compliment knowing you achieved this masterpiece without ever turning on your oven!


