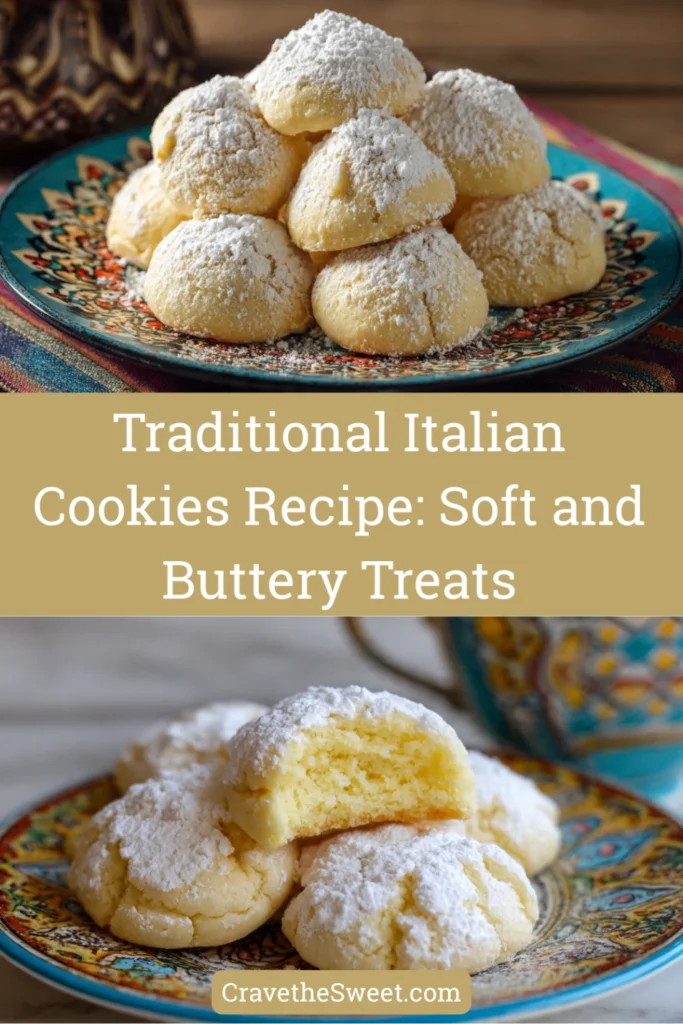
Every Christmas, my Italian grandmother would make trays and trays of cookies—anise-flavored, almond-studded, and my favorite, the simple butter cookies with a distinctive glaze and sprinkles on top. I called them “Italian wedding cookies” though she’d laugh and say they were just her everyday cookies. When she passed, I inherited her recipe box with flour-dusted cards in her handwriting. This Italian cookies recipe was the most worn card, spotted with vanilla extract and covered in notes. Now I make them every holiday season, and the scent of vanilla and almond extract immediately transports me back to her kitchen, watching her work magic with butter, sugar, and flour.
Why You’ll Love This Italian Cookies Recipe
This Italian cookies recipe creates tender, cake-like cookies with a delicate crumb that practically melts in your mouth. Unlike crispy American cookies, these are soft and pillowy with a subtle sweetness that’s never overwhelming. The almond and vanilla flavoring gives them that distinctive Italian bakery taste that’s both comforting and sophisticated. The colorful glaze and sprinkles make them festive and beautiful without requiring any special decorating skills. These cookies are incredibly versatile—perfect for holidays, weddings, baby showers, or just because you want something special with your afternoon coffee. The recipe makes a generous batch ideal for sharing, gifting, or filling your cookie jar. They stay fresh for over a week when properly stored, and they freeze beautifully for future cravings. Best of all, they’re simple enough for beginners but impressive enough to make you look like an experienced baker.
What Are Italian Cookies?
Italian cookies encompass many varieties, but this Italian cookies recipe produces what many Americans recognize as classic Italian bakery cookies—soft, cake-like butter cookies with sweet glaze and colorful sprinkles on top. These cookies are sometimes called Italian wedding cookies, though that name can also refer to different varieties like nut balls rolled in powdered sugar. The authentic version features a tender, fine-crumbed texture achieved through a combination of butter, eggs, and sometimes milk or cream. Traditional flavorings include almond extract, vanilla, and sometimes lemon or anise. The cookies are typically topped with a simple powdered sugar glaze that hardens slightly, creating a sweet coating, then finished with colorful sprinkles called nonpareils. Good Italian cookies should be soft and tender, not crunchy, with balanced sweetness and subtle almond flavor. They’ve been a staple of Italian-American bakeries and family gatherings for generations, particularly popular during holidays and celebrations.
Common Mistakes to Avoid
The biggest mistake with this Italian cookies recipe is overmixing the dough. Once you add the flour, mix just until combined. Overmixing develops gluten, creating tough cookies instead of tender ones.
Using salted butter instead of unsalted throws off the delicate flavor balance. Always use unsalted butter so you can control the salt level.
Not using enough almond extract creates bland cookies. Almond extract is essential for that authentic Italian bakery flavor—don’t skip it or reduce it.
Making cookies too large means they won’t bake evenly and will have a different texture than intended. Keep them small, about tablespoon-sized.
Overbaking makes these naturally soft cookies dry and cake-like in an unpleasant way. They should barely have any color when you remove them from the oven.
Glazing cookies while they’re still warm causes the icing to melt and run off instead of setting properly. Always let cookies cool completely first.
Finally, adding sprinkles after the glaze has dried means they won’t stick. Add them while the glaze is still wet so they adhere properly.
How to Know When Your Cookies Are Done
Properly baked Italian cookies should be very pale with just the slightest hint of golden color around the bottom edges. The tops should remain white or very pale cream.
When you touch the top of a cookie lightly, it should spring back slightly. If it leaves a deep indentation, they need another minute.
The cookies should look set and dry on top, not wet or shiny. They’ll still feel soft—don’t wait for them to feel firm.
This Italian cookies recipe typically requires 10-12 minutes at 350°F. Start checking at 9 minutes, as these can go from perfect to overbaked quickly.
The cookies should have spread slightly but should still maintain a rounded, puffy shape. They shouldn’t be flat.
If you lift a cookie with a spatula, the bottom should be very pale golden, not brown. Brown bottoms indicate too high heat or too long baking.
After cooling for 5 minutes on the baking sheet, the cookies should be firm enough to transfer without falling apart but still tender.
What to Serve With Italian Cookies
This Italian cookies recipe creates treats that are traditionally served with espresso or cappuccino. The strong coffee cuts through the sweetness perfectly and is the classic Italian pairing.
Hot tea, particularly Earl Grey or chamomile, makes a lovely afternoon pairing. The cookies are perfect for tea time.
Cold milk is always a classic choice, especially for kids who love dunking these soft cookies.
Serve them as part of a cookie tray alongside biscotti, pizzelle, or other Italian cookies for an authentic dessert spread.
These cookies are perfect with gelato or Italian ice for a complete Italian-inspired dessert experience.
Limoncello or other Italian liqueurs make elegant adult pairings for special occasions and holidays.
Fresh fruit like strawberries or peaches provides a light, fresh contrast to the sweet cookies.
Storage Tips
Store your Italian cookies in an airtight container at room temperature for up to 10 days. They stay remarkably fresh thanks to the butter and glaze.
Layer cookies between sheets of wax paper or parchment to prevent the glaze from sticking and the cookies from clumping together.
For longer storage, freeze unglazed cookies for up to 3 months. Thaw at room temperature, then glaze and decorate as usual.
You can also freeze fully decorated cookies for up to 2 months. Freeze them on a baking sheet until solid, then transfer to freezer containers with parchment between layers.
The unbaked dough can be refrigerated for up to 3 days before baking. Let it come to room temperature for easier scooping.
Never stack glazed cookies directly on top of each other without parchment paper, or they’ll stick together and ruin the decorations.
If cookies become slightly hard during storage, place a piece of bread in the container overnight. The cookies will absorb moisture from the bread and soften.
Estimated Nutrition (Per Cookie)
Calories: 95 | Total Fat: 4g | Saturated Fat: 2.5g | Cholesterol: 20mg | Sodium: 45mg | Total Carbohydrates: 14g | Dietary Fiber: 0g | Sugars: 9g | Protein: 1g
Note: Nutritional information is approximate and based on making 48 cookies from this recipe.
Recipe Overview
Prep Time: 20 minutes
Cook Time: 12 minutes per batch
Total Time: 1 hour 30 minutes (including cooling and decorating)
Difficulty: Easy
Servings: 48 cookies
Ingredients
For the Cookies:
- 4 cups all-purpose flour
- 1 tablespoon baking powder
- ½ teaspoon salt
- 1 cup unsalted butter, softened
- 1½ cups granulated sugar
- 4 large eggs
- 2 teaspoons vanilla extract
- 1 teaspoon almond extract
- ¼ cup milk
For the Glaze:
- 3 cups powdered sugar
- 4-5 tablespoons milk
- 1 teaspoon vanilla extract
- Colorful sprinkles (nonpareils)
Step-by-Step Instructions
Step 1: Preheat your oven to 350°F. Line baking sheets with parchment paper or silicone baking mats.
Step 2: In a medium bowl, whisk together flour, baking powder, and salt. Set aside.
Step 3: In a large bowl, beat butter and sugar with an electric mixer on medium-high speed for 3-4 minutes until light and fluffy.
Step 4: Add eggs one at a time, beating well after each addition. Mix in vanilla and almond extracts.
Step 5: With the mixer on low speed, alternately add the flour mixture and milk in three additions, beginning and ending with flour. Mix just until combined—don’t overmix.
Step 6: Drop dough by rounded tablespoons onto prepared baking sheets, spacing them about 2 inches apart. The dough will be soft and slightly sticky.
Step 7: Bake for 10-12 minutes until cookies are set but still very pale. They should have just the slightest color on the bottom edges.
Step 8: Let cookies cool on the baking sheet for 5 minutes, then transfer to wire racks to cool completely, about 30 minutes.
Step 9: While cookies cool, make the glaze by whisking together powdered sugar, 4 tablespoons milk, and vanilla extract. Add more milk if needed to reach a thick but pourable consistency.
Step 10: Once cookies are completely cool, dip the top of each cookie into the glaze, letting excess drip off. Place on a wire rack or parchment paper.
Step 11: Immediately add sprinkles while the glaze is still wet. Work quickly so the glaze doesn’t dry before you add sprinkles.
Step 12: Let the glaze set completely, about 30 minutes, before storing or serving. The glaze should be dry to the touch and slightly firm.
Enjoy these authentic Italian treats that bring a taste of the old country to your kitchen!