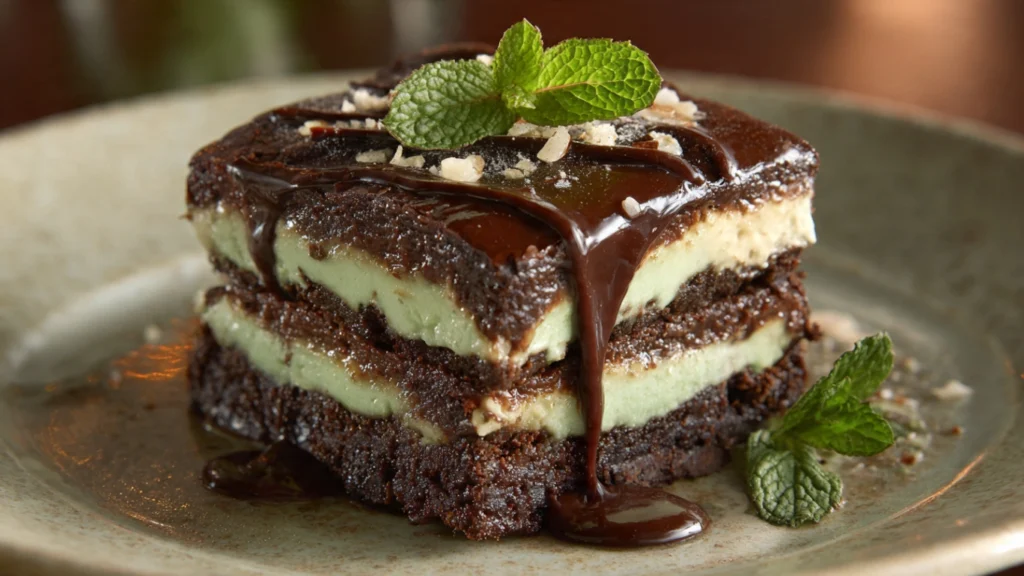
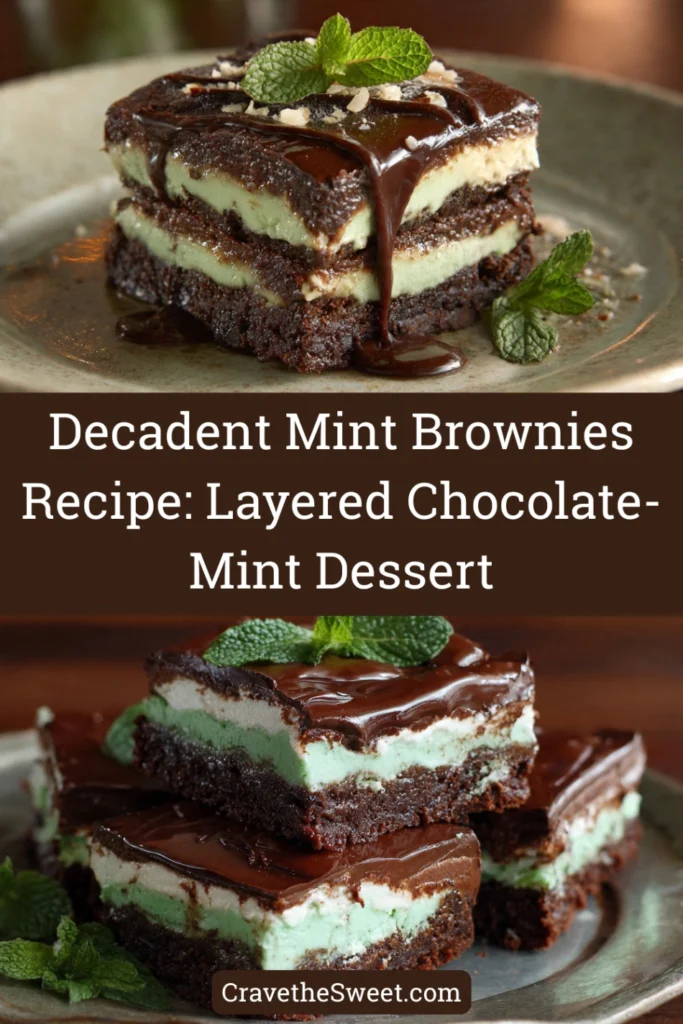
I first made mint brownies for a St. Patrick’s Day party, thinking they’d be a fun themed dessert. When I cut into that pan revealing the dark chocolate brownie layer, bright green mint layer, and glossy chocolate ganache topping, everyone crowded around. The combination of fudgy brownie with creamy mint frosting and rich chocolate was like eating homemade thin mints in brownie form. Now this mint brownies recipe is requested year-round, not just for St. Patrick’s Day. People are always amazed when I tell them how simple it is—it looks like something from a fancy bakery but uses straightforward techniques anyone can master.
Why You’ll Love This Mint Brownies Recipe
This mint brownies recipe creates an impressive three-layer dessert that tastes like a combination of brownies and peppermint patties. The fudgy chocolate brownie base provides rich chocolate flavor, the mint buttercream middle layer adds cool, refreshing contrast, and the chocolate ganache topping ties everything together with glossy elegance. Despite the impressive appearance, each component is simple to make using basic techniques. The mint layer uses just powdered sugar, butter, milk, and peppermint extract—no complicated steps required. The recipe makes a generous 9×13-inch pan perfect for crowds, parties, or potlucks where you want to bring something memorable. The brownies are incredibly rich, so cutting them into small squares means the recipe serves many people. They’re surprisingly easy to transport since the layers set firmly and don’t shift or slide. Best of all, the mint-chocolate combination appeals to almost everyone, making these brownies a guaranteed crowd-pleaser.
What Are Mint Brownies?
Mint brownies are layered dessert bars featuring a chocolate brownie base, mint-flavored frosting middle layer, and chocolate ganache topping, creating a homemade version of popular mint-chocolate candies. This mint brownies recipe produces what’s sometimes called grasshopper brownies or mint chocolate brownies, with each distinct layer contributing flavor and texture. The brownie layer should be fudgy and dense, providing rich chocolate foundation. The mint layer is essentially buttercream tinted green with peppermint extract for that signature cool mint flavor. The ganache topping is simply chocolate and cream melted together, creating a smooth, glossy finish. The dessert became popular in American home baking in the 1970s and remains a favorite for holidays, especially St. Patrick’s Day when the green layer feels festive. Good mint brownies should have clean, distinct layers that don’t blur together, balanced mint flavor that’s refreshing without being toothpaste-like, and rich chocolate that complements rather than overwhelms the mint.
Common Mistakes to Avoid
The biggest mistake with this mint brownies recipe is using too much peppermint extract in the mint layer. Peppermint extract is very strong—too much tastes medicinal. Start with less and add more if needed.
Not letting the brownie layer cool completely before adding the mint frosting causes it to melt and the layers to blend together. Patience is essential.
Making the mint layer too thick creates an overwhelming mint taste that unbalances the dessert. A thin layer provides perfect mint flavor without overpowering.
Using green food coloring that’s too dark makes the mint layer look artificial and unappealing. Aim for a soft, pastel mint green.
Not refrigerating the mint layer before adding ganache causes the warm ganache to melt it. The mint layer must be firm and cold.
Cutting brownies before the ganache has fully set creates messy, smeared slices. Wait until everything is firm and set.
Finally, storing these at room temperature in warm weather causes the layers to soften and potentially slide. Keep them refrigerated.
How to Know When Your Brownies Are Done
The brownie layer is done when a toothpick inserted 2 inches from the edge comes out with a few moist crumbs. The center should still look slightly underdone—it will firm up as it cools.
The brownies should have pulled away slightly from the pan edges and developed a thin, crackly top.
This mint brownies recipe typically requires 25-30 minutes for the brownie layer at 350°F. Start checking at 23 minutes.
The mint layer is “done” when it’s spreadable and holds its shape. It doesn’t require cooking—just mixing until smooth.
After spreading the mint layer, refrigerate for at least 30 minutes. It’s ready when it feels firm to the touch and doesn’t indent when pressed lightly.
The ganache topping is done when it’s pourable but not hot. It should be warm and fluid enough to spread smoothly.
The final brownies are ready to cut when the ganache has set completely, about 1-2 hours after adding it. The surface should be firm and not tacky.
What to Serve With Mint Brownies
This mint brownies recipe creates such a rich, complete dessert that it really needs no accompaniment. Each square is a self-contained treat.
However, vanilla ice cream on the side provides a creamy, cool contrast that some people love with the rich chocolate-mint bars.
Hot coffee or espresso makes the perfect beverage pairing, cutting through the sweetness and enhancing the chocolate flavor.
Cold milk is always a classic choice, especially popular with kids and teenagers.
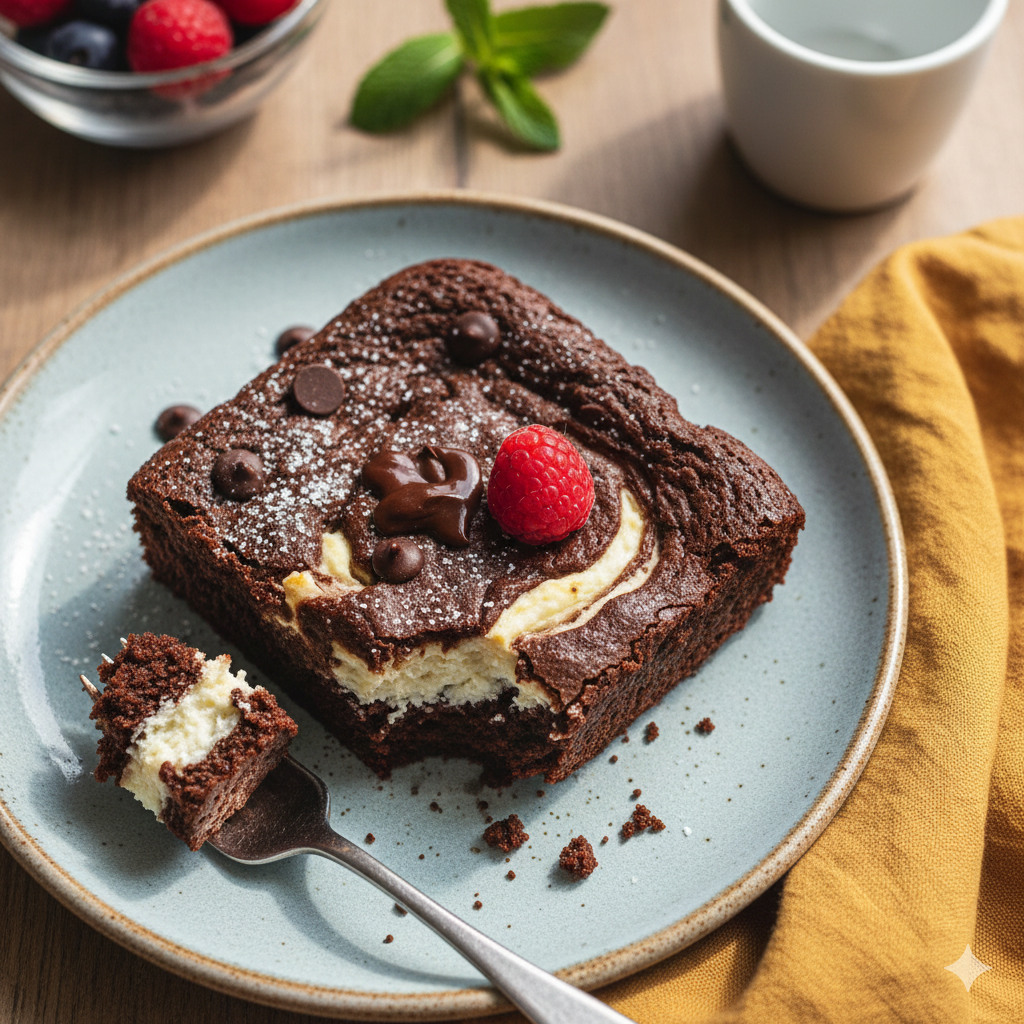
Fresh raspberries scattered around the plate add a tart, fruity element and beautiful color that complements the mint green layer.
For an extra-indulgent presentation, drizzle each brownie square with additional chocolate or caramel sauce.
These brownies are perfect for dessert tables at parties, cookie exchanges, or holiday gatherings where impressive presentation matters.
Storage Tips
Store mint brownies in an airtight container in the refrigerator for up to 5 days. The layers stay distinct and the brownies remain fresh.
Layer the brownies between sheets of parchment paper to prevent them from sticking together in the container.
For longer storage, freeze the brownies for up to 2 months. Wrap individually in plastic wrap, then place in a freezer bag. Thaw in the refrigerator.
Bring refrigerated brownies to cool room temperature about 15 minutes before serving for the best flavor and texture. Very cold brownies are too firm.
This mint brownies recipe can be frozen after the brownie layer but before adding the mint frosting and ganache. Add the toppings after thawing for fresher taste.
Don’t leave these brownies at room temperature for more than a few hours, especially in warm weather. The mint layer will soften and may melt.
Cut brownies store better than a whole uncut pan, as cutting exposes less surface area to air and prevents drying.
Estimated Nutrition (Per Brownie, 24 Servings)
Calories: 245 | Total Fat: 13g | Saturated Fat: 8g | Cholesterol: 45mg | Sodium: 85mg | Total Carbohydrates: 31g | Dietary Fiber: 1g | Sugars: 25g | Protein: 2g
Note: Nutritional information is approximate and based on cutting the pan into 24 squares.
Recipe Overview
Prep Time: 30 minutes
Cook Time: 28 minutes
Total Time: 3 hours (including cooling and chilling)
Difficulty: Medium
Servings: 24 brownies
Ingredients
For the Brownie Layer:
- ½ cup unsalted butter, melted
- 1 cup granulated sugar
- 2 large eggs
- 1 teaspoon vanilla extract
- ⅓ cup unsweetened cocoa powder
- ½ cup all-purpose flour
- ¼ teaspoon salt
- ¼ teaspoon baking powder
For the Mint Layer:
- 2 cups powdered sugar
- ¼ cup unsalted butter, softened
- 2 tablespoons milk
- ½ teaspoon peppermint extract
- Green food coloring (a few drops)
For the Ganache Topping:
- 1 cup semi-sweet chocolate chips
- ⅓ cup heavy cream
Step-by-Step Instructions
Step 1: Preheat your oven to 350°F. Grease a 9×13-inch baking pan and line it with parchment paper, leaving overhang on the sides for easy removal.
Step 2: In a large bowl, whisk together melted butter and sugar until well combined. Add eggs and vanilla, whisking until smooth.
Step 3: Add cocoa powder, flour, salt, and baking powder to the wet ingredients. Stir with a wooden spoon just until combined. Don’t overmix.
Step 4: Pour the brownie batter into the prepared pan, spreading it evenly with a spatula.
Step 5: Bake for 25-28 minutes until a toothpick inserted 2 inches from the edge comes out with a few moist crumbs. The center should still look slightly underdone.
Step 6: Remove from the oven and let cool completely in the pan on a wire rack, about 1 hour. This cooling is essential before adding the next layer.
Step 7: While brownies cool, make the mint layer. In a medium bowl, beat together powdered sugar, softened butter, milk, and peppermint extract until smooth and creamy.
Step 8: Add a few drops of green food coloring to the mint mixture, stirring until you achieve a soft mint green color. Don’t make it too dark.
Step 9: Once the brownies are completely cool, spread the mint frosting evenly over the top. Use an offset spatula for smooth, even coverage.
Step 10: Refrigerate the pan for at least 30 minutes to firm up the mint layer before adding the ganache.
Step 11: For the ganache, place chocolate chips in a heatproof bowl. Heat cream in the microwave or on the stovetop until just simmering. Pour over chocolate and let sit 2 minutes, then stir until smooth.
Step 12: Pour the ganache over the chilled mint layer, spreading it evenly to the edges. Refrigerate for 1-2 hours until the ganache is completely set, then use the parchment overhang to lift the brownies from the pan. Cut into squares with a sharp knife, wiping it clean between cuts.
Enjoy these impressive layered treats that taste as amazing as they look!