

The smell of peanut butter cookies baking takes me straight back to my grandmother’s kitchen. She’d make a batch every Sunday afternoon, and the whole house would fill with that incredible nutty, sweet aroma. I remember how she’d press each cookie with a fork in that classic crisscross pattern, explaining it wasn’t just for looks—it helped them bake evenly. Years later, when I asked for her recipe, she handed me a worn index card with just six ingredients listed. I was shocked at how simple it was. Now this peanut butter cookies recipe is the one I turn to whenever I need comfort food or want to share something special with people I love.
Why You’ll Love This Peanut Butter Cookies Recipe
This peanut butter cookies recipe creates perfectly soft, chewy cookies with intense peanut butter flavor in every bite. The recipe uses simple ingredients you probably have in your pantry right now, and it comes together in one bowl with minimal mess. Unlike some peanut butter cookies that turn out dry or crumbly, these stay wonderfully soft and tender for days. The edges get slightly crispy while the centers remain chewy—that perfect textural contrast everyone loves. You don’t need any fancy equipment, just a bowl and a fork for mixing and creating that iconic crisscross pattern. The cookies are naturally gluten-free if you use certified gluten-free peanut butter and skip the optional flour. They’re also incredibly versatile—you can add chocolate chips, press a chocolate kiss in the center, or keep them classic and simple. Best of all, the dough doesn’t require chilling, so you can go from craving to eating in under 30 minutes.
What Are Peanut Butter Cookies?
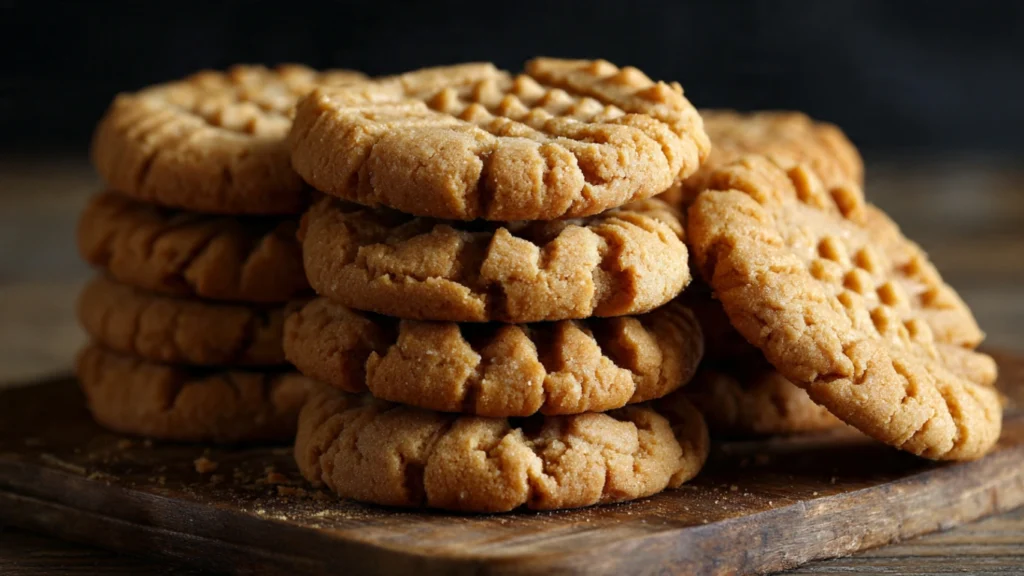
Peanut butter cookies are classic American drop cookies made primarily with peanut butter, sugar, and eggs. This peanut butter cookies recipe produces the traditional version featuring that distinctive fork-pressed crisscross pattern on top. The cookies emerged in American cookbooks in the early 1900s, gaining massive popularity as peanut butter became a household staple. Traditional recipes create a dense, tender cookie with pronounced peanut flavor and a slightly crumbly yet soft texture. The fork marks aren’t just decorative—they help flatten the naturally thick dough so cookies bake evenly throughout. Some versions include flour for a more cake-like texture, while flourless versions create denser, fudgier cookies. The best peanut butter cookies strike a balance between crispy edges and soft centers, with enough sweetness to complement but not overpower the nutty peanut butter taste. They’re considered one of the easiest cookie recipes for beginners since they’re nearly foolproof.
Common Mistakes to Avoid
The biggest mistake with this peanut butter cookies recipe is using natural peanut butter instead of regular processed peanut butter. Natural peanut butter is too oily and doesn’t have the right consistency for proper cookie structure. Use brands like Jif or Skippy for best results.
Overmixing the dough develops too much gluten, creating tough cookies instead of tender ones. Mix just until ingredients are combined—no more.
Not pressing the cookies flat enough means they won’t bake evenly. These cookies don’t spread much on their own, so you need to flatten them to about ½-inch thickness with a fork.
Using too large cookie portions makes them difficult to bake through properly. Stick to tablespoon-sized portions for the ideal ratio of crispy edges to soft centers.
Baking at too high a temperature browns the bottoms before the centers cook through. The moderate 350°F temperature in this recipe ensures even baking.
Removing cookies from the baking sheet immediately causes them to break apart. They need 5 minutes on the hot pan to firm up before transferring.
Finally, overbaking makes them dry and hard. Remember, cookies continue cooking after you remove them from the oven due to residual heat.
How to Know When Your Cookies Are Done
Properly baked peanut butter cookies should be lightly golden brown around the edges with centers that still look slightly underdone and pale. The centers will firm up as they cool—don’t wait for them to look completely set.
When you touch the edge of a cookie lightly, it should feel firm, while the center should still be soft but not liquid or jiggly. This slight softness ensures chewy cookies.
The cookies will have puffed up slightly during baking and may have small cracks on the surface, which is perfectly normal and actually desirable.
This peanut butter cookies recipe typically requires 10-12 minutes at 350°F. Start checking at 9 minutes, especially if your cookies are on the smaller side.
The fork marks should still be visible and defined after baking. If they’ve disappeared completely, the cookies have spread too much and may be overbaked.
When you remove the cookies from the oven, they should look almost underdone. Don’t panic—they’ll continue baking on the hot sheet and will be perfect.
If cookies are dark brown all over or feel hard when you touch them, they’re overbaked. Next time, reduce baking time by a minute or two.
What to Serve With Peanut Butter Cookies
This peanut butter cookies recipe creates treats that are absolutely perfect with cold milk. The classic pairing is unbeatable—the milk complements the rich peanut butter flavor and helps balance the sweetness.
Hot coffee or a latte makes a wonderful adult pairing, especially for afternoon snacks. The slight bitterness of coffee cuts through the sweetness beautifully.
Vanilla ice cream sandwiched between two cookies creates an indulgent dessert that’s perfect for summer. The cold creaminess contrasts wonderfully with the chewy cookies.
Fresh apple slices alongside provide a crisp, tart counterpoint that makes for a more balanced snack, especially for kids’ lunchboxes.
Hot chocolate creates a cozy pairing for cold weather, doubling down on the comforting, nostalgic factor these cookies provide.
Jelly or jam spread on top of a warm cookie creates a PB&J-inspired treat that’s especially popular with children.
Greek yogurt on the side adds protein and creates a more substantial snack that keeps you satisfied longer.
Storage Tips
Store your peanut butter cookies in an airtight container at room temperature for up to one week. They actually taste better the next day as the flavors develop and meld together.
To keep cookies soft, place a slice of bread in the container with them. The cookies will absorb moisture from the bread, staying tender for days.
For longer storage, refrigerate cookies in an airtight container for up to 2 weeks. Let them come to room temperature before serving for the best texture and flavor.
This peanut butter cookies recipe freezes exceptionally well. Place baked, cooled cookies in a freezer bag with parchment between layers. They’ll keep for up to 3 months.
You can also freeze the unbaked dough. Roll it into balls, freeze on a baking sheet until solid, then transfer to a freezer bag. Bake from frozen, adding 1-2 extra minutes to the baking time.
Never store peanut butter cookies in the same container as other cookies, as they’ll absorb other flavors and lose their distinct peanut butter taste.
If cookies become too hard during storage, warm them in the microwave for 5-8 seconds to restore softness.
Estimated Nutrition (Per Cookie)
Calories: 110 | Total Fat: 6g | Saturated Fat: 1.5g | Cholesterol: 15mg | Sodium: 75mg | Total Carbohydrates: 12g | Dietary Fiber: 1g | Sugars: 9g | Protein: 3g
Note: Nutritional information is approximate and based on making 24 cookies from this recipe.
Recipe Overview
Prep Time: 10 minutes
Cook Time: 12 minutes
Total Time: 30 minutes (including cooling)
Difficulty: Easy
Servings: 24 cookies
Ingredients
- 1 cup creamy peanut butter (not natural style)
- 1 cup granulated sugar
- 1 large egg
- 1 teaspoon vanilla extract
- ½ teaspoon baking soda
- ¼ teaspoon salt
Step-by-Step Instructions
Step 1: Preheat your oven to 350°F. Line two baking sheets with parchment paper or silicone baking mats. Set them aside while you prepare the dough.
Step 2: In a large mixing bowl, combine the peanut butter and sugar. Use a wooden spoon or sturdy spatula to mix them together until well combined and smooth. The mixture will be thick.
Step 3: Add the egg and vanilla extract to the peanut butter mixture. Stir vigorously until the egg is fully incorporated and the mixture is smooth and creamy looking.
Step 4: Sprinkle the baking soda and salt over the mixture. Stir until everything is evenly distributed throughout the dough. The dough will be thick and slightly sticky.
Step 5: Scoop the dough using a tablespoon or small cookie scoop, rolling each portion into a ball about 1 inch in diameter. You should get approximately 24 cookies.
Step 6: Place the dough balls on the prepared baking sheets, spacing them about 2 inches apart. They will spread slightly during baking but not much.
Step 7: Dip a fork in sugar to prevent sticking, then press down on each cookie to flatten it to about ½-inch thickness. Press again in the opposite direction to create the classic crisscross pattern.
Step 8: Bake for 10-12 minutes until the edges are lightly golden and the centers still look slightly underdone. The cookies will continue to cook as they cool.
Step 9: Remove the baking sheets from the oven. Let the cookies cool on the baking sheet for 5 minutes without moving them. They’re fragile when hot and will break if you try to move them too soon.
Step 10: After 5 minutes, use a spatula to carefully transfer the cookies to a wire cooling rack. Let them cool completely, about 15 minutes.
Step 11: Once completely cool, the cookies will have firmed up and developed that perfect soft-chewy texture. Store them in an airtight container.
Step 12: Enjoy these classic cookies with cold milk or your favorite beverage!
These simple, delicious cookies never go out of style!


