
I’ll never forget the first time I attempted a red velvet cake recipe for my daughter’s birthday. I was so nervous about getting that signature deep red color and velvety texture just right. After a few kitchen disasters involving too much food coloring and dense, hockey-puck-like layers, I finally cracked the code. Now, this stunning cake is my go-to for every special celebration, and I’m thrilled to share everything I’ve learned with you.
Why You’ll Love This Red Velvet Cake Recipe
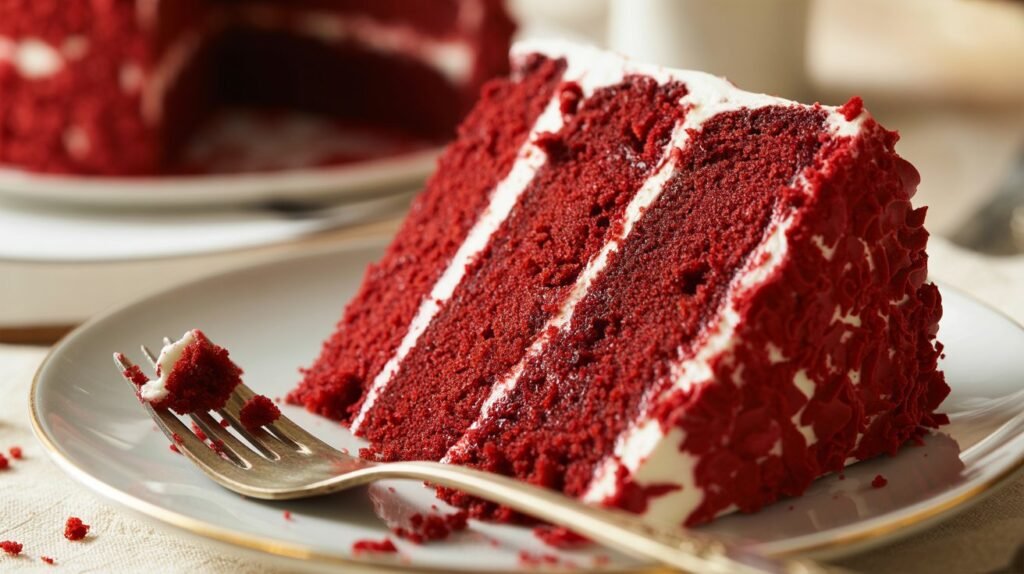
This red velvet cake recipe delivers everything you want in a showstopping dessert. The cake layers are incredibly moist with a tender crumb that practically melts in your mouth. The subtle cocoa flavor paired with tangy buttermilk creates a taste that’s completely unique and utterly addictive. The cream cheese frosting is silky smooth and not overly sweet, balancing the cake perfectly. Whether you’re baking for a birthday, Valentine’s Day, Christmas, or just because, this cake never fails to impress. Even beginners can master this recipe with my detailed instructions and helpful tips.
What Is Red Velvet Cake?
Red velvet cake is a classic American dessert known for its striking crimson color and distinctive flavor profile. Unlike regular chocolate cake, a proper red velvet cake recipe uses just a small amount of cocoa powder, giving it a subtle chocolate undertone rather than an intense chocolate flavor. The “velvet” part comes from the fine, soft texture achieved through the reaction between buttermilk and baking soda, along with the addition of acidic ingredients like vinegar. Traditionally, this chemical reaction would produce a slight reddish tint, but modern versions use food coloring to achieve that dramatic red hue we all love. The cake is typically paired with tangy cream cheese frosting, creating the perfect sweet and tangy combination.
Common Mistakes to Avoid
One of the biggest mistakes people make with a red velvet cake recipe is using too much cocoa powder. Remember, this isn’t a chocolate cake. Stick to the measured amount or your cake will lose its characteristic flavor. Another common error is overmixing the batter once you add the flour. This develops too much gluten and results in a tough, dense cake instead of the tender texture you’re after. Mix just until the ingredients are combined.
Many bakers also skip the vinegar or use old baking soda, which prevents the proper chemical reaction needed for that velvety texture. Always check that your baking soda is fresh by testing it with a little vinegar before you start. It should bubble vigorously.
Don’t forget to bring your eggs and buttermilk to room temperature before baking. Cold ingredients don’t combine as smoothly and can result in an uneven texture. I usually set mine out on the counter about thirty minutes before I begin.
Finally, resist the urge to open the oven door during the first twenty minutes of baking. The sudden temperature drop can cause your cakes to sink in the middle. Trust the process and let them bake undisturbed.
How to Know Your Red Velvet Cake Is Done
The best way to test if your cake is ready is the toothpick method. Insert a wooden toothpick or cake tester into the center of each layer. It should come out with just a few moist crumbs clinging to it, not wet batter. If you see wet batter, give it another two to three minutes and test again.
The cake should also spring back when you gently press the center with your finger. The edges will start pulling away slightly from the sides of the pan. You’ll notice the top looks set rather than jiggly or wet.
Another indicator is the color. The top should appear deep red with a slightly darker edge. The cake will also emit that wonderful, slightly tangy aroma that tells you it’s perfectly baked. Don’t rely solely on timing since every oven is different. Start checking around the twenty-five minute mark, but your cake might need up to thirty-five minutes depending on your oven.
What to Serve With Red Velvet Cake
This red velvet cake recipe is stunning enough to stand alone, but you can elevate it even further with thoughtful accompaniments. A scoop of vanilla ice cream on the side adds a delightful temperature contrast and creamy richness. Fresh berries, especially raspberries or strawberries, provide a tart freshness that cuts through the sweetness beautifully.
For an elegant presentation, serve thin slices with a drizzle of raspberry coulis or white chocolate ganache on the plate. A dollop of freshly whipped cream alongside each slice adds a light, airy element. Hot coffee or cold milk are classic beverage pairings that complement the cake’s flavors perfectly.
During holidays, I love serving this cake with a spiced hot chocolate or peppermint tea. For summer gatherings, pair it with lemonade or iced tea. The versatility of this cake makes it appropriate for any occasion or season.
Storage Tips for Your Red Velvet Cake
Proper storage keeps your red velvet cake recipe tasting fresh for days. Once frosted, store the cake in an airtight container or cover it loosely with plastic wrap. Keep it in the refrigerator since the cream cheese frosting needs to stay cold. It will stay fresh for up to five days this way.
Before serving refrigerated cake, let it sit at room temperature for about thirty minutes. This brings out the flavors and softens the texture. Cold cake straight from the fridge can taste muted and feel dense.
If you need to freeze the cake, wrap unfrosted layers tightly in plastic wrap, then in aluminum foil. They’ll keep for up to three months in the freezer. Thaw frozen layers in the refrigerator overnight before frosting and serving. You can also freeze frosted cake, but the texture of the frosting might change slightly. Wrap it carefully and freeze for up to two months.
Individual slices freeze wonderfully too. Wrap each piece separately so you can grab a single serving whenever a craving hits.
Estimated Nutrition Information
Per slice (based on 12 servings): Approximately 520 calories, 28g fat, 64g carbohydrates, 6g protein, 95mg cholesterol, 380mg sodium. These values are estimates and will vary based on specific ingredients used and portion sizes.
Keep in mind that red velvet cake is a special occasion treat. The combination of butter, sugar, and cream cheese frosting makes it rich and indulgent. Enjoy it mindfully as part of a balanced diet.
Recipe Overview
Prep Time: 20 minutes
Cook Time: 30 minutes
Total Time: 50 minutes (plus cooling and frosting time)
Difficulty: Moderate
Servings: 12 slices
Ingredients
For the Cake:
- 2½ cups all-purpose flour
- 1½ cups granulated sugar
- 1 teaspoon baking soda
- 1 teaspoon salt
- 2 tablespoons unsweetened cocoa powder
- 1½ cups vegetable oil
- 1 cup buttermilk, room temperature
- 2 large eggs, room temperature
- 2 tablespoons red food coloring
- 1 teaspoon white vinegar
- 1 teaspoon vanilla extract
For the Cream Cheese Frosting:
- 16 ounces cream cheese, softened
- ¾ cup unsalted butter, softened
- 4 cups powdered sugar, sifted
- 1 tablespoon vanilla extract
- Pinch of salt
Step-by-Step Instructions
Step 1: Prepare Your Workspace
Preheat your oven to 350°F. Grease two 9-inch round cake pans thoroughly with butter or cooking spray, then dust with flour. Tap out any excess flour. You can also line the bottoms with parchment paper circles for extra insurance against sticking.
Step 2: Mix the Dry Ingredients
In a large mixing bowl, sift together the flour, sugar, baking soda, salt, and cocoa powder. Sifting is important for this red velvet cake recipe because it removes lumps and aerates the ingredients, contributing to that light texture.
Step 3: Combine the Wet Ingredients
In a separate bowl, whisk together the vegetable oil and buttermilk until well combined. Add the eggs one at a time, whisking after each addition. Stir in the red food coloring, vinegar, and vanilla extract. The mixture will look vibrant and smell slightly tangy.
Step 4: Combine Wet and Dry Mixtures
Make a well in the center of your dry ingredients. Pour the wet mixture into the well. Using a rubber spatula or wooden spoon, gently fold the ingredients together. Mix just until you no longer see dry flour streaks. The batter will be thin and pourable, which is exactly what you want. Remember not to overmix.
Step 5: Bake the Cakes
Divide the batter evenly between your prepared pans. A kitchen scale helps ensure equal layers, but eyeballing works fine too. Tap the pans gently on the counter a few times to release any air bubbles. Place them on the center rack of your preheated oven, making sure they’re not touching each other or the oven walls.
Bake for 28 to 32 minutes, until a toothpick inserted in the center comes out with just a few moist crumbs. Start checking at the 25-minute mark since oven temperatures vary.
Step 6: Cool the Cakes
Remove the pans from the oven and let them cool in the pans for 10 minutes. Run a butter knife around the edges to loosen, then turn the cakes out onto wire cooling racks. Let them cool completely before frosting, at least one hour. Trying to frost warm cake will result in melted, sliding frosting.
Step 7: Make the Cream Cheese Frosting
While your cakes cool, prepare the frosting. In a large bowl, beat the softened cream cheese and butter together with an electric mixer on medium speed until smooth and creamy, about 3 minutes. Make sure there are no lumps.
Reduce the speed to low and gradually add the sifted powdered sugar, one cup at a time. Once incorporated, increase the speed to medium-high and beat until light and fluffy, about 2 minutes. Add the vanilla extract and salt, beating until combined. If the frosting seems too thick, add a tablespoon of milk. If it’s too thin, add more powdered sugar.
Step 8: Assemble and Frost
Place your first cake layer on a serving plate or cake stand. If the top is domed, use a serrated knife to level it off for easier stacking. Spread about one cup of frosting evenly across the top, going all the way to the edges.
Place the second layer on top, bottom side up for a flat surface. Apply a thin layer of frosting all over the cake to create a crumb coat. This seals in any loose crumbs. Refrigerate for 15 minutes to set this layer.
Apply the remaining frosting generously over the top and sides, using an offset spatula to create smooth swirls or whatever design you prefer. Some people like to leave the sides partially naked for a rustic look.
Step 9: Finishing Touches
For extra flair, pipe decorative borders with any leftover frosting or sprinkle the top with red velvet cake crumbs. You can also add fresh flowers, berries, or chocolate shavings. Get creative and make it your own.
Refrigerate the finished cake for at least 30 minutes before slicing to help the frosting set. Use a sharp knife dipped in hot water and wiped clean between cuts for the neatest slices.
This red velvet cake recipe has become a staple in my home, and I hope it becomes one in yours too. The combination of that gorgeous color, tender crumb, and tangy frosting creates something truly special. Don’t be intimidated by the steps. Take your time, follow the instructions, and you’ll have a bakery-worthy cake that’ll have everyone asking for seconds. Happy baking!


