
When my nephew graduated high school last June, I wanted to make something that felt genuinely special — not just a store-bought sheet cake with a plastic diploma stuck in the frosting. I’d been making layered cakes for years but had never attempted a full decorated grad cake at home. I settled on a classic vanilla butter cake with Swiss meringue buttercream, decorated in his school colors with a fondant graduation cap on top. Standing in my kitchen at midnight piping the final details, I thought I might have bitten off more than I could chew. The next afternoon when I carried it to the party, the entire room went quiet for a second before everyone started reaching for their phones to photograph it. My nephew said it was the coolest thing anyone had ever made for him. That moment made every minute of baking completely worth it.
Why You’ll Love It
Grad cakes made at home have something store-bought versions simply cannot offer — heart. This recipe gives you a moist, tender vanilla layer cake with a rich, silky buttercream that tastes dramatically better than anything from a grocery store bakery counter. It’s fully customizable to any school colors, any graduation theme, and any number of servings. The decorating process is approachable even for beginner bakers — no fondant sculpting skills required, just a steady hand and a piping bag. Making your own grad cake saves a significant amount of money compared to ordering a custom cake, and the pride of serving something homemade at a milestone celebration is genuinely priceless.
What Is It?
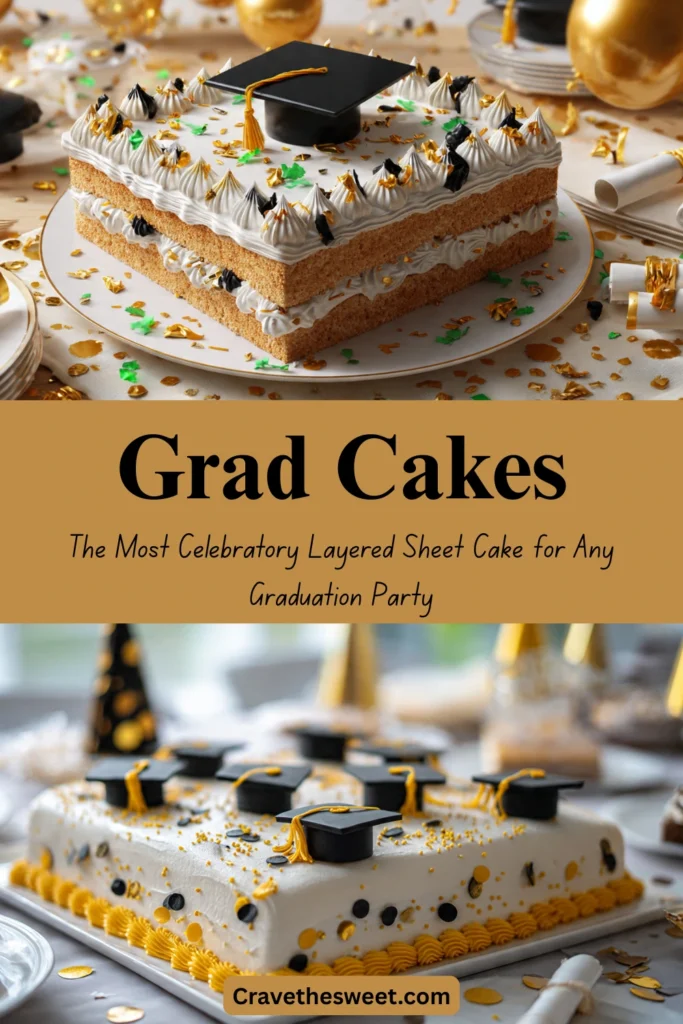
Grad cakes are celebration cakes made specifically for graduation parties, typically decorated in the graduate’s school colors and featuring classic graduation motifs — diploma scrolls, graduation caps, the graduate’s name, and their graduating year. This recipe is a three-layer vanilla butter cake frosted with a smooth vanilla Swiss meringue buttercream. The layers are filled with strawberry jam and vanilla buttercream for a classic, crowd-pleasing flavor combination. The outside is decorated with piped rosette borders and simple graduation-themed decorations that look impressive without requiring professional cake decorating experience. It serves a generous crowd and can be made entirely over two days to keep the workload manageable.
Common Mistakes to Avoid
Baking cold ingredients. Cold eggs and cold butter don’t emulsify properly, resulting in a dense, uneven crumb. Pull your butter, eggs, and buttermilk out of the refrigerator at least an hour before you start baking. Room temperature ingredients create a dramatically better cake.
Not leveling the cake layers. Domed cake layers make for a wobbly, unstable stacked cake that leans and looks unprofessional. Use a long serrated knife or cake leveler to trim each layer flat before assembling.
Skipping the crumb coat. A thin initial layer of frosting — the crumb coat — seals in all the loose crumbs before the final frosting layer goes on. Skip it and your beautiful outer layer will be full of brown crumbs trapped in white frosting. Chill the crumb coat for 20 minutes before finishing.
Decorating before the frosting firms up. Press any toppers, piped decorations, or fondant accents onto frosting that has been chilled for at least 30 minutes. Decorating over soft frosting leads to sliding, sinking, and frustration.
How to Know It’s Done
The cake layers are done when a toothpick inserted into the very center comes out completely clean, the tops spring back when lightly pressed, and the edges have just begun to pull away from the sides of the pan. This typically happens at 28–32 minutes at 350°F. The finished frosted grad cake is ready to serve when the outer frosting layer is firm and set to the touch, all decorations are secure, and the cake has been at room temperature for 20–30 minutes after being removed from the refrigerator. A cold cake slices cleanly but tastes best at room temperature.
What to Serve With It
Grad cakes are the centerpiece of any graduation dessert table, but a few complementary additions round out the spread beautifully. A platter of graduation-themed cupcakes in matching school colors makes portioning easier at large parties. Fresh strawberries and raspberries alongside each slice provide a bright, tart contrast to the rich buttercream. Sparkling lemonade, fruit punch, or a simple champagne toast pairs perfectly with this celebratory cake. For a full dessert table, add a candy buffet in the graduate’s school colors — M&Ms, gumballs, and ribbon candy sorted by color look stunning and keep guests happily snacking between cake slices.
Storage Tips
Room temperature: Frosted grad cakes can sit covered at room temperature for up to 8 hours during a party without any issues, as long as the kitchen isn’t too warm.
Refrigerator: Store any leftover cake covered with plastic wrap or in an airtight cake box in the refrigerator for up to 4 days. The buttercream will firm up when cold — allow slices to come to room temperature for 20 minutes before serving for the best texture and flavor.
Freezer: Unfrosted cake layers freeze exceptionally well. Wrap each layer tightly in plastic wrap and then foil, and freeze for up to 2 months. Thaw overnight in the refrigerator before assembling and frosting.
Estimated Nutrition (Per Slice, Based on 16 Servings)
- Calories: ~485
- Total Fat: 24g
- Saturated Fat: 14g
- Carbohydrates: 64g
- Sugar: 48g
- Protein: 5g
- Sodium: 290mg
Note: Values are estimates and vary based on frosting quantity and slice size.
Recipe Overview
- Prep Time: 40 minutes
- Cook Time: 30 minutes
- Cooling and Decorating Time: 2 hours
- Total Time: 3 hours 10 minutes
- Difficulty: Intermediate — manageable for a motivated beginner
- Servings: 16 generous slices
Ingredients
For the Vanilla Butter Cake (Three Layers):
- 3 cups all-purpose flour
- 1 tablespoon baking powder
- ½ teaspoon fine salt
- 1 cup (2 sticks) unsalted butter, softened
- 2 cups granulated sugar
- 4 large eggs, room temperature
- 1 tablespoon pure vanilla extract
- 1¼ cups whole buttermilk, room temperature
For the Vanilla Swiss Meringue Buttercream:
- 6 large egg whites
- 1½ cups granulated sugar
- 2 cups (4 sticks) unsalted butter, softened and cubed
- 2 teaspoons pure vanilla extract
- Pinch of salt
- Gel food coloring in the graduate’s school colors
For the Filling:
- ½ cup good-quality strawberry jam
- 1 cup buttercream reserved from the batch above
For Decoration:
- Graduation cap topper (store-bought or handmade from fondant)
- Edible gold or silver star sprinkles
- Piping bags fitted with star and round tips
Step-by-Step Instructions
Step 1: Bake the Cake Layers
Preheat your oven to 350°F. Grease three 8-inch round cake pans, line the bottoms with parchment circles, and grease again. Whisk together the flour, baking powder, and salt in a bowl and set aside. In a large bowl, beat the softened butter and sugar on medium-high speed for 3–4 minutes until very light and fluffy. Add eggs one at a time, beating well after each. Mix in the vanilla. Add the flour mixture in three additions, alternating with the buttermilk in two additions, beginning and ending with flour. Mix just until combined after each addition. Divide evenly among the three prepared pans and bake for 28–32 minutes until a toothpick comes out clean. Cool in pans for 10 minutes, then turn out onto wire racks to cool completely.
Step 2: Make the Swiss Meringue Buttercream
Combine egg whites and sugar in the bowl of a stand mixer set over a pot of simmering water. Whisk constantly by hand until the mixture reaches 160°F and the sugar is completely dissolved — the mixture should feel completely smooth between your fingers with no gritty sugar granules. Transfer the bowl to the stand mixer and whip on high speed with the whisk attachment until the meringue is thick, glossy, and the bowl feels completely cool to the touch — about 10 minutes. Switch to the paddle attachment and add the softened butter one or two cubes at a time on medium speed. The mixture may look curdled at some point — keep mixing. It will come together into a silky, beautiful buttercream. Add vanilla and salt and beat until smooth.
Step 3: Level and Fill the Layers
Use a serrated knife to level each completely cooled cake layer, trimming the domed top flat. Place the first layer on your cake board or serving plate. Spread a thin layer of buttercream around the edge to create a dam, then fill the center with half the strawberry jam and a thin layer of buttercream. Add the second layer and repeat. Place the third layer on top, cut side down.
Step 4: Crumb Coat and Chill
Apply a thin, even layer of buttercream over the entire outside of the cake — top and sides — using an offset spatula. This crumb coat doesn’t need to be pretty; it just needs to seal in the crumbs. Refrigerate for 20–30 minutes until the crumb coat is completely firm to the touch.
Step 5: Final Frost and Decorate
Apply the final, thicker layer of buttercream to the outside of the cake, smoothing the sides with a bench scraper and the top with an offset spatula for a clean, professional finish. Tint portions of remaining buttercream in the graduate’s school colors and transfer to piping bags. Pipe a decorative border of rosettes or stars around the base and top edge. Add the graduation cap topper to the center of the top, scatter gold star sprinkles, and pipe the graduate’s name and year in a contrasting color. These are the details that transform a great cake into a truly memorable grad cake that honors this incredible milestone.
Refrigerate until 30 minutes before serving, then slice, celebrate, and savor every moment.


