
Every spring, I look for at least one project I can do with my kids that’s equal parts fun and delicious. A few years ago, we tried making spring cake pops for the first time on a rainy Saturday afternoon in March, and what started as a simple kitchen experiment turned into our most beloved seasonal tradition. We rolled the filling, melted the pastel chocolate, and decorated each little ball with flowers, sprinkles, and swirls while music played and flour somehow ended up on the dog. The result was a tray of the most cheerful little treats I’d ever seen. My kids were so proud they insisted on hand-delivering them to our neighbors. Spring cake pops have been our March and April staple ever since.
Why You’ll Love Them
Spring cake pops are fun to make, stunning to look at, and genuinely crowd-pleasing in a way that few other desserts manage. They’re perfectly portioned, easy to eat without a plate or fork, and the pastel colors make them feel instantly festive and seasonal. They work beautifully for Easter celebrations, spring birthdays, baby showers, Mother’s Day, classroom parties, or simply because the weather is warming up and you want something that looks as bright as the season feels. Once you get the basic technique down, the decorating possibilities are truly endless.
What Are Spring Cake Pops?
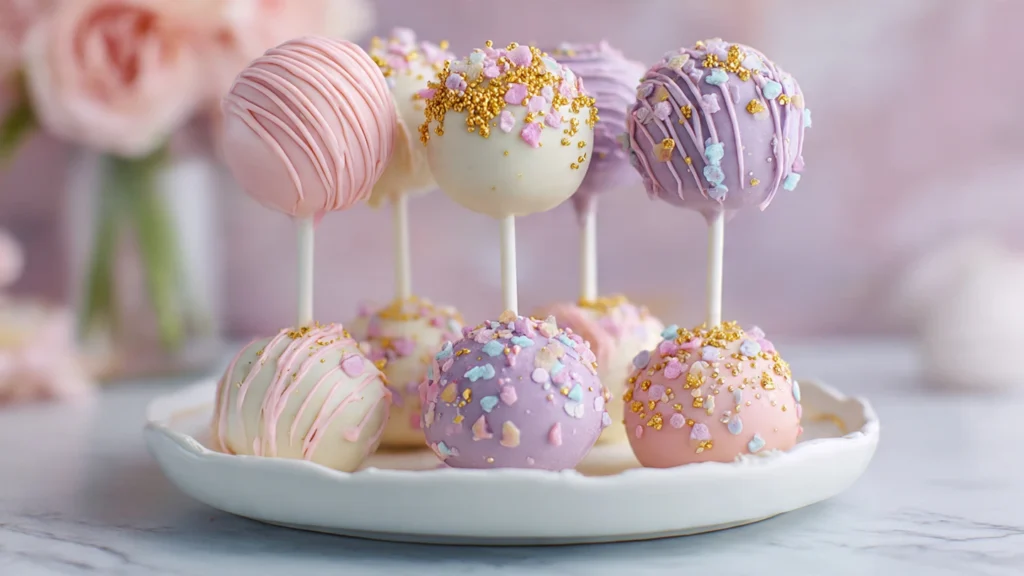
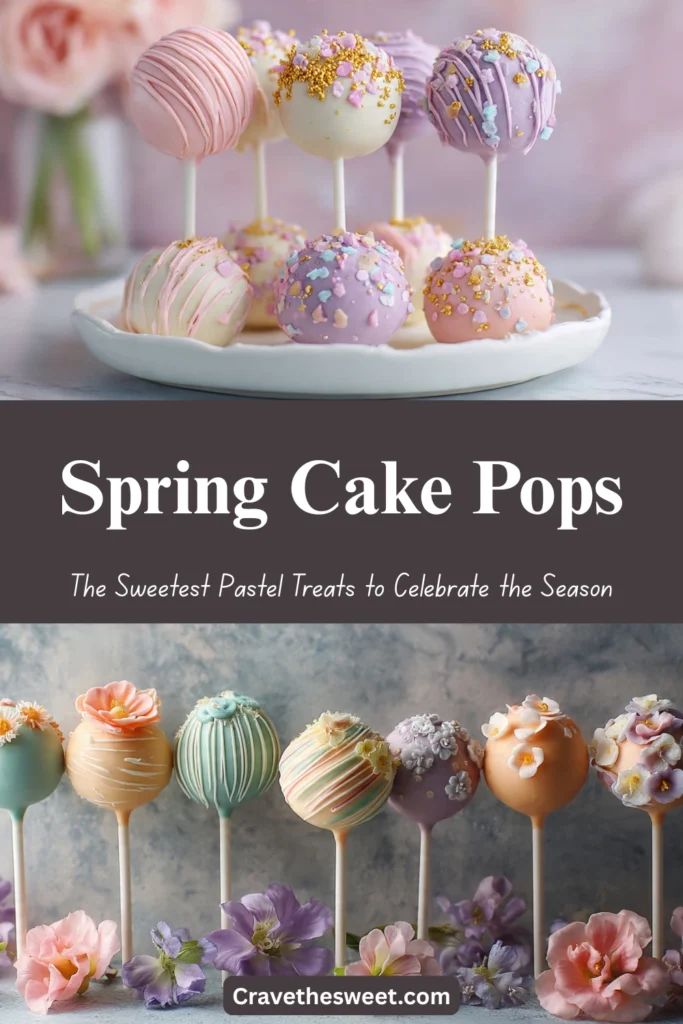
Cake pops are bite-sized desserts made from a mixture of crumbled cake and frosting that gets rolled into balls, dipped in melted chocolate or candy coating, and set on a lollipop stick. Spring cake pops put a seasonal spin on this beloved treat by using soft pastel colors — think blush pink, baby yellow, mint green, and soft lavender — for the coating, then decorating with spring-themed details like flowers, butterflies, bumblebees, or simple swirl patterns. The inside is moist, dense, and fudgy like a rich truffle, while the outside shell snaps cleanly like a fine chocolate. They’re whimsical, beautiful, and taste even better than they look.
Common Mistakes to Avoid
Adding too much frosting to the filling. This is the most common mistake beginners make. Too much frosting makes the filling overly soft and greasy, which causes the coating to crack as it sets. Add frosting gradually — just enough so the mixture holds together when pressed.
Skipping the chilling step before dipping. Warm cake balls will fall off the stick the moment they hit the melted chocolate. Always refrigerate your rolled balls for at least 30 minutes before dipping. Firm, cold balls stay on the stick and dip cleanly.
Dipping the stick without sealing it first. Before inserting the stick into your cake ball, dip the tip in melted chocolate first. This creates an anchor that holds the stick firmly in place and prevents it from pulling out during dipping.
Using chocolate that’s too thick. Thick coating creates a heavy, uneven shell and makes it hard to get a smooth finish. Add a small amount of coconut oil or shortening to thin it out to a fluid, dippable consistency.
How to Know They’re Done
Your spring cake pops are set and ready when the coating is completely opaque, firm, and dry to the touch with no tacky or soft spots anywhere on the surface. Gently run your fingertip across the coating — it should feel smooth and solid, not yielding. Any decorative drizzles or sprinkles added on top should also be fully set before the pops are packaged or served. This usually takes about 15–20 minutes at room temperature or 8–10 minutes in the refrigerator after dipping.
What to Serve With Them
Spring cake pops are a natural fit on any dessert table alongside cupcakes, cookies, and seasonal fruit. Stand them upright in a block of floral foam covered in Easter grass, a vase filled with decorative sand, or a pretty ceramic bowl of colorful jelly beans for a stunning centerpiece that doubles as a dessert. They pair sweetly with glasses of cold lemonade, sparkling water with fruit, or a warm cup of chamomile tea. For a party display, arrange them by color in a gradient from pink to yellow to green to lavender for a rainbow effect that makes guests stop and stare.
Storage Tips
Room temperature: Spring cake pops can be stored at room temperature in a cool, dry location for up to 3 days. Keep them away from direct sunlight or warm spots in your kitchen, as heat will cause the coating to soften and bloom.
Refrigerator: Store in an airtight container in the refrigerator for up to one week. Allow them to come to room temperature for 15 minutes before serving so the coating returns to its glossy, snappy best.
Freezer: Freeze fully coated but undecorated cake pops on a baking sheet until solid, then transfer to a freezer-safe bag for up to 6 weeks. Thaw in the refrigerator overnight and add final decorations after thawing.
Estimated Nutrition (Per Cake Pop, Based on 24 Servings)
- Calories: ~175
- Total Fat: 8g
- Saturated Fat: 5g
- Carbohydrates: 24g
- Sugar: 18g
- Protein: 1g
- Sodium: 130mg
Note: Values are estimates and will vary based on cake flavor, frosting type, and coating brand.
Recipe Overview
- Prep Time: 30 minutes
- Chill Time: 45 minutes
- Total Time: 1 hour 15 minutes
- Difficulty: Easy — great for beginners and kids
- Servings: 24 cake pops
Ingredients
For the Filling:
- 1 box vanilla, funfetti, or lemon cake mix, baked and fully cooled
- ½ cup vanilla buttercream frosting, store-bought or homemade
For the Coating:
- 3 cups pastel candy melts (pink, yellow, lavender, and mint — one per color group)
- 2 teaspoons coconut oil or vegetable shortening, divided
For Decoration:
- White candy melts for drizzling
- Pastel sprinkles, flower-shaped sugar decorations, or nonpareils
- Edible glitter or pearl dust (optional)
- 24 lollipop sticks or paper straws cut to size
Step-by-Step Instructions
Step 1: Bake and Cool the Cake
Bake your cake according to package directions in a 9×13-inch pan. Allow it to cool completely — this is non-negotiable. A warm cake will make your filling too soft to roll properly. Once fully cooled, crumble the entire cake into a large bowl using your hands or a fork until the texture is fine and uniform with no large chunks remaining.
Step 2: Mix the Filling
Add the buttercream frosting to the crumbled cake one tablespoon at a time, mixing thoroughly after each addition. You want the mixture to just barely hold together when you press a small amount firmly between your fingers — think moldable clay, not wet dough. Using too much frosting is the most common mistake in spring cake pops, so resist the urge to add more than necessary. Start with three tablespoons, test, and add the fourth only if needed.
Step 3: Roll the Balls
Scoop the filling using a tablespoon or small cookie scoop to ensure consistent sizing. Roll each portion between your palms into a smooth, firm ball about 1¼ inches in diameter. Place the rolled balls on a parchment-lined baking sheet in a single layer. Once all 24 balls are rolled, place the baking sheet in the refrigerator for a minimum of 30 minutes — 45 minutes is even better. Cold, firm balls are the foundation of successful spring cake pops.
Step 4: Melt the Chocolate and Insert Sticks
Melt one color of candy melts in a microwave-safe bowl in 30-second intervals, stirring between each burst, until completely smooth. Stir in a small amount of coconut oil if needed to reach a thin, fluid consistency. Remove the chilled cake balls from the refrigerator. Dip the tip of each lollipop stick about half an inch into the melted chocolate, then immediately press it straight down into the center of a cake ball, going about halfway through. The chocolate tip anchors the stick and prevents it from sliding out during dipping. Return the tray to the refrigerator for 10 minutes to let the anchors set completely.
Step 5: Dip the Cake Pops
Hold each cake pop by the stick and submerge it fully into the melted chocolate in one smooth, confident motion. Lift it straight out and allow the excess chocolate to drip off by gently tapping your wrist — not shaking, which can crack the coating. Rotate the pop slowly as it drips to encourage an even coating on all sides. Place finished pops upright in a styrofoam block or tall glass to set. Repeat with all 24 pops, working one color at a time and remelting chocolate as needed between batches.
Step 6: Decorate
While each coating is still wet, immediately add your spring decorations — press flower-shaped sprinkles gently into the surface, shake on pastel nonpareils, or add a dusting of edible glitter. Work quickly because the coating sets fast. For drizzled designs, wait until the base coating is fully set, then drizzle a contrasting color of melted white chocolate in thin lines across the surface using a spoon or piping bag. Allow all decorations to set completely before serving or displaying your finished spring cake pops.
Stand them up, step back, and admire how something this pretty came straight from your own kitchen.


