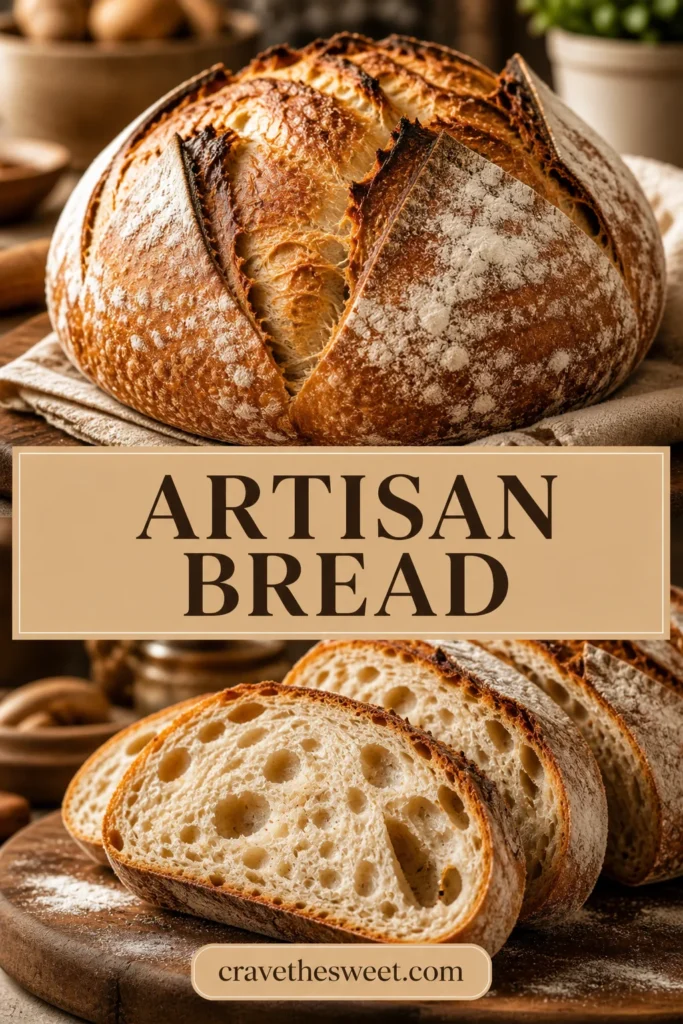
There is something magical about baking artisan bread at home. The first time I made it, I could hardly believe that a few simple ingredients could turn into a beautiful loaf with a crisp, golden crust and a soft, chewy center. The smell that filled my kitchen was just as wonderful as the taste.
What I love most about artisan bread is that it looks impressive without requiring complicated baking skills. The dough does most of the work while it rests and rises. You simply mix the ingredients, give the dough time to develop flavor, shape it gently, and bake it until beautifully golden.
If you have always wanted to make bakery-style bread at home, this easy artisan bread recipe is a wonderful place to start. It is simple, rustic, and perfect for beginners.
Why You’ll Love It
There are many reasons to love homemade artisan bread.
First, the ingredient list is short and simple. You only need flour, water, yeast, and salt, plus a little olive oil if desired. You do not need eggs, milk, or complicated ingredients.
The long resting time also gives artisan bread its wonderful flavor and texture. The dough develops a slightly chewy center while the crust becomes crisp and golden in the oven.
Another reason this recipe is special is its rustic appearance. You do not need to make the loaf perfectly smooth. A few natural cracks and uneven edges are part of the charm.
This artisan bread is also very versatile. Serve it with soup, pasta, roasted vegetables, eggs, cheese, or your favorite spread.
Best of all, making bread at home can be relaxing. Once the dough is mixed, you have plenty of time to let it rise while you work on other things.
What Is It?
Artisan bread is traditionally associated with rustic, handmade loaves that have a crisp crust and a soft, chewy interior. Unlike highly processed packaged bread, artisan-style bread focuses on simple ingredients, careful fermentation, and a beautiful crust.
This easy version uses a high-hydration dough, meaning it contains more water than many standard bread recipes. The wetter dough helps create an airy texture and chewy center.
The dough is mixed, allowed to rise, shaped into a round loaf, and baked at a high temperature. Using a covered heavy baking pot helps trap steam, which is important for developing a crisp crust.
You do not need professional baking equipment to make good artisan bread. A large oven-safe Dutch oven or heavy covered pot can help you achieve excellent results at home.
Recipe Overview
- Prep Time: 15 minutes
- Rise Time: 8–12 hours
- Cook Time: 40–45 minutes
- Total Time: About 9 hours
- Difficulty: Easy
- Servings: 10–12 slices
- Recipe Type: Homemade Bread
Ingredients
- 3 ½ cups all-purpose flour
- 1 ½ cups warm water
- 2 teaspoons salt
- 1 teaspoon active dry yeast
- 1 tablespoon olive oil, optional
- Extra flour for shaping
You can use bread flour instead of all-purpose flour if you have it. Bread flour can give the loaf a slightly chewier texture.
The water should be warm rather than hot. Extremely hot water can damage the yeast.
Step-by-Step Instructions
1. Mix the Dough
Start by adding the flour to a large mixing bowl.
Add the yeast and salt. Stir the dry ingredients together.
Slowly pour in the warm water while mixing with a wooden spoon or spatula.
Add the olive oil if using.
Continue mixing until there are no large areas of dry flour. The dough will look sticky and rough. Do not worry about that. Artisan bread dough is supposed to be much wetter and softer than many traditional bread doughs.
You do not need to knead it heavily at this stage.
2. Rest the Dough
Cover the bowl tightly with plastic wrap or a clean kitchen towel.
Let the dough rest at room temperature for about 8–12 hours.
Overnight is convenient. You can mix the dough in the evening and bake the bread the next day.
During this long resting period, the yeast works slowly and helps develop flavor. The dough should become noticeably larger, bubbly, and airy.
If your kitchen is very warm, the dough may rise faster. Keep an eye on it rather than relying only on the clock.
3. Check the Dough
After the first rise, uncover the dough.
It should look puffy and may have bubbles across the surface. It will still be sticky, which is completely normal.
Sprinkle a little flour over your work surface.
Gently scrape the dough out of the bowl. Try not to press all the air out.
4. Shape the Loaf
Lightly flour your hands.
Fold the edges of the dough toward the center several times. Turn the dough over so the seam is underneath.
Gently rotate the dough against the work surface to create a round loaf.
Do not overwork it. The goal is simply to create enough surface tension to help the loaf hold its shape.
Place the shaped dough onto a piece of parchment paper.
5. Let It Rest Again
Cover the dough loosely with a clean kitchen towel.
Allow it to rest for about 30–45 minutes.
While the dough rests, place your Dutch oven or heavy covered baking pot inside the oven.
Preheat the oven to 450°F (230°C).
Allow the pot to heat for at least 30 minutes. A very hot baking pot helps create the crisp crust that makes artisan bread so delicious.
6. Score the Dough
Once the oven and pot are fully heated, carefully remove the pot.
Using a sharp knife or bread lame, make one or two shallow cuts across the top of the dough.
Scoring gives the expanding bread a controlled place to open during baking.
You can keep the design simple. A single slash across the top works beautifully.
7. Bake the Artisan Bread
Carefully place the parchment and dough into the hot Dutch oven.
Put the lid on immediately.
Bake covered for about 25–30 minutes.
The covered environment traps steam around the dough. This helps the loaf expand and creates a crisp, beautifully developed crust.
8. Finish Baking
Remove the lid after the first 25–30 minutes.
Continue baking for another 15–20 minutes.
The loaf should become deep golden brown.
If you prefer a lighter crust, remove it earlier. For a darker, crunchier crust, let it bake a little longer while watching carefully.
9. Cool Completely
Remove the artisan bread from the pot and transfer it to a wire rack.
Allow it to cool for at least 1 hour before slicing.
This can be the hardest part because the bread smells so good, but cooling is important. The interior continues to set as the loaf cools.
Cutting into it too early can result in a gummy center.
Common Mistakes
One common mistake is adding too much flour. Because the dough is sticky, you may feel tempted to keep adding flour. Try to resist. A wetter dough helps create the open, chewy texture associated with artisan bread.
Another mistake is using water that is too hot. Very hot water can damage the yeast.
Do not rush the long fermentation. The resting period is important for flavor and texture.
Overhandling the dough can also remove too much air. Work gently when shaping the loaf.
Another important mistake is failing to preheat the baking pot. Artisan bread needs a very hot baking environment to develop a strong crust and good oven rise.
Finally, avoid cutting the loaf immediately after baking. Give it enough time to cool so the inside can finish setting.
How to Know It’s Done
The loaf should have a deep golden-brown crust when it is fully baked.
It should feel firm when you gently tap the surface, and the bottom should sound hollow when tapped.
For a more accurate check, the internal temperature should generally be around 200–210°F (93–99°C).
The crust should be dry and crisp, while the interior should feel light and chewy rather than wet or gummy.
If the crust looks beautiful but the center is still underbaked, return the loaf to the oven and continue baking for several minutes.
Remember that every oven is different, so use appearance, texture, and temperature together to judge when your artisan bread is ready.
What to Serve With It
Fresh artisan bread is delicious with almost anything.
Serve warm slices with butter for a simple snack or breakfast.
It is wonderful alongside soups and stews because the chewy bread is perfect for soaking up broth.
You can also serve it with pasta, roasted chicken, grilled vegetables, or a fresh salad.
For a simple appetizer, slice the bread and serve it with olive oil and herbs.
You can turn slices into garlic toast, bruschetta, or small sandwiches.
A warm slice topped with cheese and roasted vegetables also makes an easy lunch.
Because the flavor is mild and rustic, artisan bread works equally well with sweet and savory toppings.
Storage Tips
Allow the loaf to cool completely before storing it.
For the best crust, store artisan bread at room temperature in a paper bag or loosely wrapped kitchen towel. Avoid sealing it in plastic immediately because trapped moisture can soften the crust.
The bread is best within the first 1–2 days.
If you want to keep it longer, slice the cooled loaf and freeze the slices in a freezer-safe bag or airtight container.
Frozen bread can generally be stored for up to 2 months.
When you want a slice, thaw it at room temperature and warm it in the oven or toaster.
If the crust has softened, reheating the bread in a hot oven for a few minutes can help restore some of its crispness.
Estimated Nutrition
The following is an approximate estimate for one slice:
- Calories: 175
- Carbohydrates: 34g
- Protein: 6g
- Fat: 2g
- Saturated Fat: 0g
- Fiber: 1g
- Sugar: 1g
- Sodium: 390mg
Actual nutrition will vary depending on the exact flour, portion size, and ingredients used.
Helpful Tips for Perfect Artisan Bread
Use a kitchen scale if possible when measuring flour. Accurate measurements can make working with high-hydration dough easier.
If you do not have a Dutch oven, use another heavy oven-safe pot with a secure lid. Make sure the pot and lid are rated for the high baking temperature.
Do not worry if your dough looks messy after mixing. Rustic bread dough often looks rough before fermentation transforms it.
When shaping the loaf, use lightly floured hands instead of adding lots of flour to the dough.
For a beautiful crust, make sure your oven is completely preheated before baking.
You can also experiment with toppings. Sprinkle sesame seeds, oats, sunflower seeds, or a little coarse salt over the surface before baking.
For extra flavor, add dried herbs or roasted garlic to the dough. Keep additions moderate so they do not interfere with the structure of the loaf.
The long fermentation is one of the easiest ways to improve your bread. Giving the dough plenty of time allows the yeast to develop a deeper flavor and better texture.
Most importantly, do not expect every loaf to look perfect. One of the joys of artisan bread is its rustic, handmade appearance.
Final Thoughts
Making artisan bread at home may sound intimidating, but this recipe proves that you can create a beautiful loaf with very little hands-on work. The ingredients are simple, the process is straightforward, and most of the magic happens while the dough rests.
The finished loaf has a crisp, golden crust and a soft, chewy center that makes every slice satisfying. It is wonderful with butter, soup, pasta, cheese, or your favorite toppings.
Once you make your first successful loaf, you may find yourself wanting to bake artisan bread regularly. There is something incredibly rewarding about turning flour, water, yeast, and salt into a warm homemade loaf.
Take your time, trust the process, and enjoy the wonderful smell of fresh artisan bread coming from your own oven.