I used to buy packaged crumbs whenever a recipe called for them, but once I learned how easy they are to make at home, I rarely wanted to waste leftover bread again. This simple bread crumbs recipe is a great way to turn day-old bread into a useful pantry staple.
Homemade crumbs are crisp, flavorful, and easy to customize. You can make them fine or coarse, plain or seasoned, depending on how you plan to use them. They are perfect for crispy chicken, baked vegetables, meatballs, casseroles, pasta dishes, and so much more.
The best thing about this bread crumbs recipe is that it does not require complicated ingredients. All you need is bread, a little olive oil or butter if desired, and optional seasonings. With a few simple steps, you can have homemade crumbs ready for your favorite recipes.
Why You’ll Love It
There are many reasons to make homemade crumbs instead of buying them.
First, this bread crumbs recipe is incredibly simple. You can use leftover bread that has started to become dry, so it is also a practical way to reduce food waste.
You can control the texture, too. Make very fine crumbs for coating chicken or fish, or keep them coarse for toppings and casseroles.
Another benefit is flavor. Homemade crumbs can be seasoned exactly how you like. Add garlic powder, dried herbs, black pepper, Parmesan cheese, or other favorite seasonings.
This recipe is also budget-friendly. Instead of throwing away extra bread, you can turn it into something useful.
Homemade crumbs also taste fresh and crisp. Once you make them, you will always have an easy ingredient ready for breading, baking, or topping.
What Is It?
A bread crumbs recipe is simply a method for turning bread into small, dry pieces that can be used in cooking and baking.
Bread crumbs can be made from fresh, slightly stale, or completely dried bread. For the best results, bread that is a little dry works especially well because it contains less moisture and becomes crisp more easily.
There are two basic types: fresh crumbs and dried crumbs.
Fresh crumbs are soft and moist. They are useful in meatballs, meatloaf, fillings, and other dishes where you want tenderness.
Dried crumbs are crisp and shelf-stable for longer. They are ideal for breading chicken, fish, vegetables, and other foods.
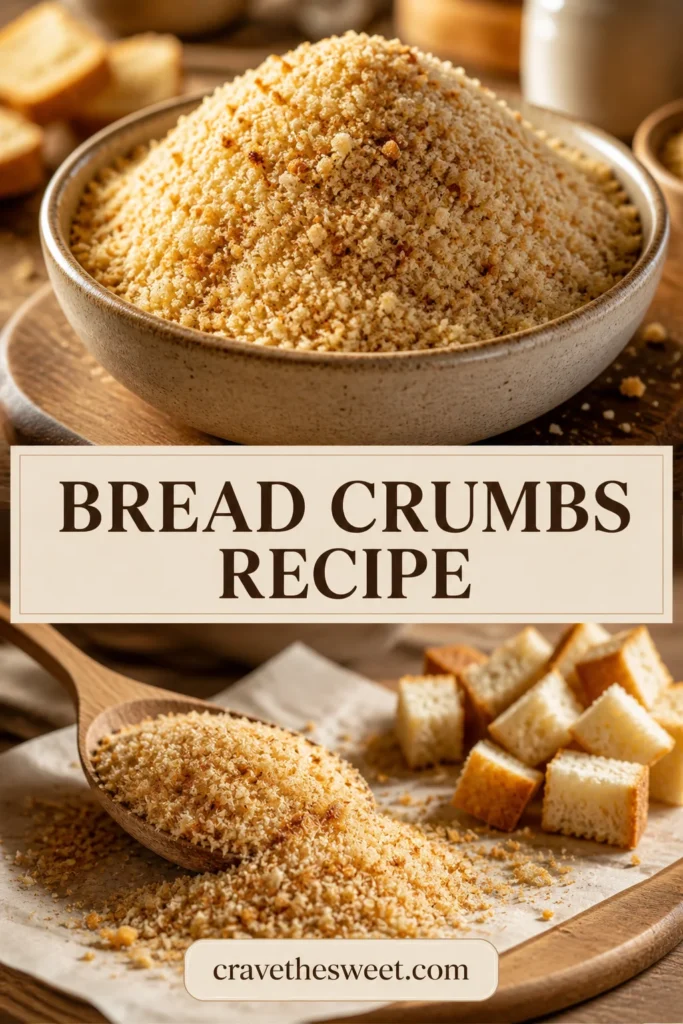
This bread crumbs recipe focuses on making crisp dried crumbs that can be stored and used whenever needed.
Recipe Overview
- Prep Time: 10 minutes
- Cook Time: 20–30 minutes
- Total Time: About 40 minutes
- Difficulty: Easy
- Servings: About 2 cups
- Recipe Type: Pantry Staple
Ingredients
- 6 cups cubed bread
- 1 tablespoon olive oil or melted butter, optional
- ½ teaspoon salt
- ½ teaspoon garlic powder, optional
- ½ teaspoon dried parsley, optional
- ¼ teaspoon black pepper, optional
- ¼ teaspoon dried oregano, optional
You can use white bread, whole wheat bread, sourdough, French bread, or another type of bread you enjoy.
For plain crumbs, simply use the bread and leave out the seasonings.
If you want seasoned crumbs, feel free to adjust the herbs and spices according to your taste.
Step-by-Step Instructions
1. Choose Your Bread
Start by choosing bread that is slightly dry.
Day-old bread is excellent for this bread crumbs recipe because it has already lost some moisture.
If your bread is still very soft and fresh, do not worry. You can dry it in the oven before turning it into crumbs.
Remove any very hard crusts if you prefer a more uniform texture, although you can leave the crusts on for extra flavor and color.
2. Cut the Bread
Cut the bread into small cubes.
Try to make the pieces relatively similar in size so they dry evenly.
Place the cubes on a large baking sheet in a single layer.
Do not pile them too high because good air circulation helps the bread dry properly.
3. Dry the Bread
Preheat your oven to 300°F (150°C).
Place the baking sheet in the oven.
Bake the bread cubes for about 15–20 minutes, stirring them once or twice during baking.
You want the bread to become dry and lightly crisp, but it does not need to become deeply brown.
If your bread was already quite stale, it may need less time.
The goal of this step is to remove moisture. Dry bread creates better crumbs and stores more easily.
4. Cool Completely
Remove the dried bread from the oven.
Let the cubes cool completely before processing them.
This step is important because warm bread can create steam inside a food processor and make the crumbs softer than you want.
Allowing the bread to cool also makes it easier to achieve a crisp, even texture.
5. Process the Bread
Place the cooled bread cubes into a food processor.
Pulse several times until you reach your desired texture.
For fine crumbs, continue processing until the pieces are very small.
For coarse crumbs, use fewer pulses.
If you do not have a food processor, place the dried bread inside a sturdy resealable bag and crush it with a rolling pin.
This method takes a little longer, but it works well.
6. Add Seasonings
Transfer the crumbs to a bowl.
Add salt, garlic powder, dried parsley, black pepper, and oregano if using.
Mix thoroughly.
For plain crumbs, you can stop here.
For a richer bread crumbs recipe, you can add a little olive oil or melted butter and toast the crumbs again. This creates a deeper flavor and extra crispness.
7. Toast the Crumbs
If you want extra-crispy seasoned crumbs, heat a skillet over medium-low heat.
Add the crumbs and stir frequently.
Toast them for about 3–5 minutes.
Watch carefully because crumbs can burn quickly.
Once they are lightly golden and fragrant, remove them from the heat.
Spread them on a plate or baking sheet and let them cool completely.
8. Store or Use
Once your homemade crumbs are completely cool, transfer them to an airtight container.
You can use them immediately or store them for later.
This bread crumbs recipe makes a convenient pantry staple that can be used in many different dishes.
Common Mistakes
One common mistake is using bread that contains too much moisture. Very fresh bread can take longer to dry and may produce soft crumbs.
Another mistake is baking the bread at an extremely high temperature. You want to dry the bread rather than burn it.
Keep an eye on the oven because the baking time depends on the type and thickness of the bread.
Over-processing can also be a problem. If you want coarse crumbs, pulse the bread only a few times.
Another mistake is adding too much seasoning before tasting. Start with a small amount and adjust as needed.
If you toast the finished crumbs in a skillet, use medium-low heat and stir constantly. Small crumbs can go from golden to burnt very quickly.
Finally, always cool the crumbs completely before storing them. Any remaining warmth can create moisture inside the container.
How to Know It’s Done
The dried bread cubes should feel firm and crisp when they are ready for processing.
Break one cube apart. The center should not feel soft or moist.
If the bread still feels flexible or chewy, return it to the oven for another 5 minutes.
When making toasted crumbs, look for a light golden color and a pleasant toasted aroma.
Do not wait for the crumbs to become very dark. They will continue to taste toasted after they cool.
The finished crumbs should be dry, crisp, and easy to crush between your fingers.
What to Serve With It
Homemade crumbs are one of the most useful ingredients in the kitchen.
Use them to coat chicken, fish, shrimp, zucchini, eggplant, mushrooms, or other vegetables before baking or frying.
They are also excellent in meatballs and meatloaf. The crumbs help bind the ingredients together while keeping the texture tender.
Sprinkle them over macaroni and cheese, baked pasta, casseroles, or roasted vegetables for a crispy topping.
You can also use them to coat cheese before baking or frying.
Seasoned crumbs make an excellent topping for stuffed vegetables and baked dishes.
For a simple meal, mix toasted crumbs with garlic, herbs, and Parmesan cheese and sprinkle them over pasta with olive oil.
There are countless ways to use this bread crumbs recipe, which is why having a jar ready in the pantry is so convenient.
Storage Tips
Allow the crumbs to cool completely before storing.
Place them in a clean, dry, airtight container.
Plain dried crumbs can generally be stored at room temperature for about 1–2 weeks if they are completely dry.
For longer storage, keep them in the refrigerator for several weeks.
You can also freeze homemade crumbs. Place them in a freezer-safe bag or airtight container and freeze for up to 3 months.
Freezing is especially useful if you make a large batch.
Label the container with the date so you can easily keep track of freshness.
Always check the crumbs before using them. If they smell unusual, show signs of moisture, or have any visible spoilage, discard them.
Estimated Nutrition
The following is an approximate estimate for ¼ cup of plain homemade crumbs:
- Calories: 110
- Carbohydrates: 21g
- Protein: 4g
- Fat: 1g
- Saturated Fat: 0g
- Fiber: 1g
- Sugar: 2g
- Sodium: 180mg
Nutrition will vary depending on the type of bread and any oil, butter, or seasonings added.
Helpful Tips for the Best Bread Crumbs
Choose bread with a good texture. White bread creates mild, light crumbs, while whole wheat bread provides a deeper flavor.
Sourdough can also make excellent crumbs because it adds a slightly tangy flavor.
For very fine crumbs, process the dried bread for longer. For a more rustic texture, pulse only a few times.
If you want extra-crispy crumbs, toast them briefly in a skillet after processing.
You can prepare plain crumbs and season only the amount you need for a specific recipe. This gives you more flexibility.
For Italian-style flavor, combine the crumbs with dried parsley, oregano, garlic powder, and a little Parmesan cheese.
For a simple savory topping, mix coarse crumbs with olive oil, garlic, herbs, and black pepper before baking.
You can also make a large batch whenever you have leftover bread. Let everything dry completely, process it, and store the crumbs for future meals.
The most important part of this bread crumbs recipe is making sure the bread is completely dry before storing. Moisture is the biggest enemy of long-lasting homemade crumbs.
Final Thoughts
This easy bread crumbs recipe is proof that useful kitchen ingredients do not need to be complicated. A few pieces of leftover bread can become crisp, flavorful crumbs that are ready for all kinds of meals.
I love making homemade crumbs because I can choose the texture and seasoning depending on what I am cooking. A plain batch is perfect for everyday recipes, while seasoned crumbs can turn a simple casserole or vegetable dish into something much more flavorful.
Once you start making your own, you may never want to throw away leftover bread again. Keep a container in your pantry or freezer, and you will always have a simple homemade ingredient ready whenever a recipe needs a crispy coating or delicious crunchy topping.