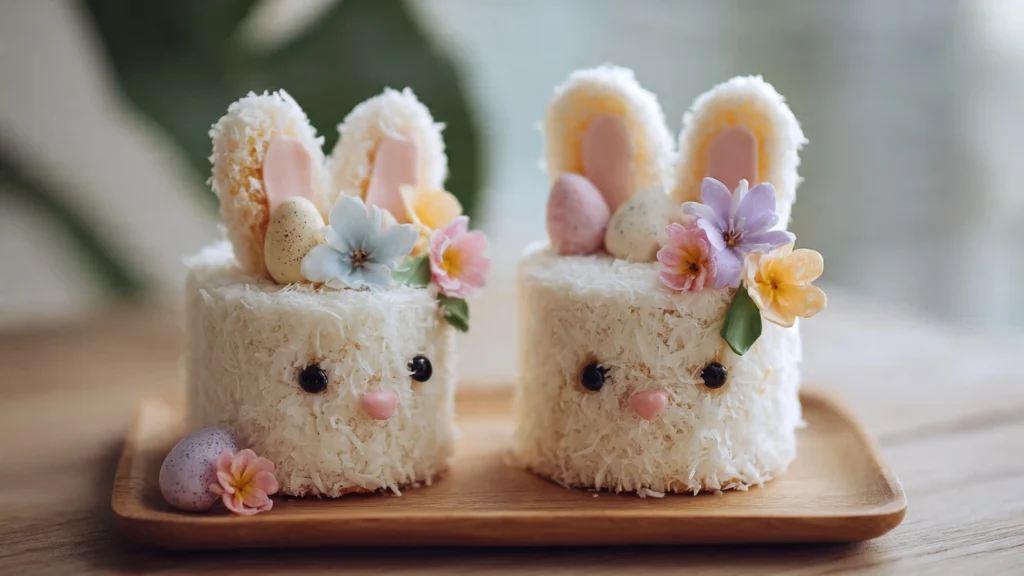
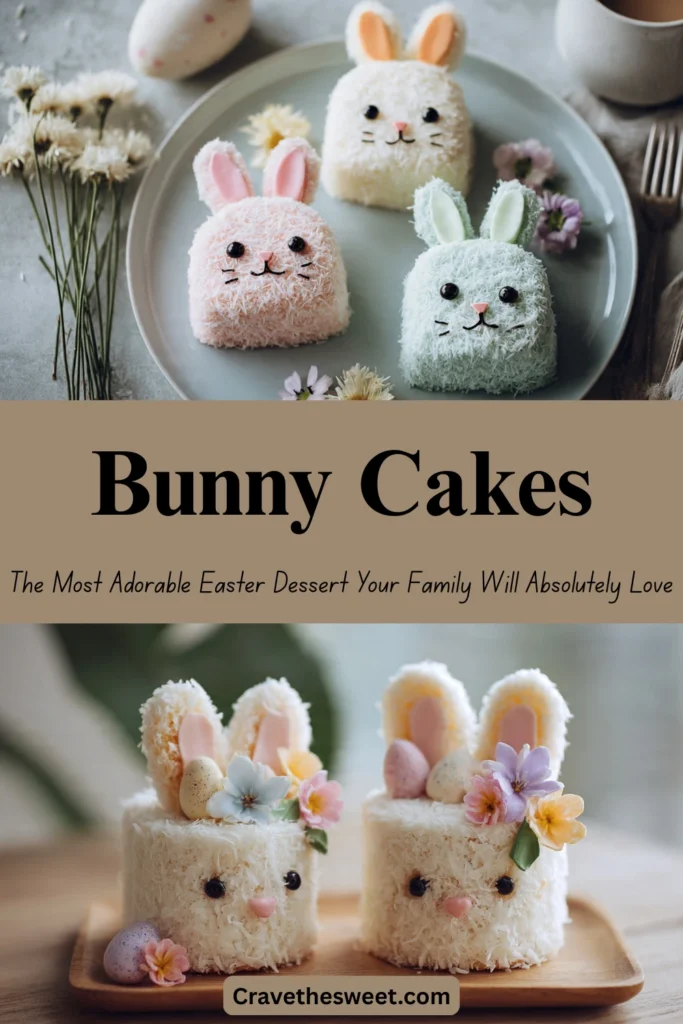
The first time I made bunny cakes for Easter, my daughter was four years old and absolutely convinced that a real bunny had somehow gotten into our kitchen and left a cake behind. I didn’t correct her. I just watched her face as she circled the cake with wide eyes, studying the white coconut fur, the pink candy ears, and the little jelly bean nose, completely enchanted. That moment of pure childhood magic is the reason I make bunny cakes every single Easter without fail. There is genuinely no other dessert that creates that kind of reaction — not just from kids, but from adults too. People walk into the room, see it on the table, and immediately smile. It’s impossible not to.
Why You’ll Love It
Bunny cakes are the rare dessert that delivers equally on flavor and on fun. The cake itself is a moist, tender vanilla layer cake that tastes like a classic celebration — buttery, soft, perfectly sweet — but the way it’s shaped and decorated transforms it into something that feels truly special and season-specific. The shredded coconut coating creates a texture that genuinely looks like white fur, and the simple candy decorations for the face require zero artistic talent. This is one of those projects that looks wildly impressive in photos but is completely achievable for a first-time decorator. If you can frost a cake and press coconut onto it, you can make this. Guaranteed.
What Are They?
Bunny cakes are Easter-themed decorated cakes shaped and decorated to look like the face or full body of a rabbit. The most classic and beloved version — the one this recipe focuses on — is made by baking two round cake layers, cutting one layer to create the bunny’s ears and bow tie from the same cake, and arranging everything on a large board to form the bunny’s face. The whole thing is frosted in white buttercream and covered in shredded sweetened coconut for that iconic fluffy fur effect. Candy-coated chocolates, jelly beans, and pink licorice or fruit strips create the eyes, nose, whiskers, and inner ears. The result is a completely charming, centerpiece-worthy Easter dessert that serves a crowd.
Common Mistakes to Avoid
Cutting the cake before it’s fully cooled. Warm cake crumbles when cut, making it nearly impossible to get the clean shapes you need for the ears and bow tie. Cool your cake layers completely — at least an hour at room temperature or 20 minutes in the refrigerator after reaching room temperature — before making any cuts.
Using too little frosting between the coconut and cake. The frosting isn’t just for flavor — it’s the glue that holds the coconut in place. Apply a generous, even layer and press the coconut firmly into it. A thin frosting layer means patchy, falling coconut and a bunny that looks balding rather than fluffy.
Not securing the ears to the board. The ear pieces can slide if not anchored. Place a small mound of frosting on the board before positioning each ear piece, pressing down gently so it stays put during the rest of the decorating process.
Using desiccated coconut instead of sweetened shredded. Desiccated coconut is finely ground and dry — it won’t give you the fluffy, fur-like texture that makes bunny cakes so irresistible. Use sweetened shredded coconut for the full effect.
How to Know It’s Done
The cake layers are ready when a toothpick inserted into the center comes out completely clean or with just one or two dry crumbs, the tops spring back immediately when pressed lightly with a fingertip, and the edges have just begun pulling away from the sides of the pan. At 350°F this typically takes 28–32 minutes for 8-inch round layers. The fully assembled and decorated bunny cake is ready to serve when all frosting is firm to the touch, the coconut is securely adhered, and the candy face decorations are set in place. Refrigerate the finished cake for 20 minutes before moving it to the serving table for the most stable results.
What to Serve With It
Bunny cakes are the undisputed star of any Easter dessert table, and they shine brightest surrounded by complementary spring treats. A platter of pastel-frosted sugar cookies, a bowl of Easter candy, and fresh strawberries alongside each slice make for a beautiful and generous spread. Serve slices with a scoop of vanilla bean ice cream for an indulgent combination that both kids and adults will love. For drinks, freshly squeezed lemonade, sparkling fruit punch in pastel colors, or warm chamomile tea all pair wonderfully with the sweet vanilla and coconut flavors of the cake.
Storage Tips
Room temperature: The assembled bunny cake can sit covered at room temperature for up to 6 hours during an Easter gathering, as long as the kitchen stays cool.
Refrigerator: Cover loosely with plastic wrap or store in a large cake box and refrigerate for up to 4 days. The coconut stays fresh and fluffy in the fridge. Bring slices to room temperature for 15 minutes before serving for the best flavor.
Freezer: Freeze unfrosted, uncut cake layers wrapped tightly in plastic wrap and foil for up to 2 months. Thaw overnight in the refrigerator, then cut, assemble, and decorate the day of serving.
Estimated Nutrition (Per Slice, Based on 16 Servings)
- Calories: ~420
- Total Fat: 20g
- Saturated Fat: 13g
- Carbohydrates: 58g
- Sugar: 44g
- Protein: 4g
- Sodium: 265mg
Note: Values are estimates and vary based on frosting quantity and decoration choices.
Recipe Overview
- Prep Time: 30 minutes
- Cook Time: 30 minutes
- Cooling and Decorating Time: 1 hour 30 minutes
- Total Time: About 2 hours 30 minutes
- Difficulty: Easy to Intermediate — great for motivated beginners
- Servings: 16 slices
Ingredients
For the Vanilla Cake:
- 2½ cups all-purpose flour
- 2½ teaspoons baking powder
- ½ teaspoon fine salt
- 1 cup (2 sticks) unsalted butter, softened
- 2 cups granulated sugar
- 4 large eggs, room temperature
- 1 tablespoon pure vanilla extract
- 1 cup whole milk, room temperature
For the White Buttercream:
- 1 cup (2 sticks) unsalted butter, softened
- 4 cups powdered sugar, sifted
- 3–4 tablespoons heavy cream or whole milk
- 1½ teaspoons pure vanilla extract
- Pinch of fine salt
For Decoration:
- 2½ cups sweetened shredded coconut
- Pink gel food coloring (for tinting a small amount of coconut for the inner ears)
- 2 large candy-coated chocolates or round candies for eyes
- 1 pink jelly bean for the nose
- Pink fruit strips or pink licorice for the inner ear lining and whiskers
- Small black or dark candy pieces for pupils (optional)
- 1 large oval-shaped white candy or marshmallow for the tail (for body-style bunny)
Step-by-Step Instructions
Step 1: Bake the Cake Layers
Preheat your oven to 350°F. Grease two 8-inch round cake pans generously, line the bottoms with parchment circles, and grease again. In a medium bowl, whisk together the flour, baking powder, and salt. In a large bowl, beat the softened butter and sugar on medium-high speed for 3 full minutes until very light and fluffy. Add eggs one at a time, beating well after each addition. Mix in the vanilla. Add the flour mixture in three additions, alternating with the milk in two additions, beginning and ending with the flour. Mix just until combined after each addition — do not overmix. Divide evenly between the two prepared pans and bake for 28–32 minutes until a toothpick comes out clean. Cool in pans for 10 minutes, then turn out onto wire racks to cool completely.
Step 2: Cut the Bunny Shape
Once the cake layers are completely cool, place one full round layer on a large cake board or serving platter — this is the bunny’s face. Take the second round layer and cut it into three pieces: two tall oval or teardrop shapes for the ears, and one small bow-tie shape from the remaining center piece. Arrange the ear pieces above the face circle and the bow tie below it on the board, leaving a small gap between each piece. Secure each piece to the board with a small dab of frosting underneath.
Step 3: Make the Buttercream
Beat the softened butter on medium-high speed for 2 minutes until creamy and pale. Add the sifted powdered sugar one cup at a time, beating on low after each addition. Add the vanilla, pinch of salt, and 3 tablespoons of cream, then beat on medium-high for 2 minutes until fluffy, smooth, and spreadable. Add the remaining tablespoon of cream if needed to reach a consistency that’s easy to spread without tearing the cake.
Step 4: Frost the Entire Bunny
Using an offset spatula, apply a generous, even layer of white buttercream over the entire surface of the cake — face, ears, and bow tie — covering every edge and gap. Don’t worry about making it perfectly smooth; the coconut will cover everything. What matters is that the frosting layer is thick enough to hold the coconut firmly in place. Fill in the gaps between the pieces with extra frosting so the whole design looks connected and cohesive.
Step 5: Apply the Coconut Fur
Working in sections, press handfuls of sweetened shredded coconut firmly into the white buttercream, covering the entire surface. Use your hands to pat and press the coconut so it adheres well with no bare spots showing through. Tint a small amount of coconut with a drop of pink gel food coloring, knead until the color is even, and press the pink coconut onto the inner portion of each ear to create the ear lining detail. This simple touch makes the bunny face instantly recognizable and charming.
Step 6: Add the Face and Finishing Details
Press two candy-coated chocolates onto the face for eyes. Place a pink jelly bean at the center of the face for the nose. Cut thin strips of pink fruit strip or licorice and press them out from either side of the nose for whiskers — three on each side. Arrange additional candy details on the bow tie to make it colorful and festive. Step back and admire your finished bunny cake — it’s ready to be the most photographed thing at your Easter celebration.