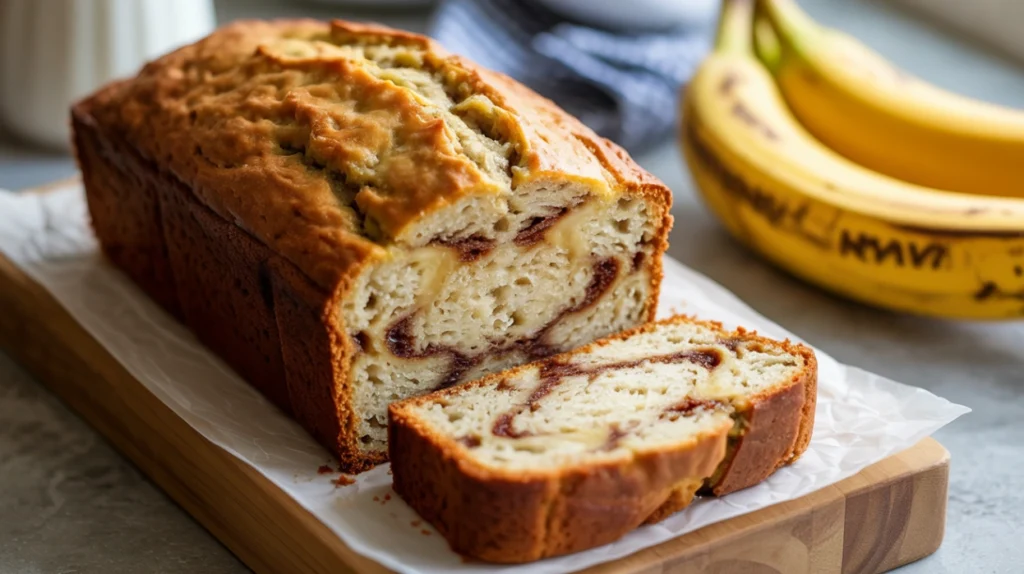

There is something so comforting about a warm loaf of homemade wheat bread sitting on the kitchen counter. I remember the first time I baked a loaf from scratch. I expected the process to be difficult, but I was surprised by how simple the ingredients were and how satisfying it felt to slice into the finished bread.
This homemade wheat bread has a soft texture, a lightly golden crust, and a deliciously wholesome flavor. It is perfect for breakfast toast, sandwiches, snacks, or simply enjoying with a little butter.
If you have never made bread before, this recipe is a great place to start. The dough is easy to prepare, the ingredients are simple, and the instructions are beginner-friendly. With a little patience while the dough rises, you can make a beautiful loaf right in your own kitchen.
Why You’ll Love It
There are many reasons to love homemade wheat bread.
First, it has a wonderful homemade flavor. Freshly baked bread tastes richer and more satisfying than bread that has been sitting on a shelf.
This wheat bread is also soft enough for sandwiches while still having a pleasant, slightly hearty texture.
Another reason to love it is its versatility. You can toast it in the morning, use it for sandwiches at lunch, or serve it with soup at dinner.
The recipe also uses simple ingredients. You do not need special baking equipment or unusual ingredients.
Making wheat bread at home can also be a relaxing experience. Kneading the dough, watching it rise, and smelling it bake can make even an ordinary day feel special.
Most importantly, this recipe is forgiving. Your loaf does not need to look perfect to taste delicious.
What Is It?
Wheat bread is bread made with wheat flour. Depending on the recipe, it can be made entirely with whole wheat flour or with a combination of whole wheat and all-purpose flour.
This recipe uses both whole wheat flour and all-purpose flour. The whole wheat flour gives the bread a pleasant wheat flavor and hearty texture, while the all-purpose flour helps keep the loaf soft and light.
A small amount of honey or sugar adds gentle sweetness and helps balance the flavor.
Milk and butter add richness and tenderness to the dough.
The dough is kneaded, allowed to rise, shaped into a loaf, and baked until golden brown. The result is homemade wheat bread that is soft enough for everyday sandwiches and flavorful enough to enjoy on its own.
Recipe Overview
- Prep Time: 25 minutes
- Rise Time: 1 hour 30 minutes
- Cook Time: 35–40 minutes
- Total Time: About 2 hours 35 minutes
- Difficulty: Easy
- Servings: 10–12 slices
- Recipe Type: Homemade Bread
Ingredients
- 2 cups whole wheat flour
- 1 ½ cups all-purpose flour
- 2 ¼ teaspoons active dry yeast
- 2 tablespoons honey or granulated sugar
- 1 teaspoon salt
- 1 ¼ cups warm milk
- 2 tablespoons unsalted butter, melted
- 1 large egg
For the Top
- 1 tablespoon melted butter
- 1 tablespoon rolled oats or wheat flour, optional
The ingredients are simple, but temperature matters. Your milk should be warm rather than hot, and the butter should be melted but not extremely hot.
Step-by-Step Instructions
1. Activate the Yeast
Pour the warm milk into a large mixing bowl.
Add the yeast and honey or sugar.
Stir gently and allow the mixture to sit for about 5–10 minutes.
You should see a little foam developing on the surface. This means the yeast is active and ready to use.
If the mixture does not foam at all, your yeast may not be active.
Be careful not to use very hot milk because excessive heat can damage the yeast.
2. Combine the Ingredients
Add the melted butter and egg to the yeast mixture.
Stir until combined.
Add the whole wheat flour, about 1 cup of all-purpose flour, and the salt.
Mix with a wooden spoon or sturdy spatula until a rough dough forms.
Gradually add the remaining all-purpose flour.
You may not need every bit, so add it slowly.
The dough should be soft and slightly sticky.
3. Knead the Dough
Transfer the dough to a lightly floured surface.
Knead it for approximately 8–10 minutes.
Push the dough forward with the heel of your hand, fold it back, turn it slightly, and repeat.
As you knead, the dough should become smoother and more elastic.
Whole wheat flour can make dough feel slightly heavier than dough made entirely from white flour. That is normal.
Avoid adding too much flour because this can make your wheat bread dense and dry.
4. Let the Dough Rise
Place the kneaded dough into a lightly greased bowl.
Cover it with a clean kitchen towel or plastic wrap.
Place the bowl somewhere warm and allow the dough to rise for about 1 hour.
It should become noticeably larger, ideally close to double its original size.
The rising time may vary depending on the temperature of your kitchen. A cool room can make the process take longer.
5. Prepare the Loaf Pan
While the dough rises, lightly grease a 9-by-5-inch loaf pan.
You can use butter or a little cooking oil to grease the inside.
Set the pan aside.
6. Shape the Dough
Once the dough has doubled in size, gently press it down to remove some of the excess air.
Place it on a lightly floured surface.
Shape it into a rectangle that is roughly the same length as your loaf pan.
Roll the dough tightly into a log, starting from one short end.
Pinch the seam closed and place the dough seam-side down in the prepared loaf pan.
Try to keep the dough evenly shaped so the loaf rises consistently.
7. Let It Rise Again
Cover the loaf loosely with a clean towel.
Let it rise for another 30–40 minutes.
The dough should become puffy and rise close to or slightly above the edge of the pan.
While it rises, preheat your oven to 350°F (175°C).
Do not skip this second rise. It helps create softer and lighter wheat bread.
8. Add the Topping
Once the dough has risen, brush the top lightly with melted butter.
If desired, sprinkle a few rolled oats or a small amount of wheat flour over the top.
You can also leave the loaf plain.
The butter helps the crust develop a beautiful golden color while keeping it pleasantly soft.
9. Bake the Bread
Place the loaf in the preheated oven.
Bake for about 35–40 minutes.
The top should become golden brown, and the loaf should feel firm when gently pressed.
If the top begins browning too quickly, loosely cover it with aluminum foil during the final part of baking.
10. Cool Before Slicing
Remove the wheat bread from the oven.
Let it cool in the pan for about 10 minutes.
Carefully remove it from the pan and transfer it to a wire rack.
Allow it to cool for at least 30–45 minutes before slicing.
Although it can be tempting to cut into the warm loaf immediately, cooling gives the interior time to finish setting.
Common Mistakes
One of the most common mistakes is adding too much flour. Whole wheat dough can feel sticky at first, but adding excessive flour can make the final loaf heavy.
Another mistake is using milk that is too hot. Yeast needs warmth, but very high temperatures can prevent it from working.
Skipping the first rise can result in dense bread. Give the dough enough time to become puffy.
Do not rush the second rise either. This step helps create a lighter texture.
Another common issue is overbaking. Wheat bread can become dry if it stays in the oven too long.
Finally, do not slice the loaf while it is extremely hot. The center needs time to set properly.
How to Know It’s Done
Your wheat bread should have a golden-brown top when it is fully baked.
The loaf should feel firm but not rock hard.
You can gently tap the top or bottom. A hollow sound is a useful sign that the bread is cooked through.
For a more accurate test, the center of the loaf should generally reach around 190°F (88°C).
If the outside looks finished but you are unsure about the center, use a kitchen thermometer.
If the loaf is browning too quickly, cover it loosely with foil and continue baking until the center is done.
Remember that baking times can vary depending on your oven and the size of your loaf.
What to Serve With It
Wheat bread is incredibly versatile.
For breakfast, toast a slice and spread it with butter, peanut butter, honey, or fruit preserves.
You can also top toasted slices with scrambled eggs, avocado, or cheese.
For lunch, use the bread to make sandwiches with chicken, turkey, vegetables, cheese, or your favorite fillings.
Fresh wheat bread is also delicious with soups and stews. Use a thick slice to soak up flavorful broth.
For a simple snack, serve it with cream cheese and sliced fruit.
You can also turn leftover slices into toast, croutons, French toast, or homemade bread crumbs.
Storage Tips
Allow the loaf to cool completely before storing it.
Wrap the wheat bread in a clean towel or place it in an airtight container or resealable bag.
Keep it at room temperature for up to 3 days for the best texture.
Avoid storing bread uncovered because exposure to air can make it dry.
For longer storage, slice the loaf and freeze the slices in a freezer-safe bag.
Frozen wheat bread can generally be stored for up to 2 months.
When you want a slice, take it directly from the freezer and toast it, or allow it to thaw at room temperature.
If the crust becomes soft after storage, briefly warming the loaf in the oven can help improve its texture.
Estimated Nutrition
The following is an approximate estimate per slice:
- Calories: 190
- Carbohydrates: 31g
- Protein: 6g
- Fat: 5g
- Saturated Fat: 2g
- Fiber: 3g
- Sugar: 4g
- Sodium: 230mg
Actual nutrition will vary depending on the exact ingredients and slice size.
Helpful Tips for Perfect Wheat Bread
Use fresh yeast for the best results. Active yeast gives the dough the lift it needs to become soft and airy.
Do not worry if the dough feels slightly heavier than white bread dough. Whole wheat flour naturally produces a heartier texture.
For softer wheat bread, make sure you do not add too much flour while kneading.
Let the dough rise somewhere comfortably warm and away from drafts.
If your kitchen is cold, the dough may need extra time to rise. Watch the dough rather than following the clock alone.
For a softer crust, brush the loaf with melted butter immediately after baking.
For extra texture, sprinkle oats or seeds over the top before baking.
You can also replace a small amount of the all-purpose flour with additional whole wheat flour if you prefer a stronger wheat flavor. However, using too much whole wheat flour can make the loaf heavier, so beginners may find the combination in this recipe easier to work with.
For clean slices, use a sharp serrated bread knife and wait until the loaf has cooled.
Most importantly, do not worry about making a perfect loaf. Homemade bread is meant to look rustic and welcoming.
Final Thoughts
Homemade wheat bread is one of those recipes that is worth learning because it can become part of so many meals. The ingredients are simple, the process is straightforward, and the smell of fresh bread baking is incredibly comforting.
This loaf has a soft center, a golden crust, and a pleasant wheat flavor that works beautifully for toast and sandwiches. It is hearty without being overly heavy, making it a great everyday bread for the whole family.
Once you become comfortable with the dough, you can make this wheat bread regularly and experiment with different toppings and serving ideas.
Whether you enjoy a warm slice with butter in the morning or use it to build a sandwich for lunch, homemade wheat bread is a simple and satisfying recipe that brings fresh-baked comfort straight to your kitchen.Wheat Bread Recipe: Soft, Homemade, and Easy for Beginners
There is something so comforting about a warm loaf of homemade wheat bread sitting on the kitchen counter. I remember the first time I baked a loaf from scratch. I expected the process to be difficult, but I was surprised by how simple the ingredients were and how satisfying it felt to slice into the finished bread.
This homemade wheat bread has a soft texture, a lightly golden crust, and a deliciously wholesome flavor. It is perfect for breakfast toast, sandwiches, snacks, or simply enjoying with a little butter.
If you have never made bread before, this recipe is a great place to start. The dough is easy to prepare, the ingredients are simple, and the instructions are beginner-friendly. With a little patience while the dough rises, you can make a beautiful loaf right in your own kitchen.
Why You’ll Love It
There are many reasons to love homemade wheat bread.
First, it has a wonderful homemade flavor. Freshly baked bread tastes richer and more satisfying than bread that has been sitting on a shelf.
This wheat bread is also soft enough for sandwiches while still having a pleasant, slightly hearty texture.
Another reason to love it is its versatility. You can toast it in the morning, use it for sandwiches at lunch, or serve it with soup at dinner.
The recipe also uses simple ingredients. You do not need special baking equipment or unusual ingredients.
Making wheat bread at home can also be a relaxing experience. Kneading the dough, watching it rise, and smelling it bake can make even an ordinary day feel special.
Most importantly, this recipe is forgiving. Your loaf does not need to look perfect to taste delicious.
What Is It?
Wheat bread is bread made with wheat flour. Depending on the recipe, it can be made entirely with whole wheat flour or with a combination of whole wheat and all-purpose flour.
This recipe uses both whole wheat flour and all-purpose flour. The whole wheat flour gives the bread a pleasant wheat flavor and hearty texture, while the all-purpose flour helps keep the loaf soft and light.
A small amount of honey or sugar adds gentle sweetness and helps balance the flavor.
Milk and butter add richness and tenderness to the dough.
The dough is kneaded, allowed to rise, shaped into a loaf, and baked until golden brown. The result is homemade wheat bread that is soft enough for everyday sandwiches and flavorful enough to enjoy on its own.
Recipe Overview
- Prep Time: 25 minutes
- Rise Time: 1 hour 30 minutes
- Cook Time: 35–40 minutes
- Total Time: About 2 hours 35 minutes
- Difficulty: Easy
- Servings: 10–12 slices
- Recipe Type: Homemade Bread
Ingredients
- 2 cups whole wheat flour
- 1 ½ cups all-purpose flour
- 2 ¼ teaspoons active dry yeast
- 2 tablespoons honey or granulated sugar
- 1 teaspoon salt
- 1 ¼ cups warm milk
- 2 tablespoons unsalted butter, melted
- 1 large egg
For the Top
- 1 tablespoon melted butter
- 1 tablespoon rolled oats or wheat flour, optional
The ingredients are simple, but temperature matters. Your milk should be warm rather than hot, and the butter should be melted but not extremely hot.
Step-by-Step Instructions
1. Activate the Yeast
Pour the warm milk into a large mixing bowl.
Add the yeast and honey or sugar.
Stir gently and allow the mixture to sit for about 5–10 minutes.
You should see a little foam developing on the surface. This means the yeast is active and ready to use.
If the mixture does not foam at all, your yeast may not be active.
Be careful not to use very hot milk because excessive heat can damage the yeast.
2. Combine the Ingredients
Add the melted butter and egg to the yeast mixture.
Stir until combined.
Add the whole wheat flour, about 1 cup of all-purpose flour, and the salt.
Mix with a wooden spoon or sturdy spatula until a rough dough forms.
Gradually add the remaining all-purpose flour.
You may not need every bit, so add it slowly.
The dough should be soft and slightly sticky.
3. Knead the Dough
Transfer the dough to a lightly floured surface.
Knead it for approximately 8–10 minutes.
Push the dough forward with the heel of your hand, fold it back, turn it slightly, and repeat.
As you knead, the dough should become smoother and more elastic.
Whole wheat flour can make dough feel slightly heavier than dough made entirely from white flour. That is normal.
Avoid adding too much flour because this can make your wheat bread dense and dry.
4. Let the Dough Rise
Place the kneaded dough into a lightly greased bowl.
Cover it with a clean kitchen towel or plastic wrap.
Place the bowl somewhere warm and allow the dough to rise for about 1 hour.
It should become noticeably larger, ideally close to double its original size.
The rising time may vary depending on the temperature of your kitchen. A cool room can make the process take longer.
5. Prepare the Loaf Pan
While the dough rises, lightly grease a 9-by-5-inch loaf pan.
You can use butter or a little cooking oil to grease the inside.
Set the pan aside.
6. Shape the Dough
Once the dough has doubled in size, gently press it down to remove some of the excess air.
Place it on a lightly floured surface.
Shape it into a rectangle that is roughly the same length as your loaf pan.
Roll the dough tightly into a log, starting from one short end.
Pinch the seam closed and place the dough seam-side down in the prepared loaf pan.
Try to keep the dough evenly shaped so the loaf rises consistently.
7. Let It Rise Again
Cover the loaf loosely with a clean towel.
Let it rise for another 30–40 minutes.
The dough should become puffy and rise close to or slightly above the edge of the pan.
While it rises, preheat your oven to 350°F (175°C).
Do not skip this second rise. It helps create softer and lighter wheat bread.
8. Add the Topping
Once the dough has risen, brush the top lightly with melted butter.
If desired, sprinkle a few rolled oats or a small amount of wheat flour over the top.
You can also leave the loaf plain.
The butter helps the crust develop a beautiful golden color while keeping it pleasantly soft.
9. Bake the Bread
Place the loaf in the preheated oven.
Bake for about 35–40 minutes.
The top should become golden brown, and the loaf should feel firm when gently pressed.
If the top begins browning too quickly, loosely cover it with aluminum foil during the final part of baking.
10. Cool Before Slicing
Remove the wheat bread from the oven.
Let it cool in the pan for about 10 minutes.
Carefully remove it from the pan and transfer it to a wire rack.
Allow it to cool for at least 30–45 minutes before slicing.
Although it can be tempting to cut into the warm loaf immediately, cooling gives the interior time to finish setting.
Common Mistakes
One of the most common mistakes is adding too much flour. Whole wheat dough can feel sticky at first, but adding excessive flour can make the final loaf heavy.
Another mistake is using milk that is too hot. Yeast needs warmth, but very high temperatures can prevent it from working.
Skipping the first rise can result in dense bread. Give the dough enough time to become puffy.
Do not rush the second rise either. This step helps create a lighter texture.
Another common issue is overbaking. Wheat bread can become dry if it stays in the oven too long.
Finally, do not slice the loaf while it is extremely hot. The center needs time to set properly.
How to Know It’s Done
Your wheat bread should have a golden-brown top when it is fully baked.
The loaf should feel firm but not rock hard.
You can gently tap the top or bottom. A hollow sound is a useful sign that the bread is cooked through.
For a more accurate test, the center of the loaf should generally reach around 190°F (88°C).
If the outside looks finished but you are unsure about the center, use a kitchen thermometer.
If the loaf is browning too quickly, cover it loosely with foil and continue baking until the center is done.
Remember that baking times can vary depending on your oven and the size of your loaf.
What to Serve With It
Wheat bread is incredibly versatile.
For breakfast, toast a slice and spread it with butter, peanut butter, honey, or fruit preserves.
You can also top toasted slices with scrambled eggs, avocado, or cheese.
For lunch, use the bread to make sandwiches with chicken, turkey, vegetables, cheese, or your favorite fillings.
Fresh wheat bread is also delicious with soups and stews. Use a thick slice to soak up flavorful broth.
For a simple snack, serve it with cream cheese and sliced fruit.
You can also turn leftover slices into toast, croutons, French toast, or homemade bread crumbs.
Storage Tips
Allow the loaf to cool completely before storing it.
Wrap the wheat bread in a clean towel or place it in an airtight container or resealable bag.
Keep it at room temperature for up to 3 days for the best texture.
Avoid storing bread uncovered because exposure to air can make it dry.
For longer storage, slice the loaf and freeze the slices in a freezer-safe bag.
Frozen wheat bread can generally be stored for up to 2 months.
When you want a slice, take it directly from the freezer and toast it, or allow it to thaw at room temperature.
If the crust becomes soft after storage, briefly warming the loaf in the oven can help improve its texture.
Estimated Nutrition
The following is an approximate estimate per slice:
- Calories: 190
- Carbohydrates: 31g
- Protein: 6g
- Fat: 5g
- Saturated Fat: 2g
- Fiber: 3g
- Sugar: 4g
- Sodium: 230mg
Actual nutrition will vary depending on the exact ingredients and slice size.
Helpful Tips for Perfect Wheat Bread
Use fresh yeast for the best results. Active yeast gives the dough the lift it needs to become soft and airy.
Do not worry if the dough feels slightly heavier than white bread dough. Whole wheat flour naturally produces a heartier texture.
For softer wheat bread, make sure you do not add too much flour while kneading.
Let the dough rise somewhere comfortably warm and away from drafts.
If your kitchen is cold, the dough may need extra time to rise. Watch the dough rather than following the clock alone.
For a softer crust, brush the loaf with melted butter immediately after baking.
For extra texture, sprinkle oats or seeds over the top before baking.
You can also replace a small amount of the all-purpose flour with additional whole wheat flour if you prefer a stronger wheat flavor. However, using too much whole wheat flour can make the loaf heavier, so beginners may find the combination in this recipe easier to work with.
For clean slices, use a sharp serrated bread knife and wait until the loaf has cooled.
Most importantly, do not worry about making a perfect loaf. Homemade bread is meant to look rustic and welcoming.
Final Thoughts
Homemade wheat bread is one of those recipes that is worth learning because it can become part of so many meals. The ingredients are simple, the process is straightforward, and the smell of fresh bread baking is incredibly comforting.
This loaf has a soft center, a golden crust, and a pleasant wheat flavor that works beautifully for toast and sandwiches. It is hearty without being overly heavy, making it a great everyday bread for the whole family.
Once you become comfortable with the dough, you can make this wheat bread regularly and experiment with different toppings and serving ideas.
Whether you enjoy a warm slice with butter in the morning or use it to build a sandwich for lunch, homemade wheat bread is a simple and satisfying recipe that brings fresh-baked comfort straight to your kitchen.