
My daughter has been obsessed with cats since she was old enough to point at one and say “kitty.” So when her seventh birthday came around, there was exactly zero discussion about what kind of cake she wanted. Cat cakes birthday themed — specifically a cake that looked like her favorite gray tabby — was the only acceptable option. I had never made anything like it before and spent an embarrassing amount of time staring at fondant in the craft store, convinced I was about to fail spectacularly. What actually happened was one of my proudest baking moments. The cake came out absolutely adorable — two round layers cut and arranged into a cat face, frosted in gray buttercream with pointy fondant ears, whisker details, and big candy eyes. My daughter gasped when she saw it, then immediately asked if we could keep it instead of eating it.
Why You’ll Love It
Cat cakes birthday designs are one of the most charming and achievable decorated cake projects a home baker can take on. Unlike elaborate sculpted cakes that require professional tools and experience, the classic cat face cake uses a simple round-cutting technique that anyone can master. The design is instantly recognizable and wildly endearing, and you can customize every detail — fur color, eye color, expression, accessories like a bow or birthday hat — to perfectly match the birthday cat lover’s personality or their actual pet. It’s the kind of cake that makes people reach for their phones before they even think about reaching for a fork.
What Is It?
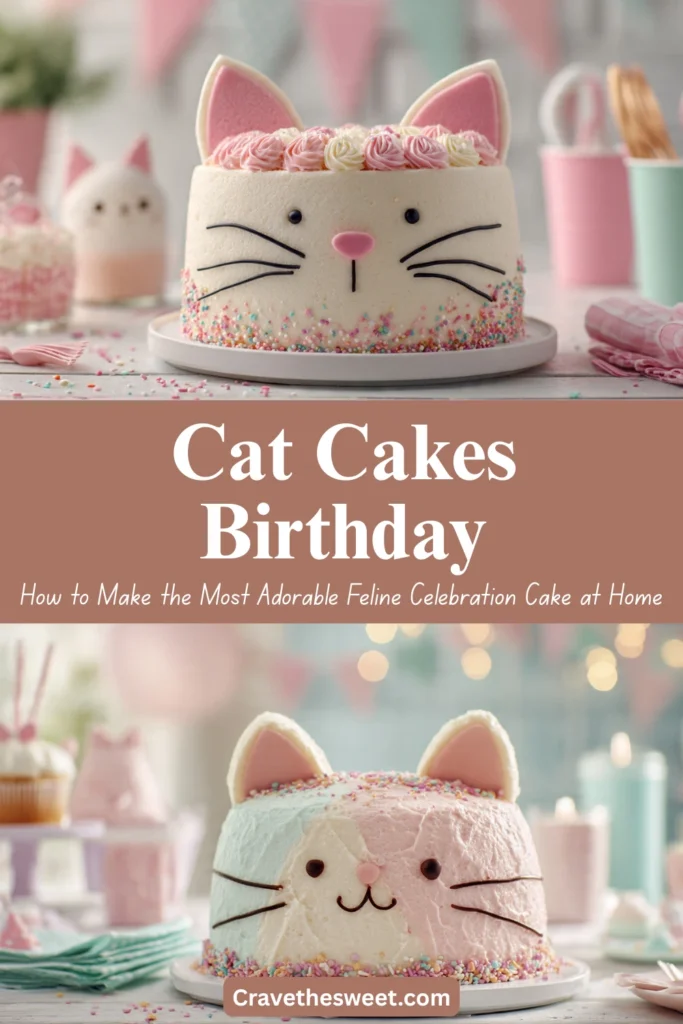
Cat cakes birthday designs are celebration cakes shaped and decorated to resemble a cat’s face or full cat figure. The most approachable and popular version — the one this recipe covers — is made by baking two round cake layers and using one layer as the face while cutting triangular ears and a small bow tie or collar from the second layer, then arranging them on a cake board. The whole thing is frosted in a fur-colored buttercream — gray, orange, black, white, or any color to match a real or imaginary cat — and decorated with fondant or candy features including ears, eyes, a nose, a mouth, and whiskers. The result is a completely delightful birthday centerpiece that cat lovers of all ages absolutely adore.
Common Mistakes to Avoid
Cutting the cake before it’s fully cooled. Warm cake crumbles the moment a knife touches it, making clean ear shapes impossible. Cool your layers completely — at least one hour at room temperature — before making a single cut.
Making the buttercream too stiff for fur texture. The piped fur effect that makes cat cakes birthday designs look so realistic requires buttercream that’s soft enough to pipe smoothly through a grass or star tip. If your buttercream is too stiff, add whole milk one teaspoon at a time until it flows easily through the piping tip without requiring excessive pressure.
Skipping the crumb coat. Always apply a thin crumb coat first and chill it for 20 minutes. Without this step, crumbs will visibly contaminate your final fur layer and the surface will look rough and untidy rather than clean and polished.
Placing fondant decorations on soft frosting. Fondant ears and facial features need a firm frosting surface to adhere to cleanly. Chill the frosted cake for 15–20 minutes before positioning any fondant elements so they sit cleanly and stay put.
How to Know It’s Done
The cake layers are baked through when a toothpick inserted in the center comes out completely clean, the tops spring back immediately when pressed lightly, and the edges have just begun pulling away from the pan sides. At 350°F this typically takes 28–32 minutes for 8-inch layers. The finished decorated cat cakes birthday cake is ready to serve when all buttercream is firm to the touch, fondant decorations are secure, and piped fur details have set. Refrigerate the completed cake for 20 minutes before presenting it for the cleanest, most stable results.
What to Serve With It
A cat cakes birthday cake is the natural showpiece of any feline-themed party dessert table. Surround it with cat-paw sugar cookies, cat ear rice crispy treats dipped in colored chocolate, and a bowl of meow mix candies for a fully themed spread. Serve slices alongside a scoop of vanilla or strawberry ice cream for a classic pairing that both kids and adults love. For drinks, a pastel-colored fruit punch in a clear pitcher with cat-shaped ice cubes made from a silicone mold, or simple pink lemonade in mason jars, completes the party atmosphere beautifully.
Storage Tips
Room temperature: The decorated cake can sit at room temperature for up to 6 hours during a birthday party as long as the kitchen is cool and away from direct sunlight.
Refrigerator: Store covered loosely with plastic wrap or in a cake box for up to 4 days. The buttercream stays fresh and the fondant decorations hold their shape well when refrigerated. Allow slices to come to room temperature for 15 minutes before serving for the best flavor and texture.
Freezer: Unfrosted, uncut cake layers can be wrapped tightly in plastic wrap and foil and frozen for up to 2 months. Thaw overnight in the refrigerator before cutting, assembling, and decorating.
Estimated Nutrition (Per Slice, Based on 14 Servings)
- Calories: ~440
- Total Fat: 21g
- Saturated Fat: 13g
- Carbohydrates: 60g
- Sugar: 45g
- Protein: 4g
- Sodium: 270mg
Note: Values are estimates and vary based on frosting quantity and decoration choices.
Recipe Overview
- Prep Time: 35 minutes
- Cook Time: 30 minutes
- Cooling and Decorating Time: 1 hour 45 minutes
- Total Time: About 2 hours 50 minutes
- Difficulty: Easy to Intermediate — very achievable for beginners
- Servings: 14 slices
Ingredients
For the Vanilla Butter Cake:
- 2½ cups all-purpose flour
- 2½ teaspoons baking powder
- ½ teaspoon fine salt
- 1 cup (2 sticks) unsalted butter, softened
- 2 cups granulated sugar
- 4 large eggs, room temperature
- 1 tablespoon pure vanilla extract
- 1 cup whole milk, room temperature
For the Fur-Colored Buttercream:
- 1 cup (2 sticks) unsalted butter, softened
- 4½ cups powdered sugar, sifted
- 3–4 tablespoons whole milk or heavy cream
- 1½ teaspoons pure vanilla extract
- Pinch of fine salt
- Gray, orange, or black gel food coloring (to match your cat color)
For Cat Face Decorations:
- 4 oz fondant in matching fur color (for ears)
- 2 oz pink fondant (for inner ear and nose)
- 2 large round candy-coated chocolates or candy eyes for the eyes
- Black gel food coloring or edible black marker for pupils and mouth
- 6 thin white pretzel sticks or white spaghetti pieces for whiskers
- Pink candy or small pink jelly bean for nose
- Optional: small fondant bow in contrasting color for top of head
Step-by-Step Instructions
Step 1: Bake the Cake Layers
Preheat oven to 350°F. Grease two 8-inch round cake pans, line bottoms with parchment circles, and grease again. Whisk flour, baking powder, and salt in a bowl. In a large bowl, beat softened butter and sugar on medium-high for 3 minutes until very light and fluffy. Add eggs one at a time, beating well after each. Mix in vanilla. Add the flour mixture in three additions, alternating with the milk in two additions, beginning and ending with flour, mixing just until combined after each addition. Divide evenly between the prepared pans and bake 28–32 minutes until a toothpick comes out clean. Cool in pans 10 minutes, then transfer to wire racks and cool completely.
Step 2: Make the Fondant Cat Ears
At least 2 hours before decorating, make the cat ears from fondant. Roll the fur-colored fondant to about ¼-inch thickness and cut two large triangle shapes for the outer ears. Roll a small amount of pink fondant into smaller triangles and press onto the center of each ear for the inner ear detail. Shape gently and set on parchment to firm up. These need to be completely dry and firm before placement so they stand upright on the finished cat cakes birthday cake without drooping.
Step 3: Make the Buttercream
Beat softened butter on medium-high for 2 minutes until pale and creamy. Add sifted powdered sugar one cup at a time, beating on low after each addition. Add vanilla, salt, and 3 tablespoons of milk and beat on medium-high for 2 minutes until smooth and fluffy. Add the remaining milk if needed for spreadable consistency. Tint the buttercream with gel food coloring to match your desired cat fur color — gray for a tabby, warm orange for a ginger cat, or leave it white for a classic white cat. Reserve about ½ cup of untinted white buttercream for any accent details.
Step 4: Cut the Cat Shape
Place one round cake layer on your cake board — this is the cat’s face. Take the second round layer and cut it into two large triangles for the ears by cutting two wedge shapes from opposite sides of the round. Use the remaining piece to cut a small bow tie shape if desired. Position the ear triangles above the face circle, points facing upward, and the bow tie below the face. Secure each piece to the board with a small dab of frosting underneath.
Step 5: Crumb Coat and Chill
Apply a thin, even layer of fur-colored buttercream over the entire surface — face, ears, and bow tie — covering every edge. Don’t worry about perfection at this stage; just seal in the crumbs. Refrigerate for 20–25 minutes until completely firm.
Step 6: Pipe the Fur Texture
Fit a piping bag with a grass tip or small star tip and fill it with the fur-colored buttercream. Working in sections, pipe short strokes all over the surface of the cat’s face and ears, pulling the tip away quickly to create individual fur strand texture. Work from the outer edges inward. Leave a smooth, unpiped oval area in the center of the face where the features will go. Use the reserved white buttercream to pipe a lighter muzzle area around the nose and mouth for a realistic cat face detail.
Step 7: Add the Cat Face Features
Press the two large candy eyes onto the smooth center area of the face. Position the pink jelly bean or pink fondant nose just below center. Use a black edible marker or thin piping of black royal icing to draw a small curved mouth beneath the nose — a simple W-shape or upside-down Y creates the perfect cat expression. Press the fondant ears firmly into the top of the cake, pushing the flat base slightly into the frosting so they stand upright. Insert pretzel stick or dry spaghetti whiskers — three on each side — by pressing them gently through the muzzle area. Add the fondant bow on top of the head if using.
Stand it on the birthday table, light the candles, and listen for that wonderful gasp.


